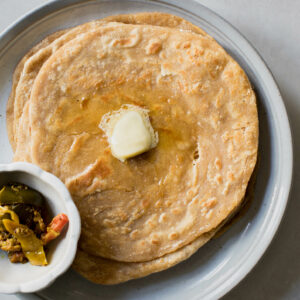
Easy Lachha Paratha Recipe (Homestyle)
A step-by-step, detailed guide on how to make simple, homestyle Lachha Parathas. Not only does this post feature a foolproof recipe, but it breaks down how to achieve soft, flaky, yet crispy Parathas. Don’t miss the post, which includes detailed step-by-step photos, essential tips, and a troubleshooting table!
Want to save this post?
Enter your email below and get it sent straight to your inbox. Plus, get recipes & tips every week!
Lachha Parathas
Parathas are my favorite food. I’ve been making them for well over a decade, and kneading their dough for over two. Store-bought parathas, though convenient, can never measure up to homemade ones. (I’ve tried and failed to trick my kids into thinking there’s no difference.) Plus, being able to make and feed my family Parathas is a truly satisfying experience.
It’s taken me embarrassingly long to share these, because for me sharing a Paratha recipe is something like translating body memory to instructional text. (My friend Maryam generously shared an early iteration of my Laccha Paratha recipe on her blog Pakistan Eats, and prior to that I shared a now-dated Mooli Paratha Recipe.)
Beyond the Recipe
Traditionally, paratha-making was a skill you’d pick up by observation and develop over time, perhaps with a little guidance.
This post, with its step-by-step detailed images, video, and troubleshooting tips, attempts to recreate that process. Not only does this recipe share the perfect atta to water ratio for repeatable success, but it addresses common pitfalls and equips you with all the techniques you’d need to never need a recipe again.
Lastly, should you have any trouble, I invite you to share a photo/video with me in the comments or email and I’ll do my best to help explain what could have gone wrong. And of course, I’d love to see your finished paratha images in the comments too!
Let’s do this!
Navigation
- Paratha 101
- Lachha Paratha Ingredients
- How To Make Lachha Parathas
- How To Make Lachha Parathas Without A Stand Mixer
- Troubleshotting Guide (More Essential Tips)
- What To Serve With Parathas
- What Goes With Paratha
- How To Store And Reheat Cooked Parathas
- How To Freeze Raw Rolled Out Paratha
- Easy Lachha Paratha Recipe (Homestyle)
Paratha 101
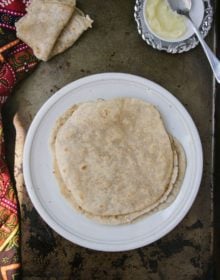
Parathas are flatbreads made from whole wheat atta flour. The dough is rolled out, brushed with ghee, butter, or oil, folded into layers, and then rolled out again before being cooked on a hot griddle or tawa.
In the context of breadmaking, parathas are not at all difficult to make. There’s no yeast, minimal kneading and rest time, and no special equipment. (Though if you’ll be making parathas often, I recommend investing in a stand mixer if you don’t already have one.)
Paratha-making is all about technique, which you refine over time, until it’s no longer something you think about. There are some fundamentals, but you’ll likely make it differently from me, just like I make it differently from my family. The key is to learn why you do things a certain way, which is what I attempt to explain in this post.
P.S. Don’t want to read the entire post? I got you! Search text for ‘essential tips’ because you don’t want to miss them!
What are Laccha Parathas and how are they different than regular parathas?
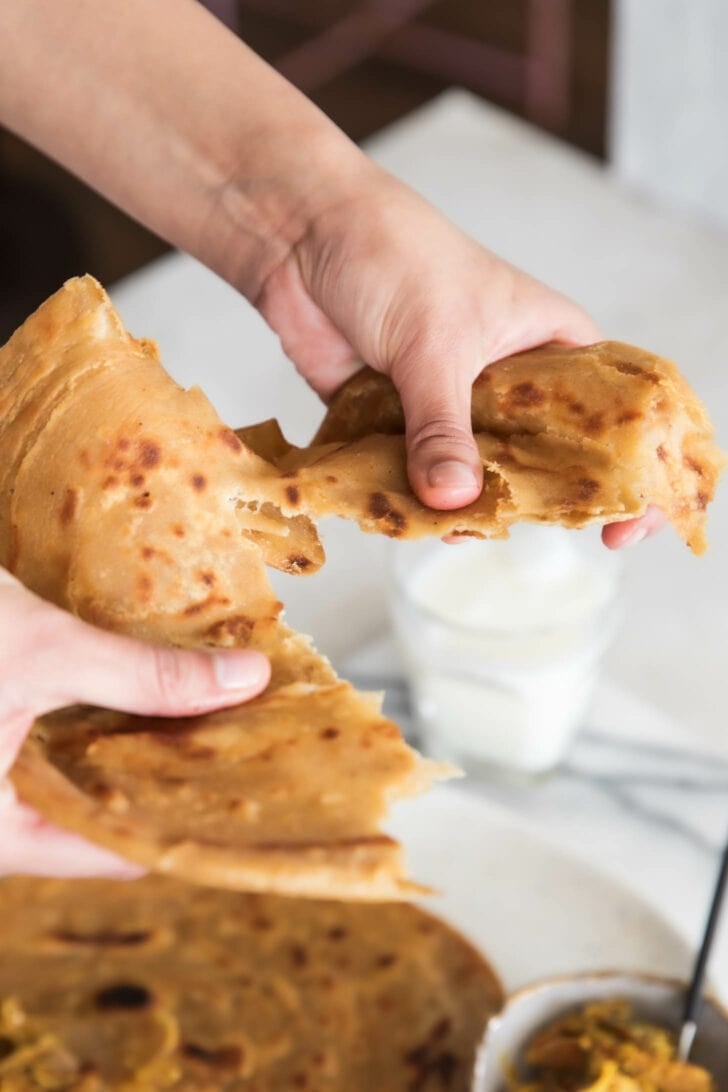
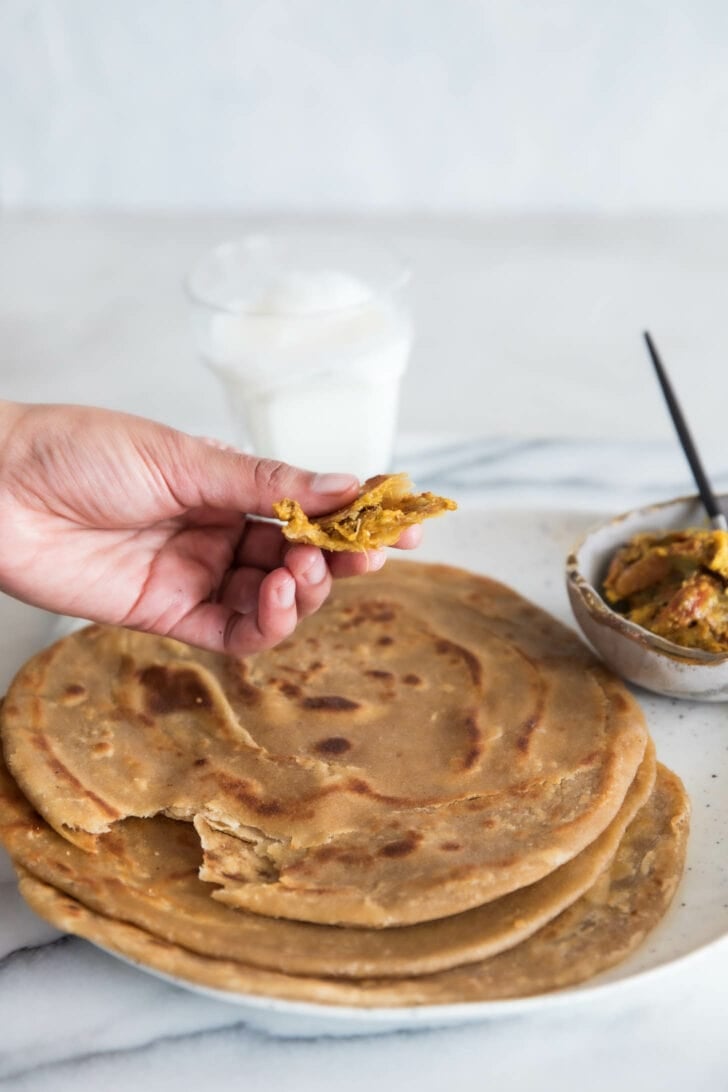
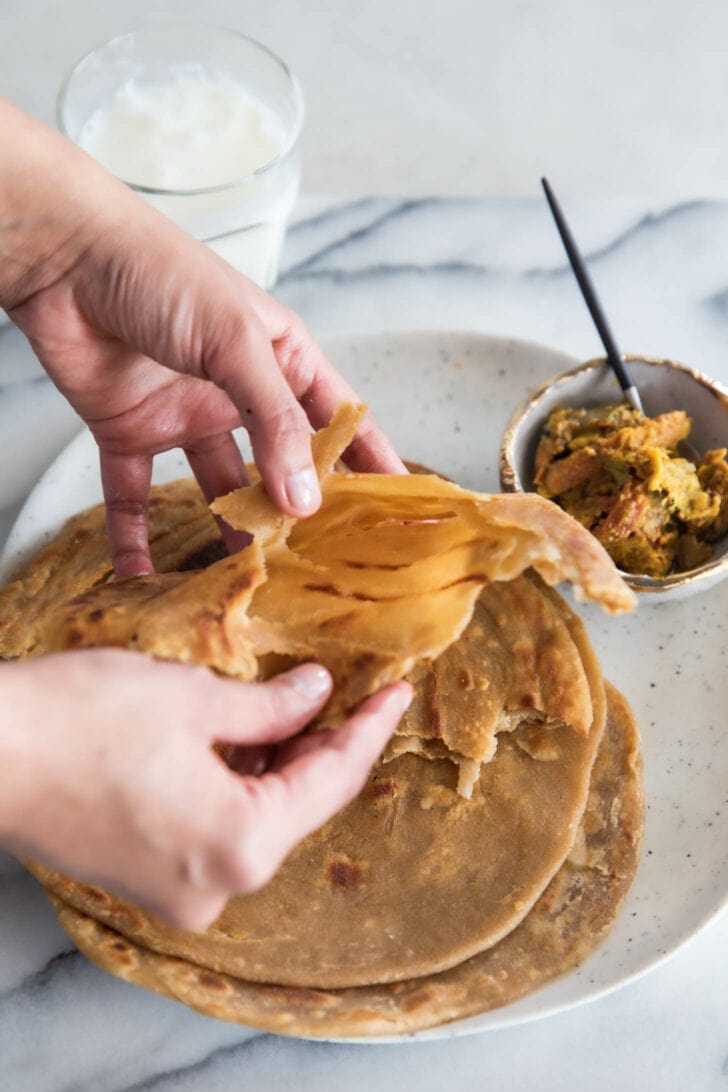
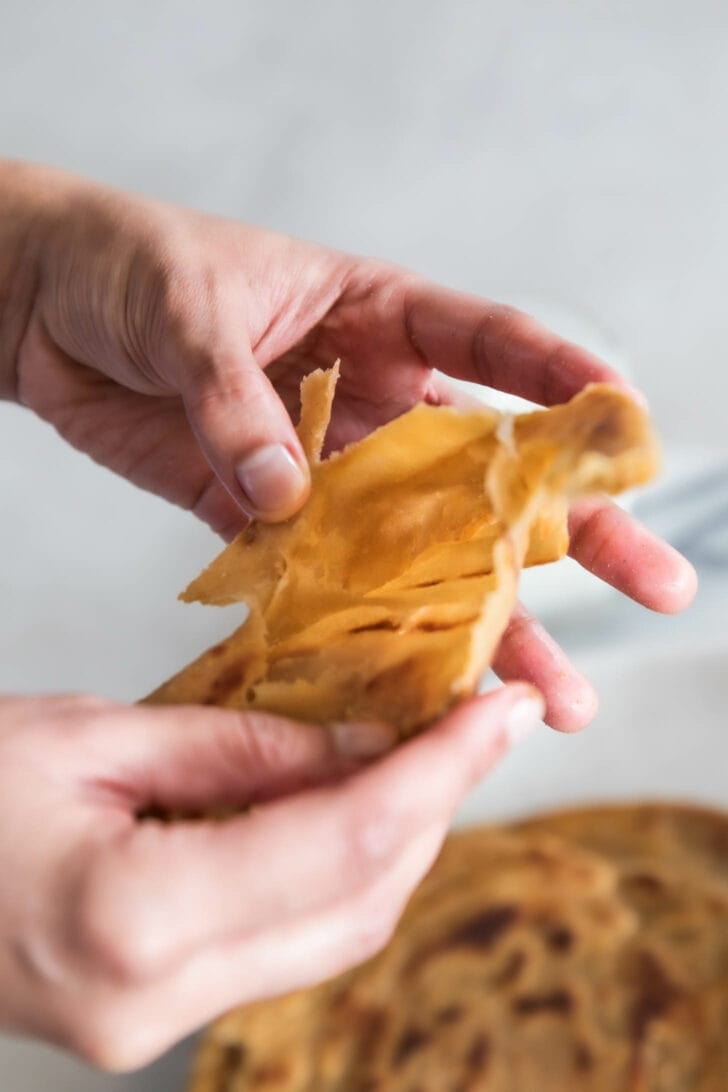
The word ‘laccha’ refers to the ‘rings’ or ‘loops’ formed in this style of paratha-making.
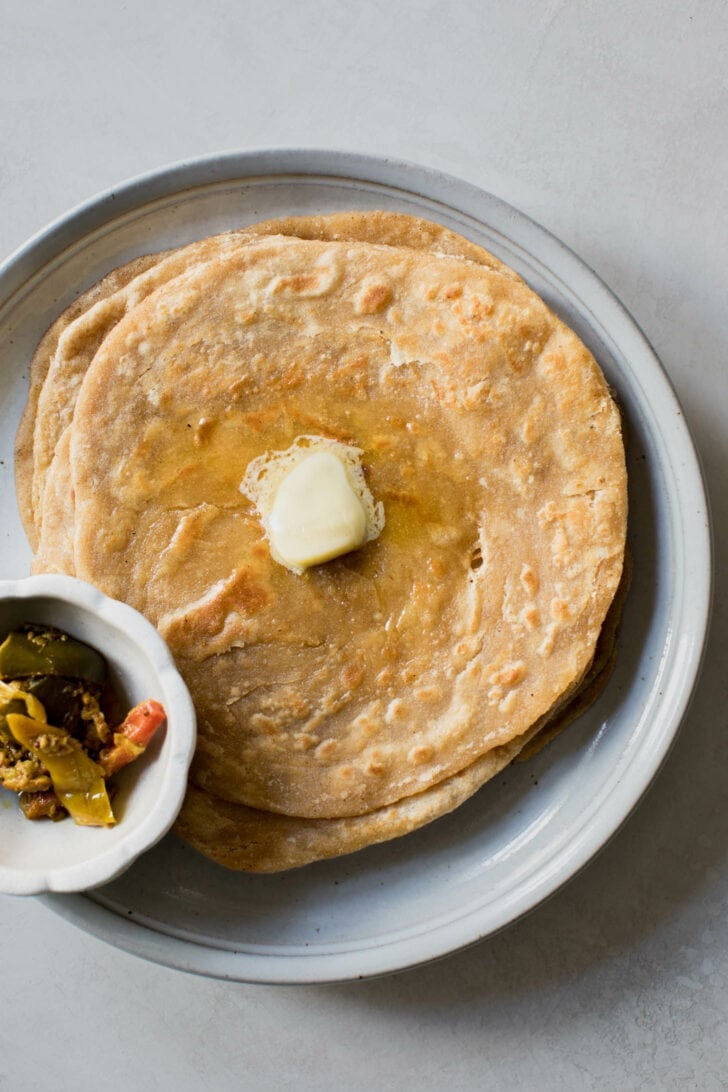
While regular (square or triangle) parathas have 2 or three layers inside, Laccha Parathas have a characteristic spiral shape with visible intertwined coils, which gives them their extra flaky, layered texture.
Lachha Paratha Ingredients
What Atta to Use
Atta is locally sourced Indian or Pakistani whole wheat flour, different in variety and processing from the 100% whole wheat flour found at American stores. What Atta you should use ultimately depends on taste preference and if you want a restaurant-style paratha or homestyle, whole wheat paratha.
Throughout the years, I’ve used many brands and have spoken to grocery store owners about the best ones:
Popular Brands for 100% Whole Wheat Atta
- Sujata Gold (100% Sharbati) – my go-to
- Royal Sharbati (previous go-to, no longer available)
- Aashirvaad
- Laxmi Sharbati
- Swarna Chakki Atta – my recipe tester used this
Best Flour Blends/Not 100% Whole Wheat
Note: Please look for these at Indo-Pak grocery stores, as they’re much cheaper and probably more fresh than ones online. I like to keep a close eye on expiration dates.
Substitute: Years ago, when I lived in Midland, TX, and couldn’t find atta, I’d substitute with a blend of 70% white whole wheat and 30% all-purpose flour (maida). This would somewhat mimic the flavor and texture.
How to Make Lachha Paratha
The instructions are written in the recipe card, but here’s an overview with pictures and some can’t-miss essential tips on why I do things a certain way.
1 – Make Paratha Dough
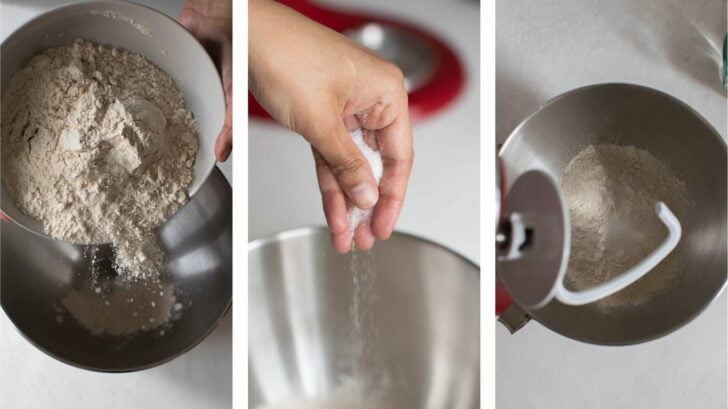
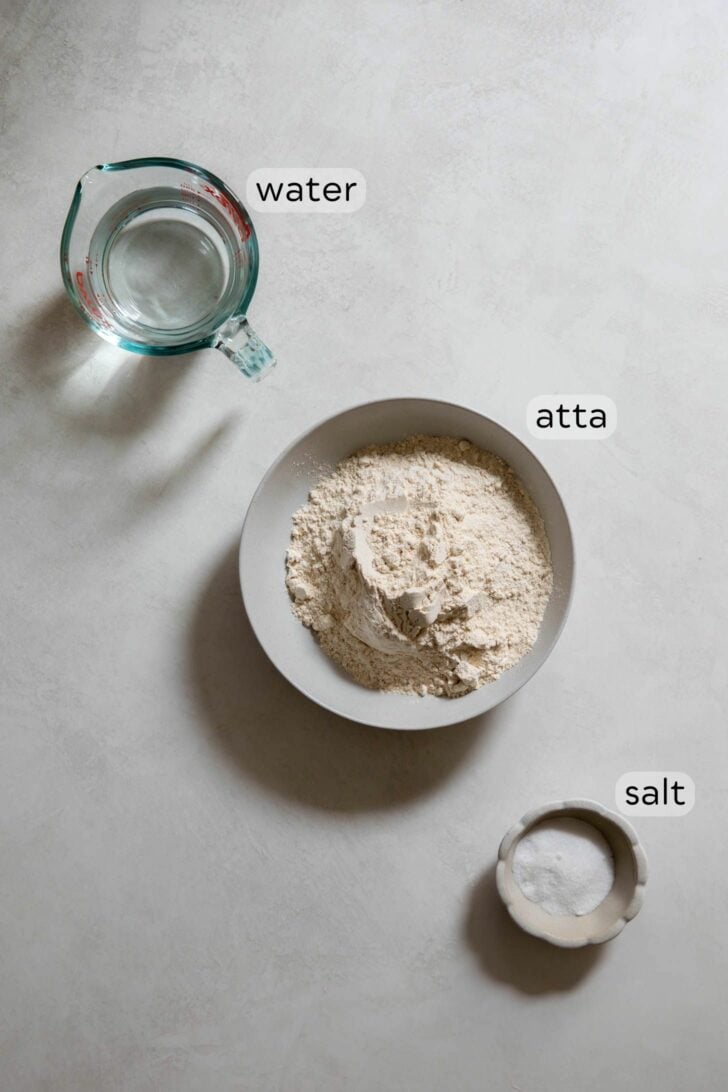
- Combine the atta flour and salt in the bowl of a stand mixer fitted with a dough attachment or a large bowl if kneading by hand.
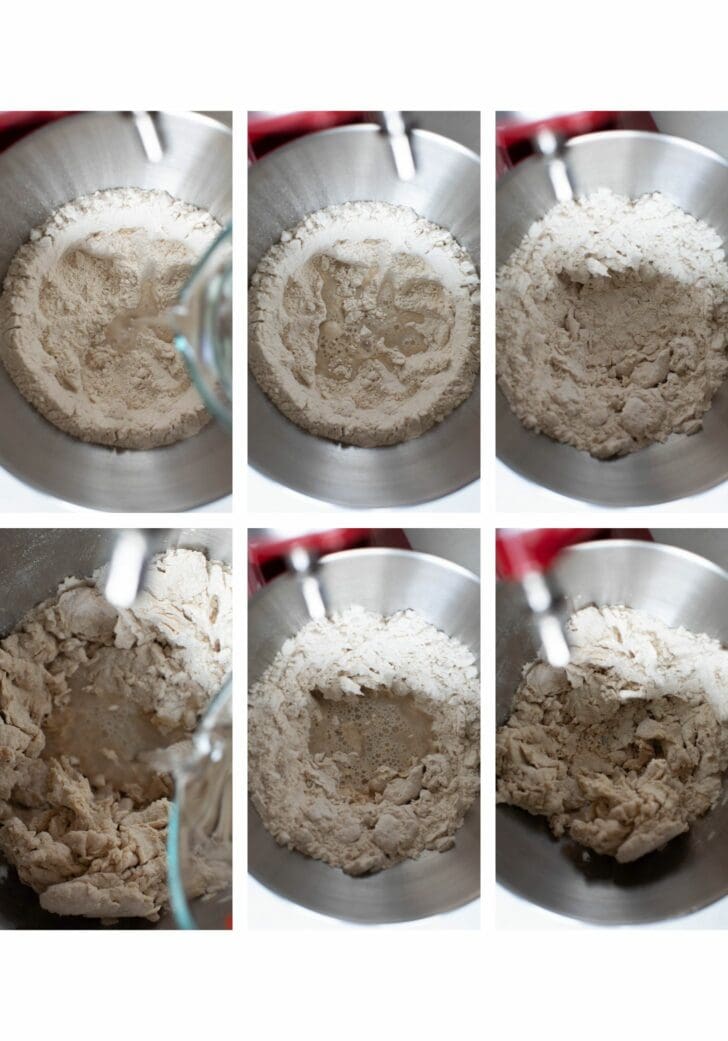
- Gradually add water. Adding water too quickly will make it difficult to control the distribution of water, and this uneven hydration may cause sticky or wet dough.
- Essential tip: To keep the dough soft, you must add enough water and that too early on in the kneading process. Adding too little water early on may make the dough tough.
Tips to make the dough extra soft: Over the years, I’ve explored various techniques for an extra soft dough. Though these aren’t a part of my routine paratha-making, they’re worth trying:
-Add 1 tbsp of ghee into the dough, which makes them slightly crispy yet soft.
-Use warm/hot water to knead. Using boiling water makes them almost break-apart soft.
-According to my recipe tester, adding 1 tablespoon of yogurt makes soft yet still crispy parathas.
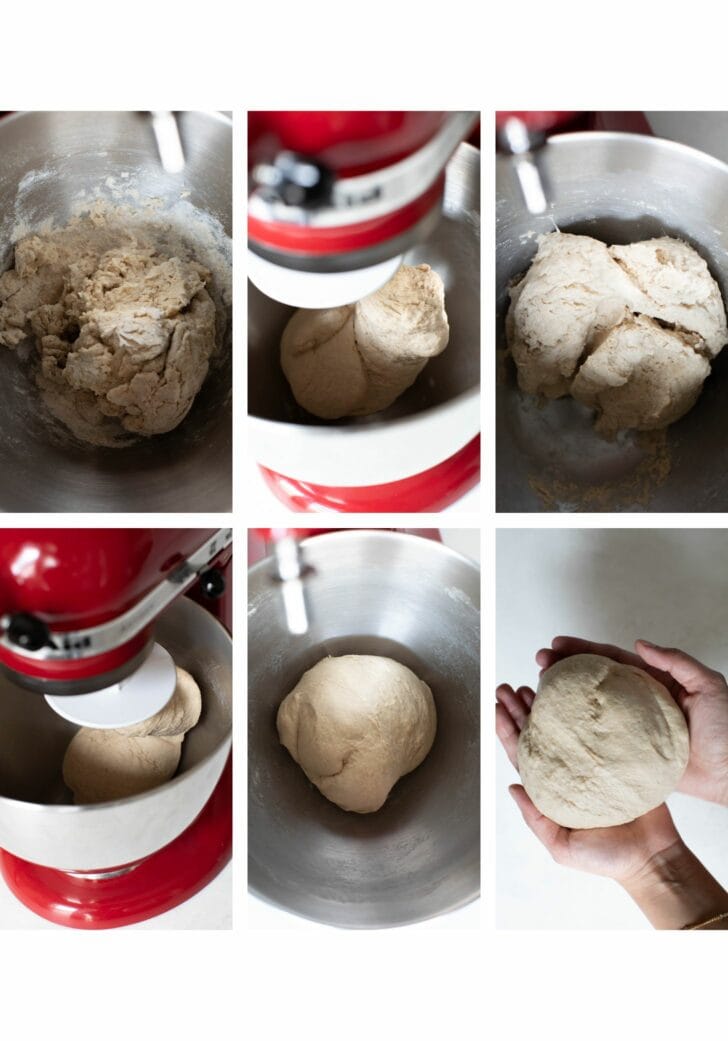
- Knead the dough. If using a stand mixer, increase the speed to medium (4) and continue to knead on until a smooth and supple ball forms. It should start wrapping itself around the dough attachment.
How to make Lachha Paratha Without a Stand Mixer
- Over the course of 5 minutes, slowly pour in the water while using your hands to knead gently. Let the water mix with the dough before adding more. Once it forms into a ball, knead for another 2 minutes until smooth and no longer sticking to the work surface.
- Essential tip: If you are kneading by hand, you don’t need to keep kneading it until it reaches the perfect consistency. Allow it to rest and the gluten will continue to develop and create a dough that’s easier to work with. This will also make the final kneading easier.
2 – Rest the dough
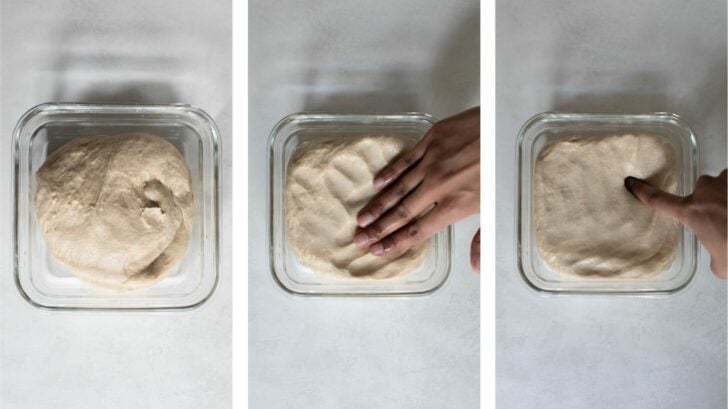
- Allowing the dough to rest for at least 10-15 minutes is ideal. If you use a stand mixer, the dough requires less resting time compared to hand-kneading.
3 – Form Peda (dough ball)
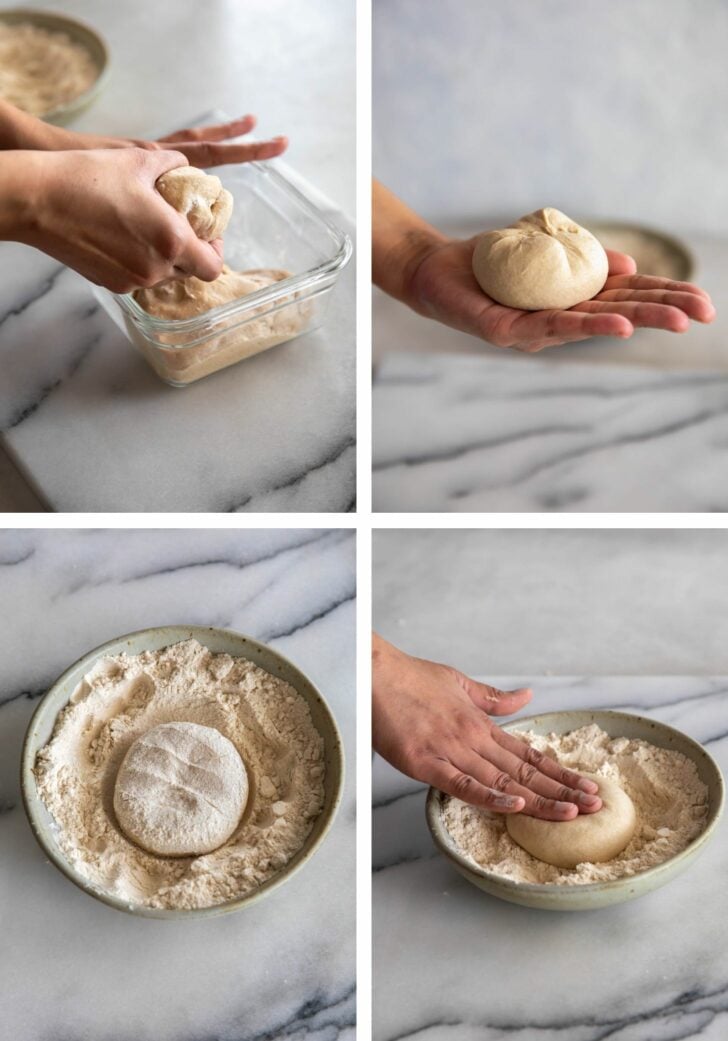
- A peda is the ball of dough you make before rolling it into a paratha. Everyone forms it differently but see video to see how I form mine.
- Beginner tip: If you’re making all the parathas at once, prepare all the dough balls (pedas) before you start. This allows you to roll them out while you cook the previous paratha. If you’re not finished rolling out the paratha and the pan is empty, reduce the heat to prevent it from getting too hot and smoking.
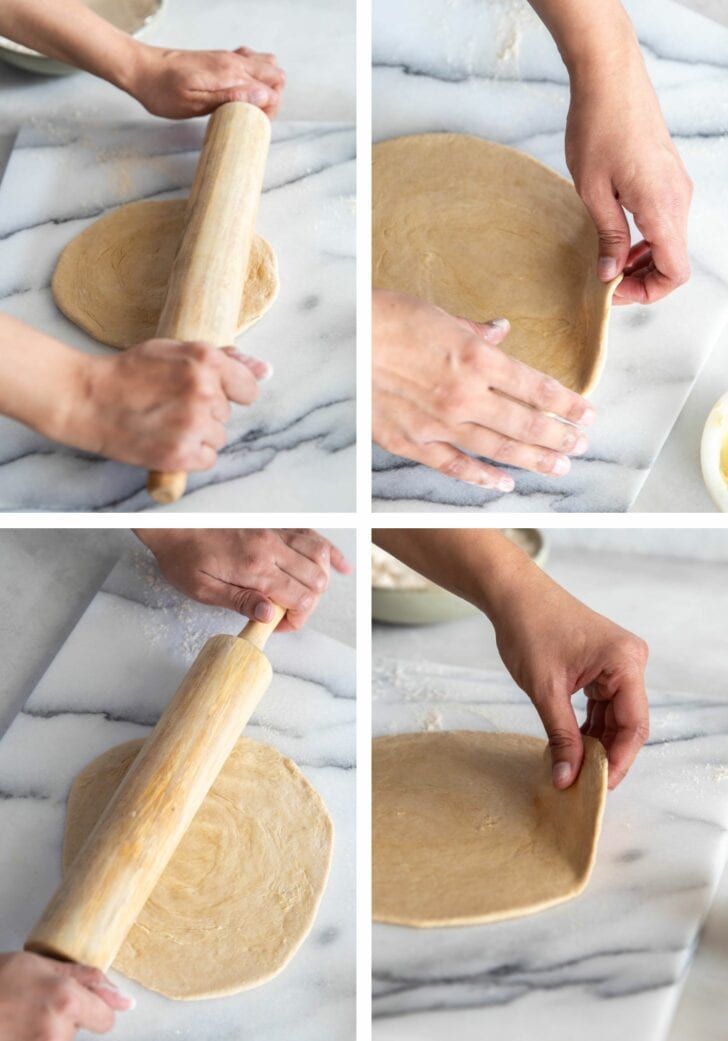
4 – Roll out the peda
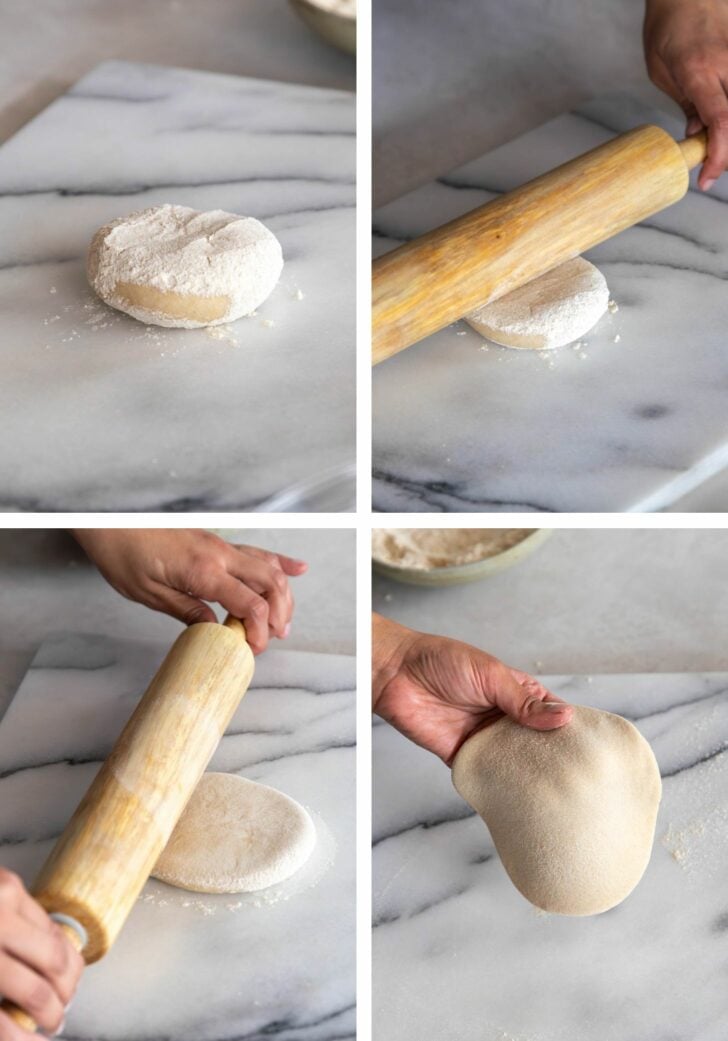
- First, you roll it out just like you would a roti.
- Essential tip: At this stage, it doesn’t matter how your rolled out paratha looks. The only important thing is that it is even and thin. The larger and thinner you roll this out, the longer your coil will be, and the longer your coil will be, the more thin layers you’ll get.
5 – Apply butter
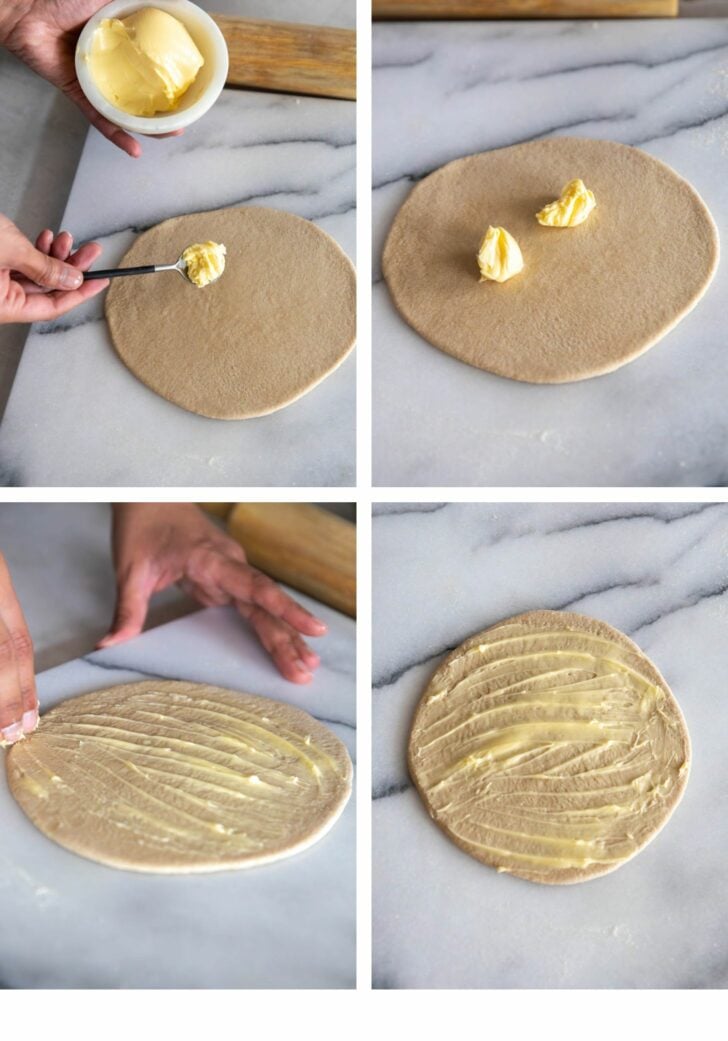
- Essential tip: If you add too much butter, it’ll make the dough harder to work with. To make it easier to work with, sprinkle flour over the butter at this stage. This also helps make more pronounced layers.
6 – Roll down
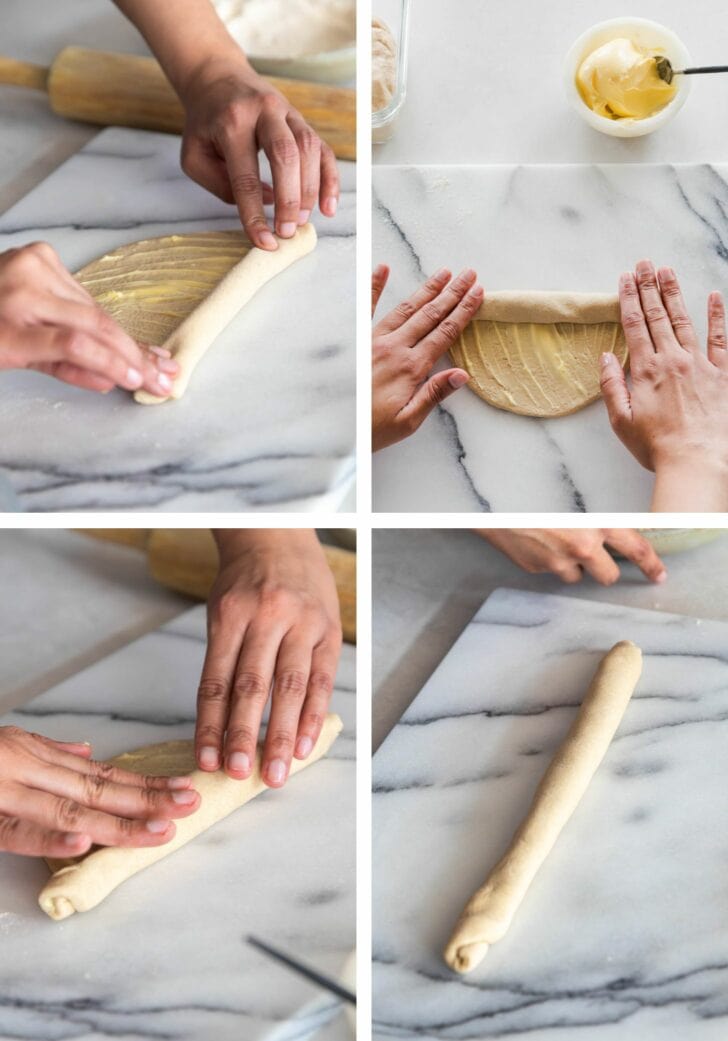
- Starting from the top, roll down Swiss-roll-style until a log forms. Focus on making it tight and even, especially from the middle where it tends to get bulky.
- Essential tip: This step influences how your rings or ‘lachas’ will turn out. The longer you roll it out, the more layers/coils you’ll have.
7 – Form coil
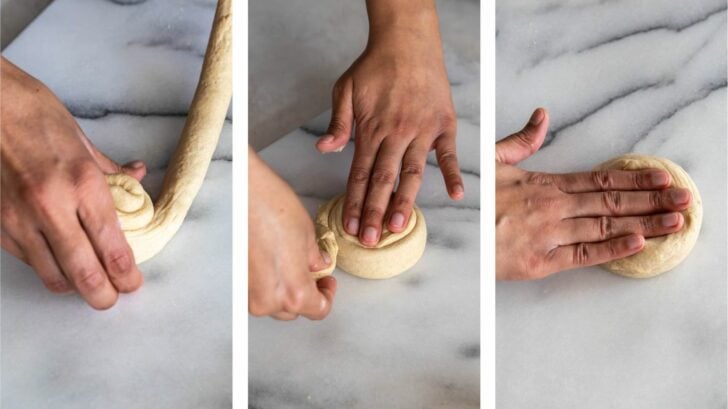
8 – Prep coil to roll out again
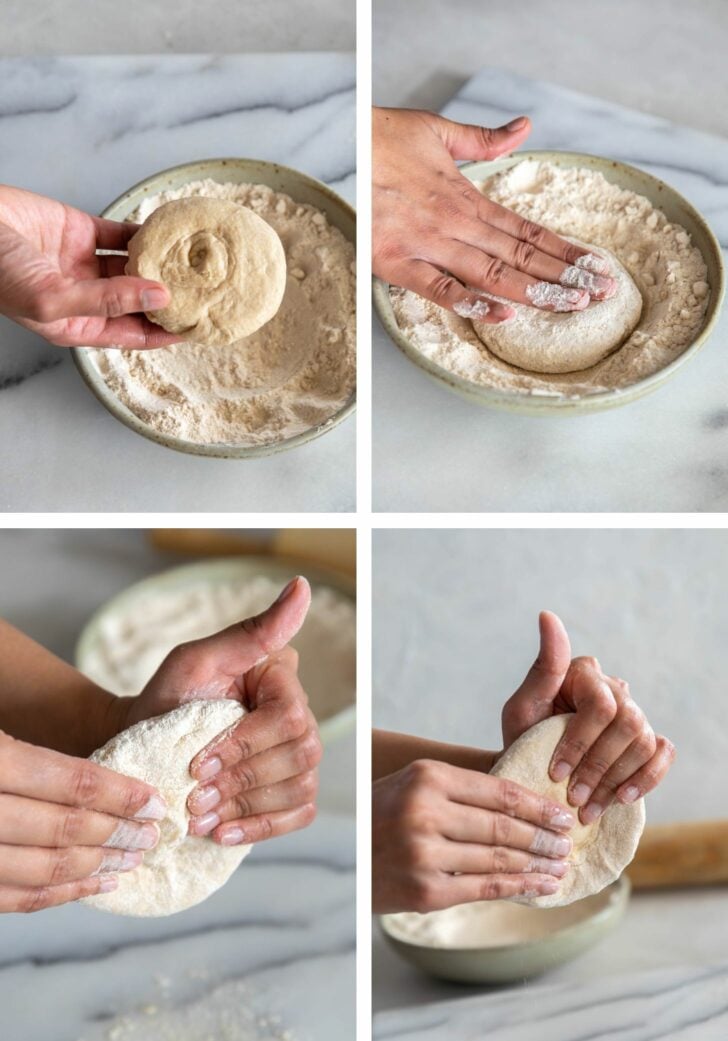
- Here you want to make sure the paratha is not too dense in the middle.
- Essential tip for dusting with dry atta: To keep parathas soft, use a minimal amount of atta when rolling them out. You want to use just enough to prevent the paratha from sticking to the rolling pin.
9 – Roll out once again
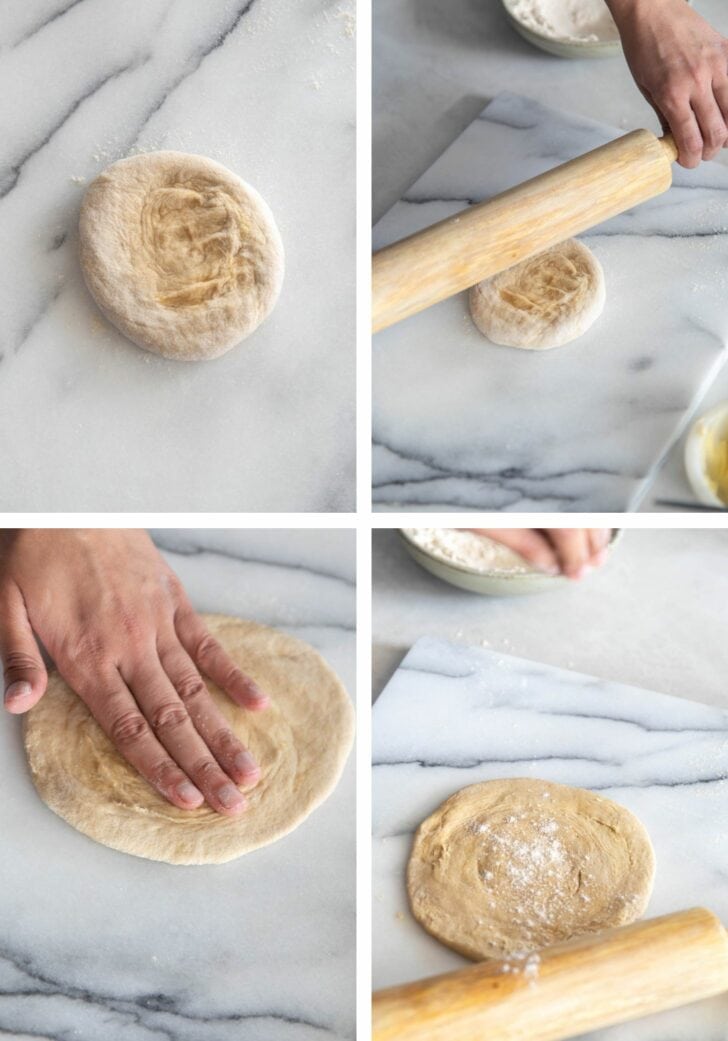
- Essential tip: Try not to use too much force or pressure while rolling out the paratha. This can create uneven thickness. Move the rolling pin freely from top to bottom, dusting the paratha as needed.
10 – Flip and even out
- Essential tip: Once your paratha has rolled out and has an even middle, focus on the outer edges. Thin out any thick parts with your rolling pin and slightly pull at the edges to round it out.
11- Clap between hands (Optional)
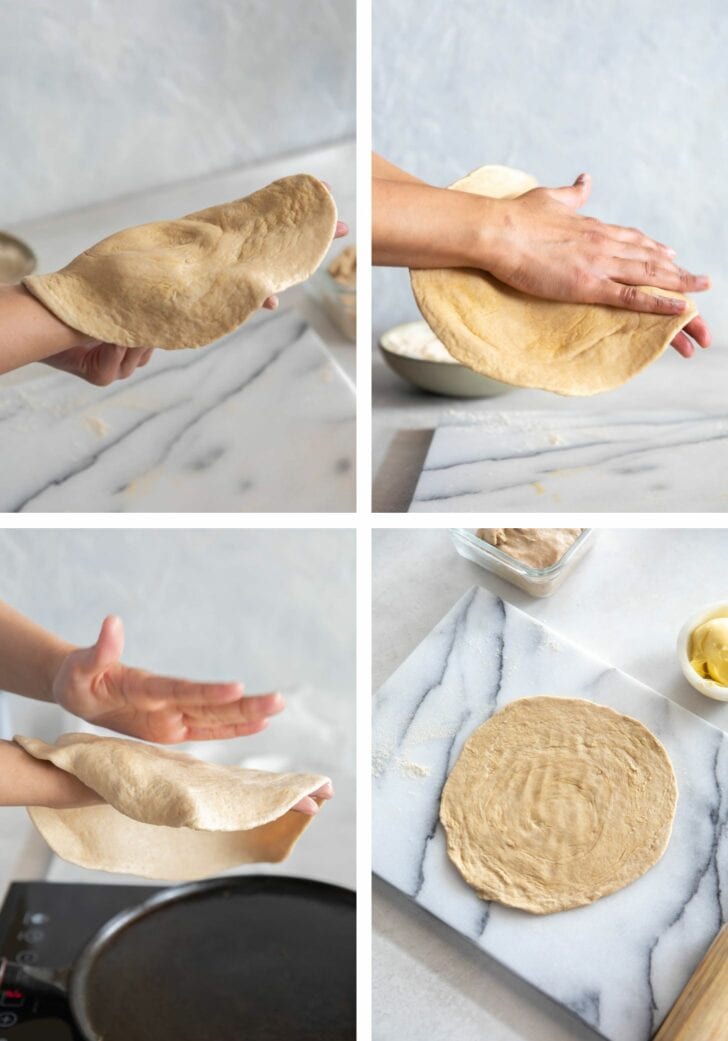
- This step isn’t essential, but it helps get a feel for thicker or uneven parts. Once you notice an uneven area, gently pull at it to even it out or place the paratha back on your work surface and thin it out slightly with your rolling pin. It also helps you notice if your middle is still thick, in which case you can take the time to thin it out again.
12 – Place paratha on Tawa for 10-15 Seconds
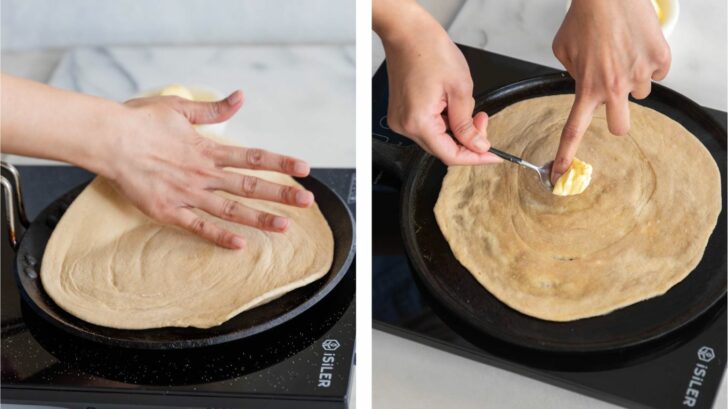
- Essential tip: The tawa should be preheated/very hot but not smoking. Once the paratha is on the tawa but not yet set, take the opportunity to gently adjust and round it out.
- I don’t like to add butter before placing paratha dough on the pan, because the butter will start to brown before the bottom of the paratha has had a chance to cook.
- Essential tip: As soon as the bottom starts to set (this will take 10-15 seconds), immediately flip the paratha using a large spatula or a pancake turner. Do not allow it to completely set and cook as that toughens up the paratha.
Using an electric or induction cooker: As I learned while filming this recipe, an induction or electric stove top requires a different technique than using gas stovetop. A key tip is to use a thinner, lightweight tawa, not a thick cast iron pan. This helps give better distribution and control of the heat.
13 – Flip Paratha
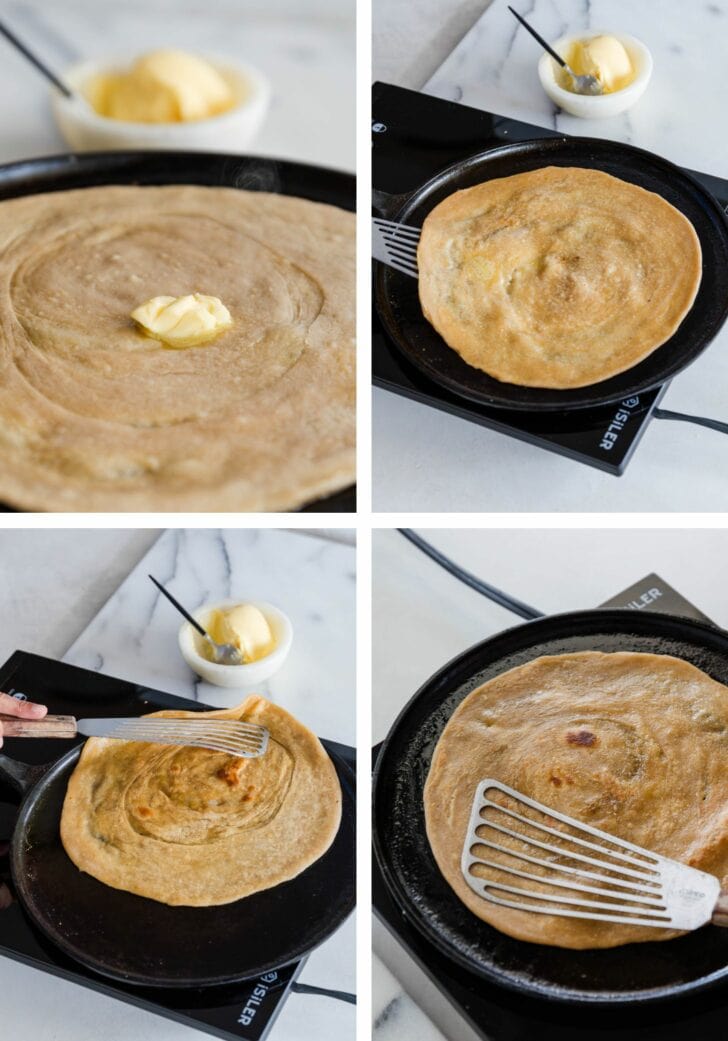
- Essential tip: Gently press on the paratha to fully and evenly cook the inside and enhance the crispy texture.
14 – Take off tawa
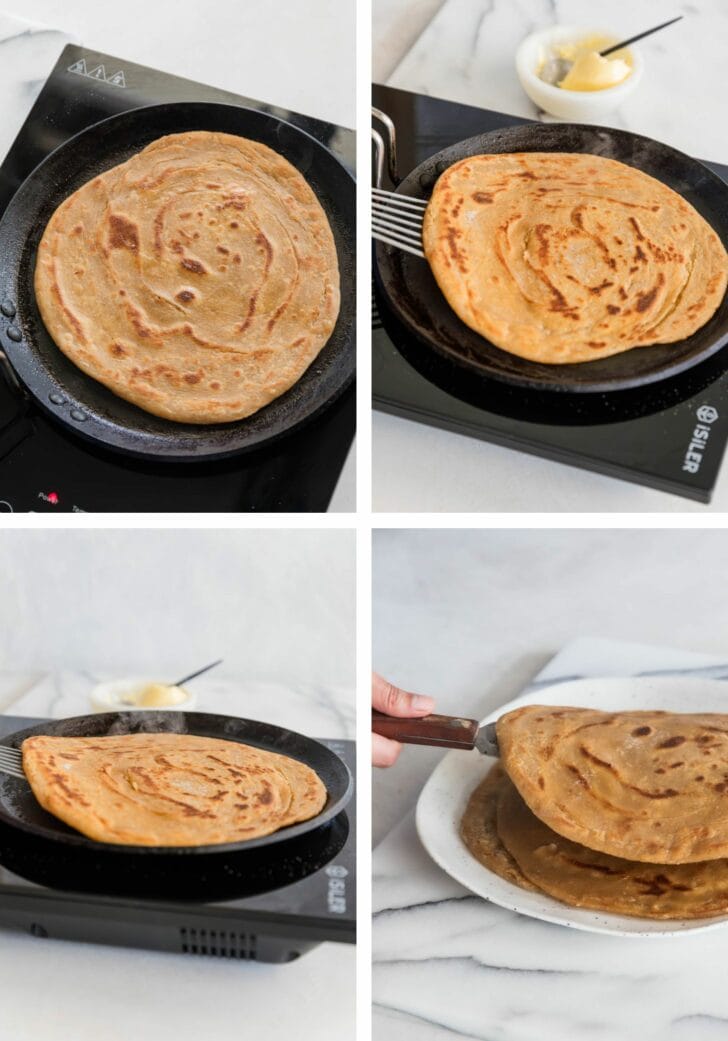
- Browning on both sides, no raw spots, and a toasted smell are all signs that the paratha is ready to take off the stove.
- Essential tip: Keep adjusting the temperature so that it’s about medium or medium-high heat. Do not allow the paratha to cook for too long, or at low temperature. This will toughen up the paratha and it will not be as pliable.
Troubleshooting Guide (More Essential Tips)
| Problem | What May Have Gone Wrong | Solution |
| Tough dough | May not have enough water in the dough | Add water and knead for longer to dissolve and soften. For refrigerated atta, microwave for 5 seconds to soften. |
| Paratha not crispy enough | It may be too thick, may need more coils | Thinner paratha = crispier paratha, roll out thinner, roll log longer, press with a spatula while it cooks |
| Paratha not soft enough | May need more butter or may have cooked too long initially | Add more butter, flip 10-15 seconds after it initially sets |
| Tough Paratha | May have cooked for too long on lower heat, also tough dough = tough paratha | Cook on med-high heat for a shorter time, ensure dough is soft/right consistency |
| Brittle parathas | May be rolled out too thin, may have pressed too much | Roll out thicker, and press gently on paratha |
| Not enough coils/lachhas | Small size of initial roll out/roti | Coils come from length of log, roll out longer/thinner for more layers |
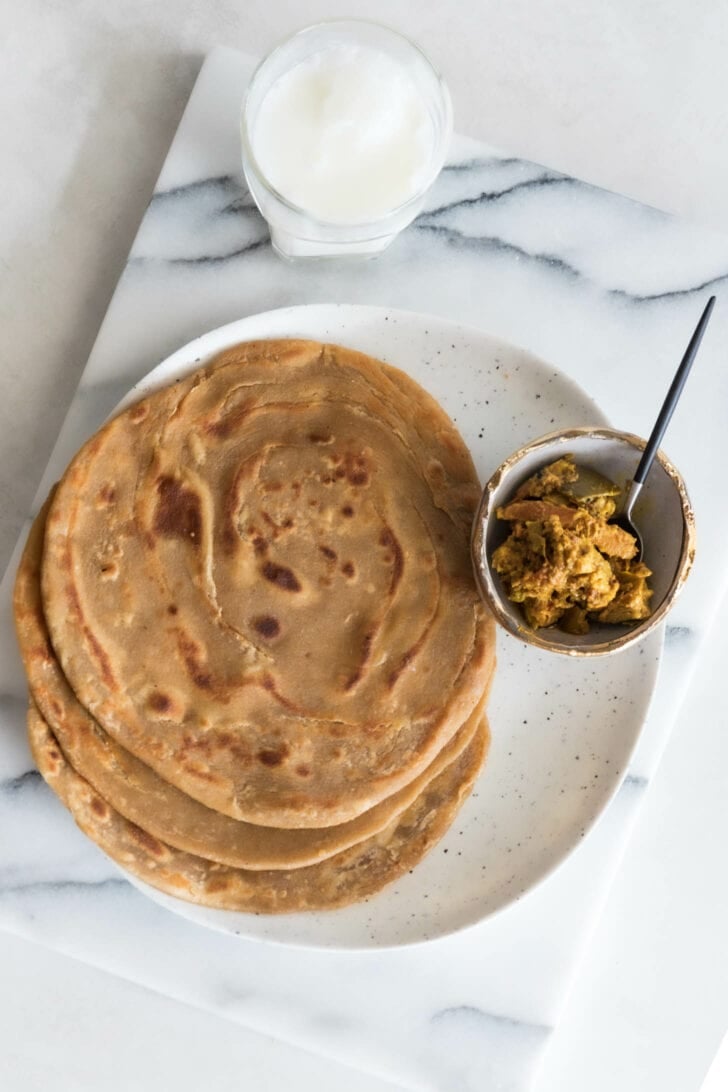
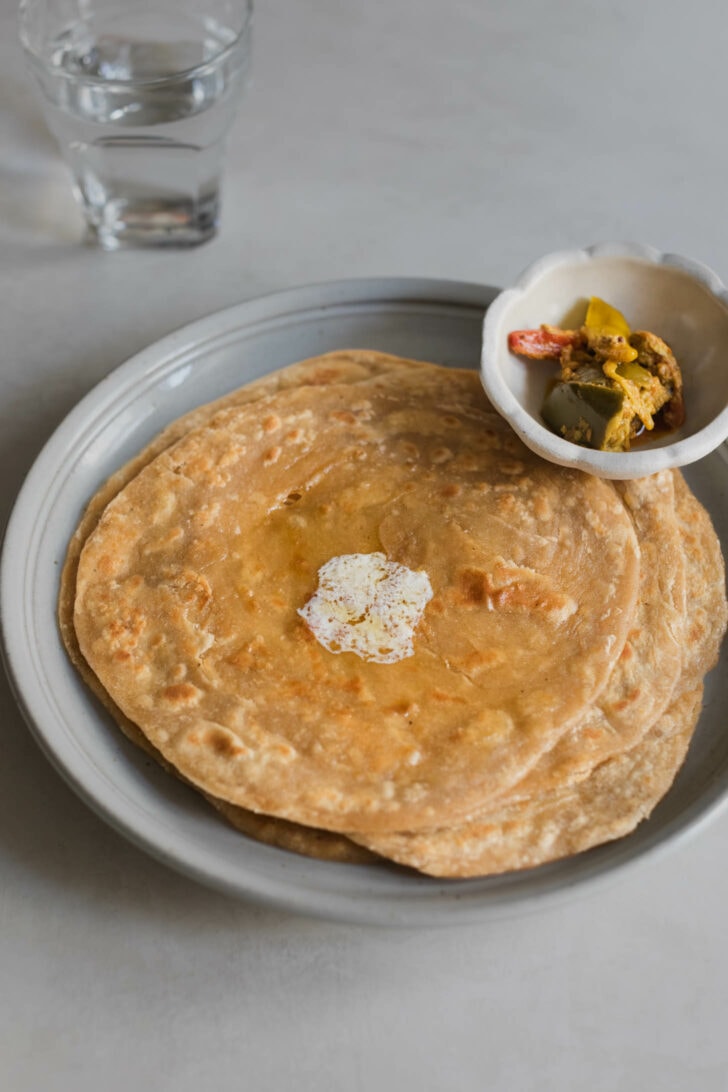
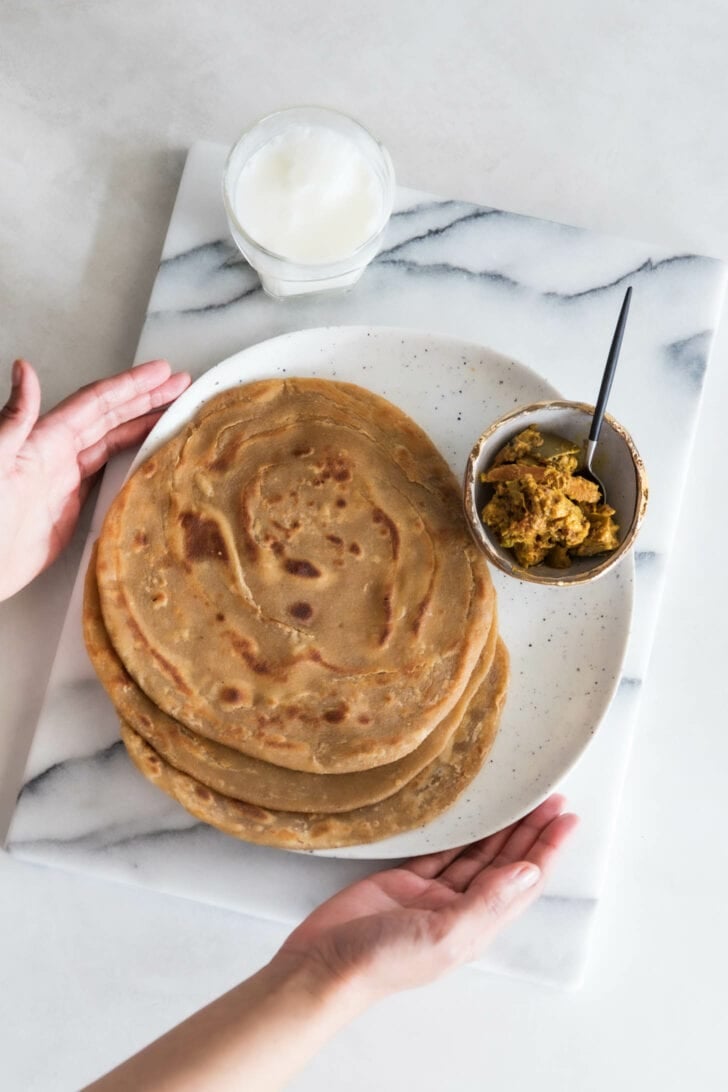
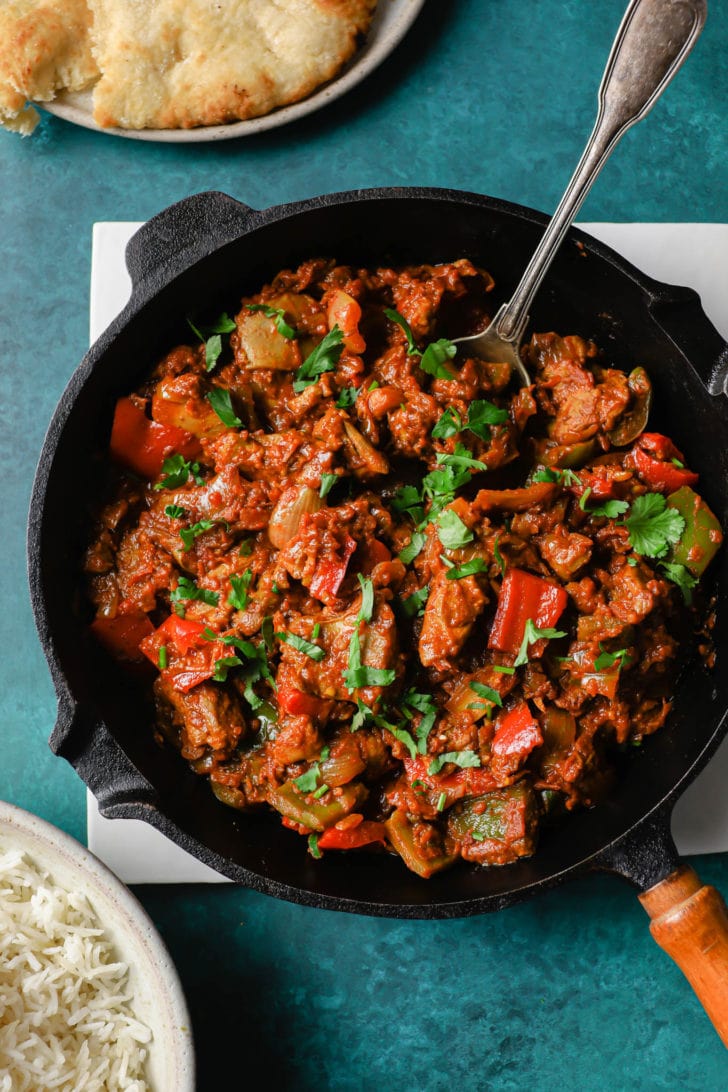
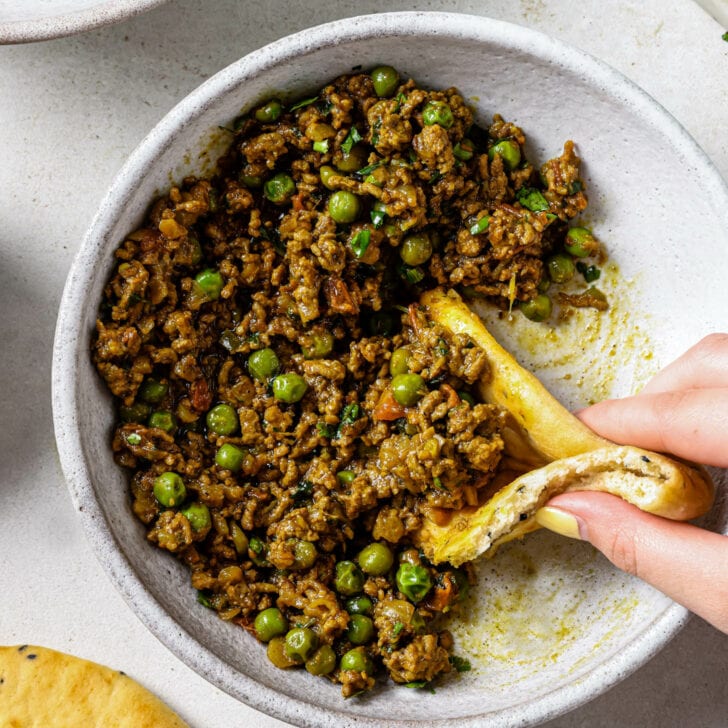
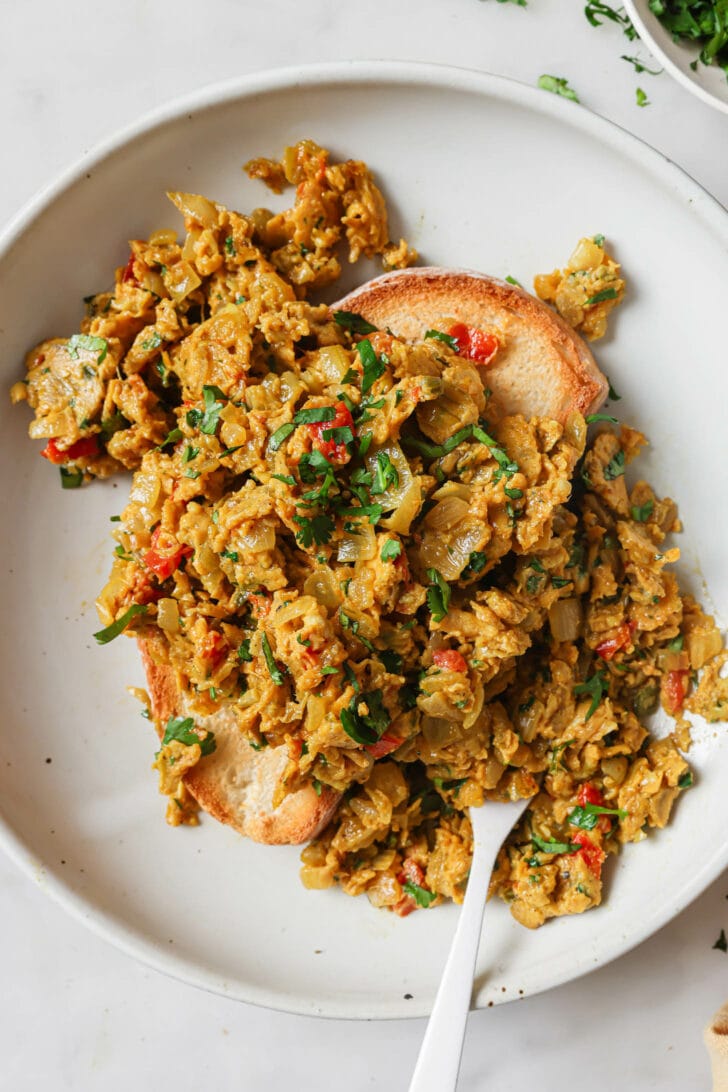
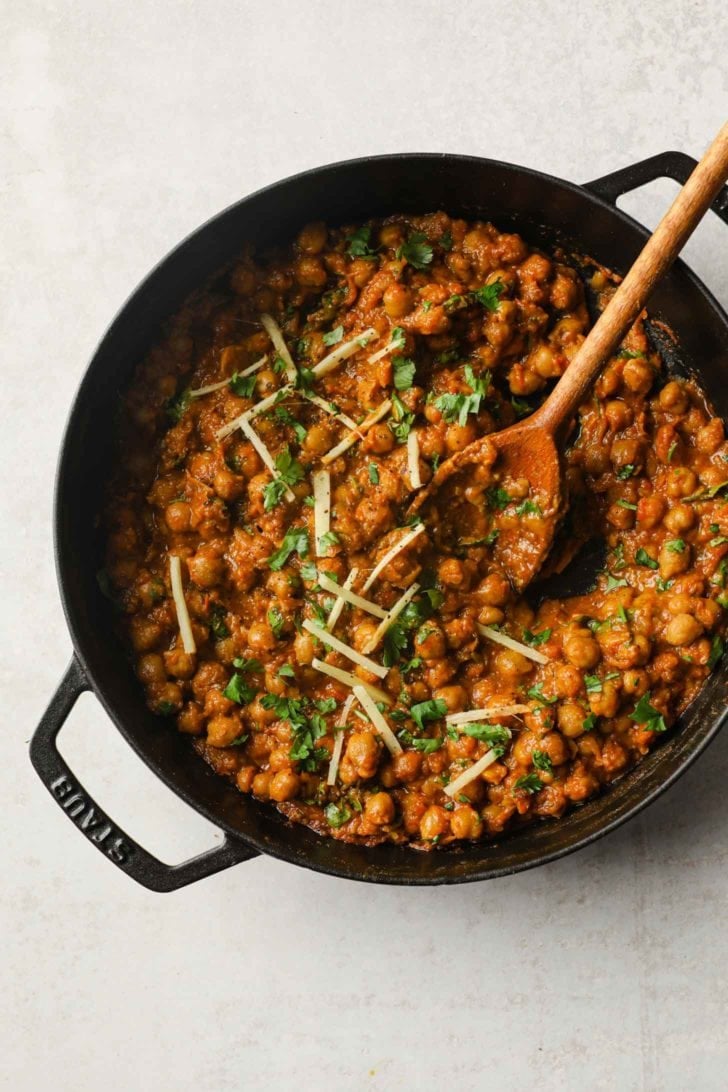
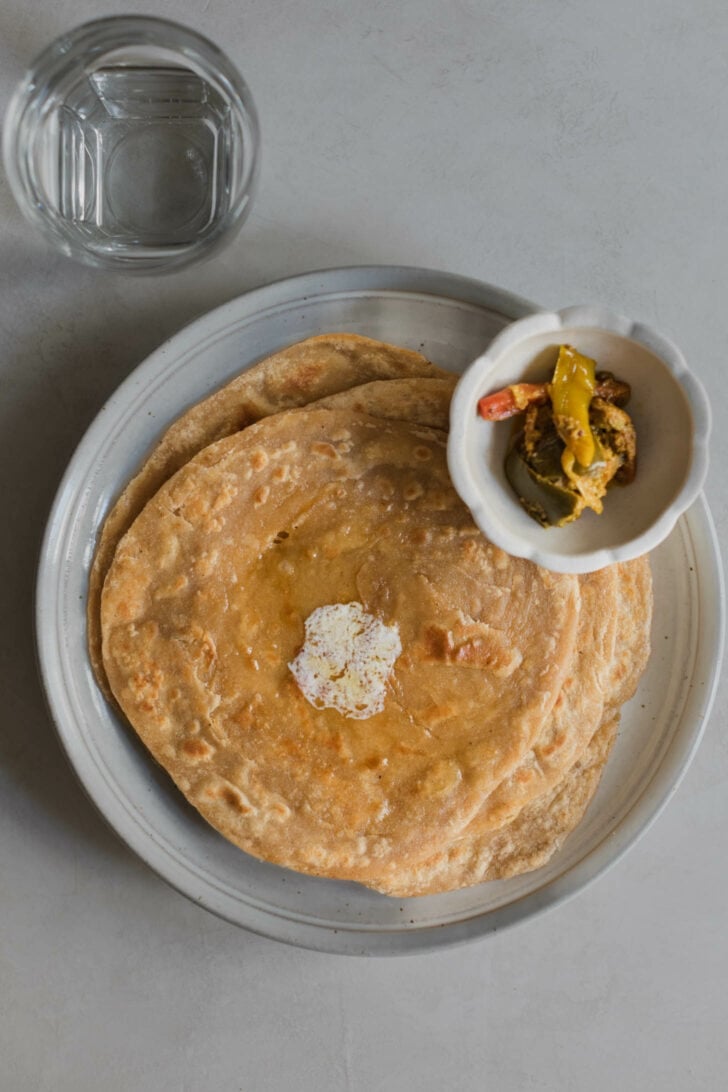
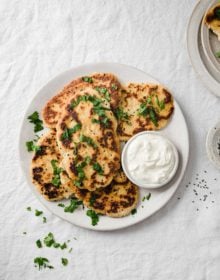
What to Serve with Parathas
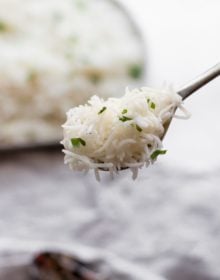
I’m not exaggerating when I say that almost every main dish on this blog will be enhanced when served with a Paratha. Here are a few recipes that are truly best served with parathas over Roti and Naan:

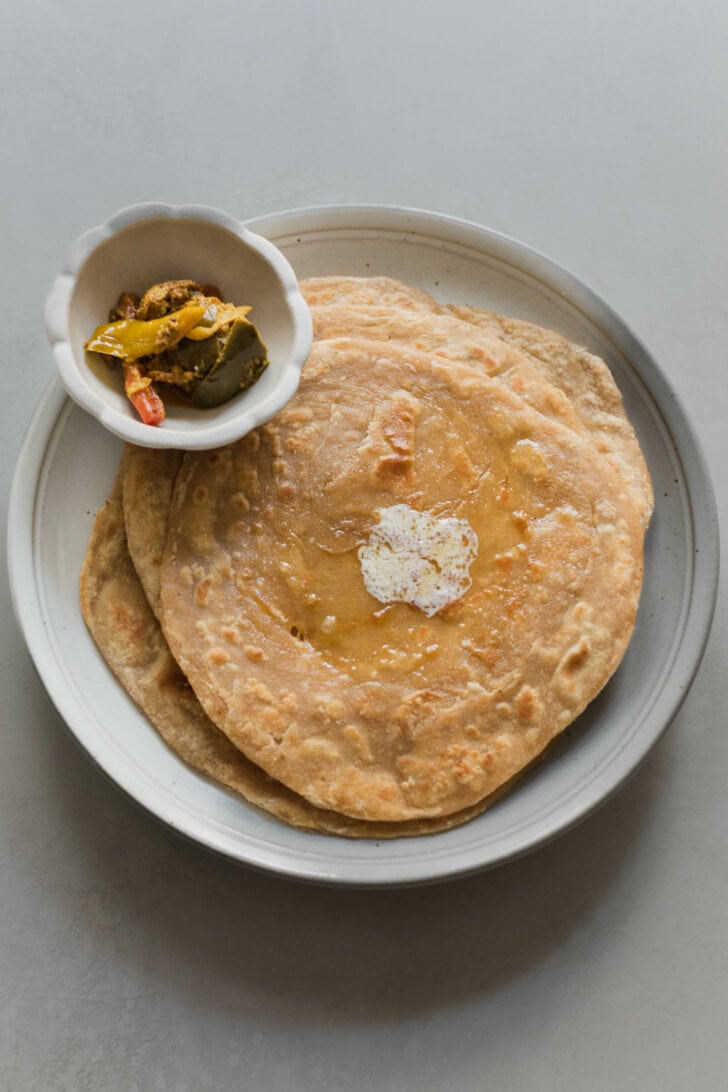
What Goes with Paratha
Non-curry items that go well with parathas:
- Yogurt
- Achaar
- Garlic (Lahsun) Chutney
- Jam/Jelly
- Sugar
- Honey
- Nutella
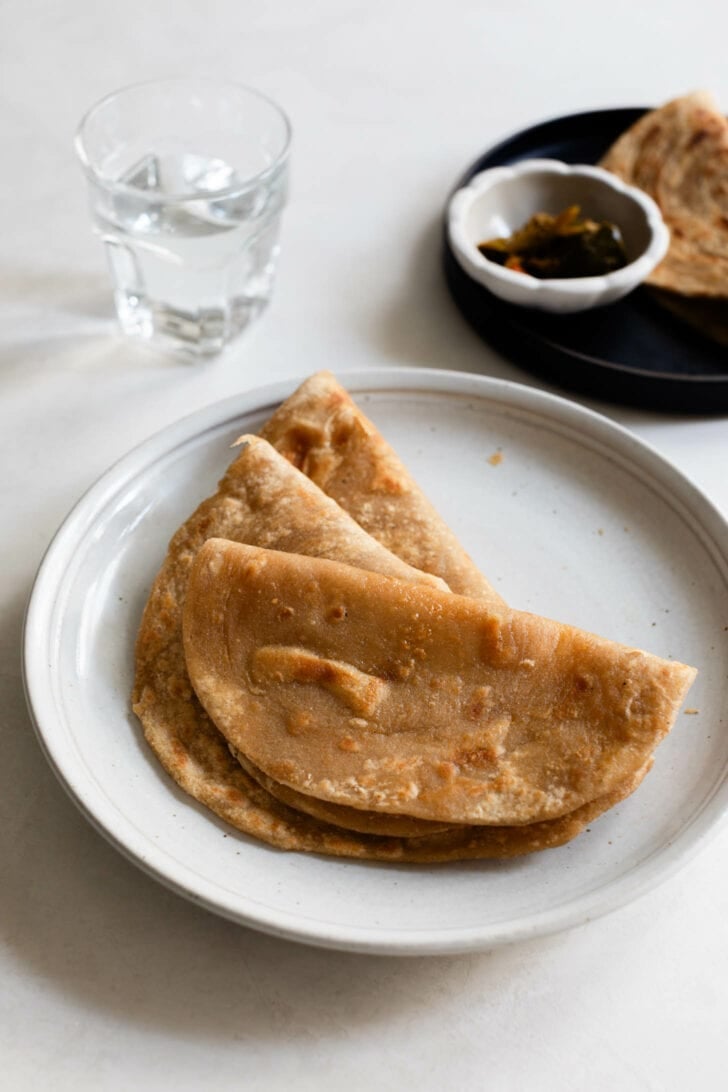
How to Store and Reheat Cooked Paratha
I find it’s best to freeze rather than refrigerate cooked Parathas. Store in an airtight bag, then microwave until half thawed. Ideally, reheat remaining on a warmed up tawa to liven up the crisp. Once thawed, I’ve tried toasting for great results and even air-frying at 350 F until heated through.
How to Freeze Raw Rolled Out Paratha
When preparing the dough, add a bit of oil or ghee to help them stay soft after freezing. Roll them out as you normally would, then place each uncooked paratha between parchment paper and freeze in an airtight container. When ready to cook, heat a pan over high heat and place the frozen paratha on the pan. Lower the heat to medium and cook, buttering and flipping as necessary.
Note: There is also a ‘half-cooked (kacha pakka)’ method of freezing, in which you partly cook the paratha and freeze. I have yet to try this one but would love to hear if you try it!
Tried this recipe? If you have a minute, please consider leaving a comment telling me how it was! If you have a photo of your dish, please feel free to upload it and share with others. If you’re on Instagram, please tag me so I can see your creations. I truly love hearing from you. Thank you!
Easy Lachha Paratha Recipe (Homestyle)
Watch the Video
Ingredients
- 2 cups (280 g) atta flour, (also called durum wheat flour), plus more for dusting – Note 1
- 1/4-1/2 tsp (3 g) sea salt
- 1 cup (227 g) room temperature water
- salted butter, preferably closer to room temperature so it’s easier to spread – sub ghee or oil
Instructions
Make Paratha Dough
- Mixer: Combine the atta flour and salt in the bowl of a stand mixer fitted with a dough attachment. Turn on the mixer to medium-low (2) speed to start mixing the atta and salt. Over the course of 3 minutes, slowly pour in the water, letting it mix with the dough before adding more. It will start to form a ball.
- Increase the speed to medium (4) and continue to knead on medium speed until a smooth and supple ball of dough forms (~3 min). It should start wrapping itself around the dough attachment.
- By hand: Alternatively, knead by hand. Place the atta flour and salt in a medium bowl and mix to combine. Over the course of 4 minutes, slowly pour in the water while using your hands to combine the flour. It'll go from crumbly to one sticky big ball. Let the water mix with the dough before adding more, and focus on breaking the tough clumps. Using wet or oiled hands, knead for another 4 minutes by gently punching the dough with your knuckles, then folding over. See how-to video + essential tips for kneading by hand.
- If the dough seems dry, tough, or unable to form, add an additional 1-2 tbsp of water. If it seems a little too wet, with the dough sticking to the sides, dust it with 1-2 tbsp atta flour. The final dough should be soft to the touch, supple, and pliable. It will be slightly sticky, but will not cling to your fingers if you touch it with wet hands.
Rest Dough
- With wet or oiled hands, remove the dough and place in an airtight container. I like to press the top of the dough with wet hands to prevent the top from drying out. Cover and let the dough rest for 10-15 minutes to allow the gluten to develop. This makes them easier to handle. Otherwise, refrigerate until ready to use, up to 3 days. (See Note 2) Allow to come close to room temperature when you’re ready to prepare the parathas.
Make Peda (ball of dough)
- Once you are ready to cook the parathas, place the butter, atta flour for dusting, and a rolling pin near your workstation. Dust your fingers with the dry atta before taking a medium-sized piece of dough (around 90-120 grams). Dust the bottom of the piece of atta before forming into a round ball by rolling it forward, then pulling back toward the middle. (See video/photo for how to do this.) Dust with atta on both sides, pressing to form a patty around 3 inches in diameter.
- Meanwhile, heat a tawa, or other heavy-bottomed flat griddle over med-high heat. (See Note 3)
Shape the Paratha
- While the tawa is heating, roll the paratha out to 5-6 inches in diameter and spread about 2 teaspoons of butter onto the flattened dough. If your butter is cold, dot pieces of it evenly onto the dough.
- Starting from the top, roll down Swiss-roll-style until a log is formed. Roll this log tightly, like you would a rolling pin, until it’s about 18 inches long. Focus on making it tight and even, as this will determine the evenness of the folded layers.
- Next, roll tightly into itself, in a spiral shape, from one edge to another. It will form the way a cinnamon roll looks from top. Focus on making it round, as this will influence the final shape. Toward the end, secure the loose end of the dough by tucking it in toward the center. Dust both sides in the atta again. I like to hold the dough in one hand while pressing the center between my fingers and thumb of the other hand. (See video).
- Using your rolling pin, roll this out once more until it is around 8-9 inches in diameter. Dust only as needed while rolling. Do not apply too much pressure and try to get it even in thickness, especially toward the middle, where it tends to get thickest. Once you’re comfortable with this process, you can shift the paratha dough between your hands like you would pizza dough. (See video) This is to help stretch it out gently and evenly. It also helps you get a feel for the thick parts, thin them out slightly, and straighten out the edges.
Cook the Parathas
- Place the paratha on the hot tawa and reduce the heat to medium. Add 1-2 tsp of butter to the top. As soon as the bottom starts to set (this will take about 10-15 seconds), immediately flip the paratha using a spatula. Do not allow it to completely set and cook. Butter the other side. Cook for one minute, then flip again.
- Cook for 1-2 minutes on each side before flipping, adding butter to the dry spots as needed. Use your spatula to press the parathas to encourage them to cook inside. Adjust heat as needed to maintain even cooking. Once the paratha is golden and crispy on both sides, remove from heat promptly. Letting it sit too long will harden the paratha. Repeat with remaining parathas or store the remaining atta in an airtight container until ready to use.
Notes
Note 2: Atta goes bad once there’s a sour, fermented odor coming from the dough. Depending on how airtight your container is, it can last up to 4 days. Note 3: Type of pan: You can use any griddle or tawa if you have a gas stovetop. However, if you have an electric or induction cooktop, use a lightweight pan. A thick, cast iron pan will take too long to cook the parathas, which may lead to tough parathas. Beginner tips: Please search + find ‘essential tips’ to find helpful techniques within the post. Also refer to the troubleshooting guide/table for common errors and solutions. Nutrition facts are for each paratha, assuming 6 parathas. Does not include butter/oil/ghee as it’s difficult to calculate how much you’d use per paratha.
2 Comments on “Easy Lachha Paratha Recipe (Homestyle)”
Greetings to you, Izzah!
I am so excited, After watching your very excellent video, I feel like I can make this!
If I could do it, my Husband would be so totally thrilled. 🙂
Thank you, I shall report back. Take care…
Hi Laura, We would love to hear back on the results!