Chana Pulao (20 minute Prep!)
A Chana Pulao (Chickpea Pulao) recipe that promises full flavor, tender chickpeas, and fluffy rice. This recipe takes 20 minutes of initial prep time but it’s tasty and elegant enough to serve as main dish for guests. Includes Stovetop and Instant Pot instructions! Tested to Perfection!
Want to save this post?
Enter your email below and get it sent straight to your inbox. Plus, get recipes & tips every week!
“I tried it out and it is THE BEST channa Pulao I ever made. I recaptured the taste of my time in Pakistan and brought back childhood memories to me. Simply awesome! Thank you so much for this recipe.”
Zainab
About 5 years ago, I published the Instant Pot version of this Chana Pulao recipe and since then, I’ve gotten many requests for the stovetop version.
My standard answer has been to make the onion base, then cook it how you would ordinarily cook rice, but this doesn’t suffice for two reasons:
- You’ll need more water, because unlike the water-releasing frozen peas of Matar Pulao or meats in Yakhni Pulao, chickpeas actually soak up water.
- Because of the extra water + the water-absorbing chickpeas, you’ll need more salt.
So here I am, 5 years later with a proper, fail-safe stovetop Chana Pulao complete with tips for getting your Pulao rice all fluffy and separate.
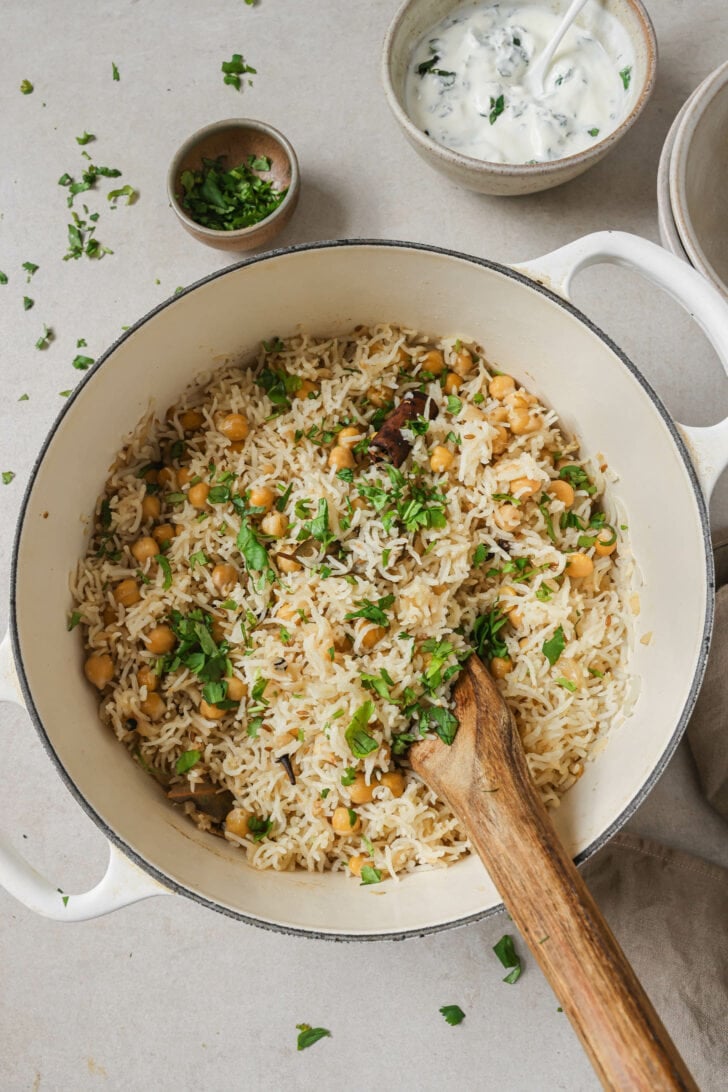
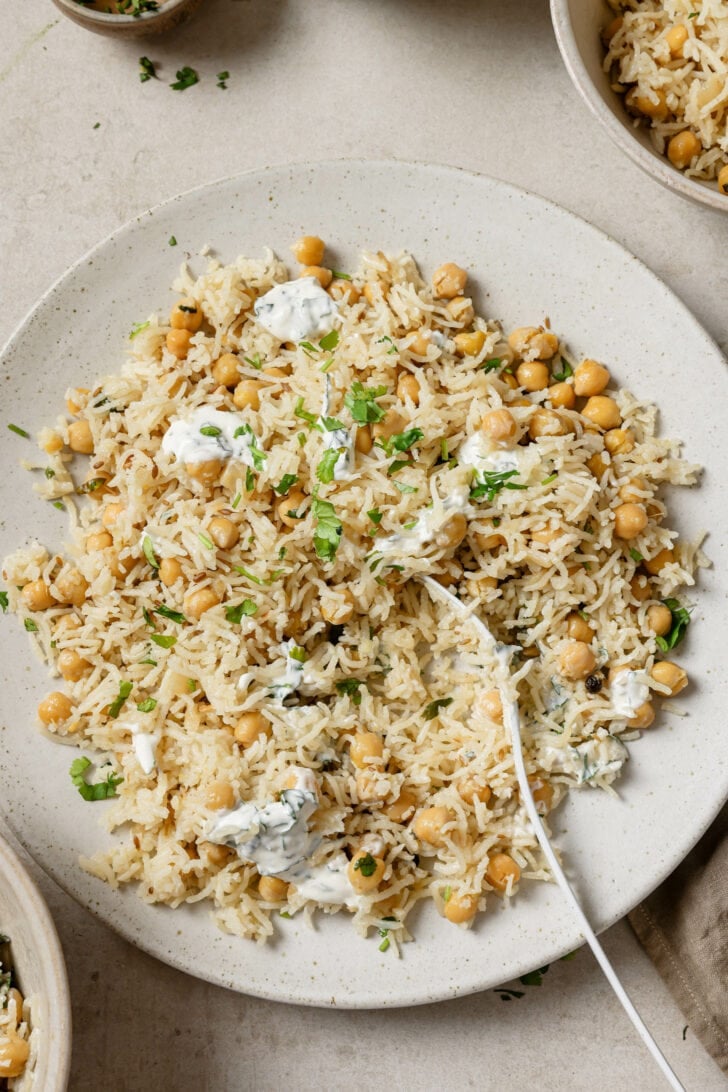
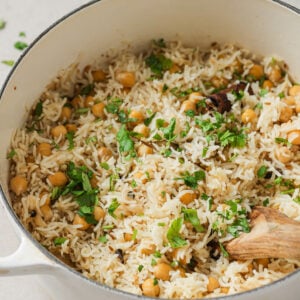
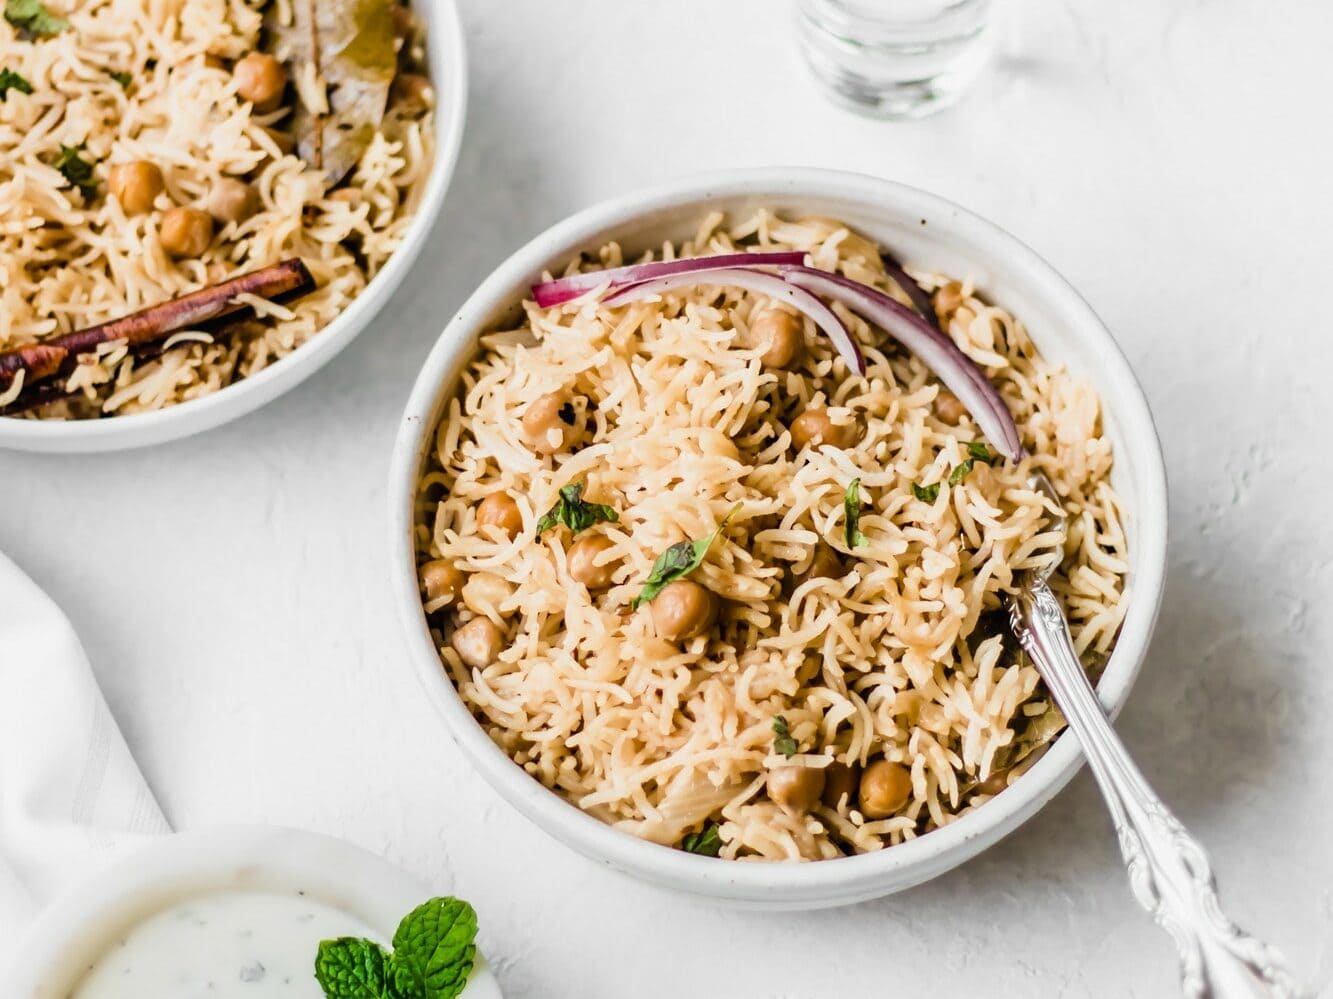
Chana Pulao
Chana Pulao, or Chickpea Pilau, is made in one-pot with whole spices and aromatics. The taste is subtle, yet earthy and rich. The keys to a beautiful Chana Pulao, or any pulao really, are to:
- Use a bit of ghee or butter.
- Deeply brown the onions.
- Add a balanced amount of whole spices, and a generous amount of salt.
- Cook the rice to perfection.
History and Origins
It’s said that chickpeas (garbanzo beans) were introduced to India two centuries ago from the Silk Road. This is probably why they’re often called ‘Kabuli‘ Chanay, noting Kabul, Afghanistan as the place from which they were introduced. I assume cooks started using them in all sorts of recipes such as Chana Masala, Punjabi Chole, and Pulao, which was brought over much earlier by the Moghuls.
More Pulao Recipes: Yakhni Chicken Pulao, Mutton (Goat/Lamb) Pulao, Matar Pulao (Peas Pulao), Instant Pot Chicken Pulao
Ingredients
All pantry items. Here’s all you’ll need:
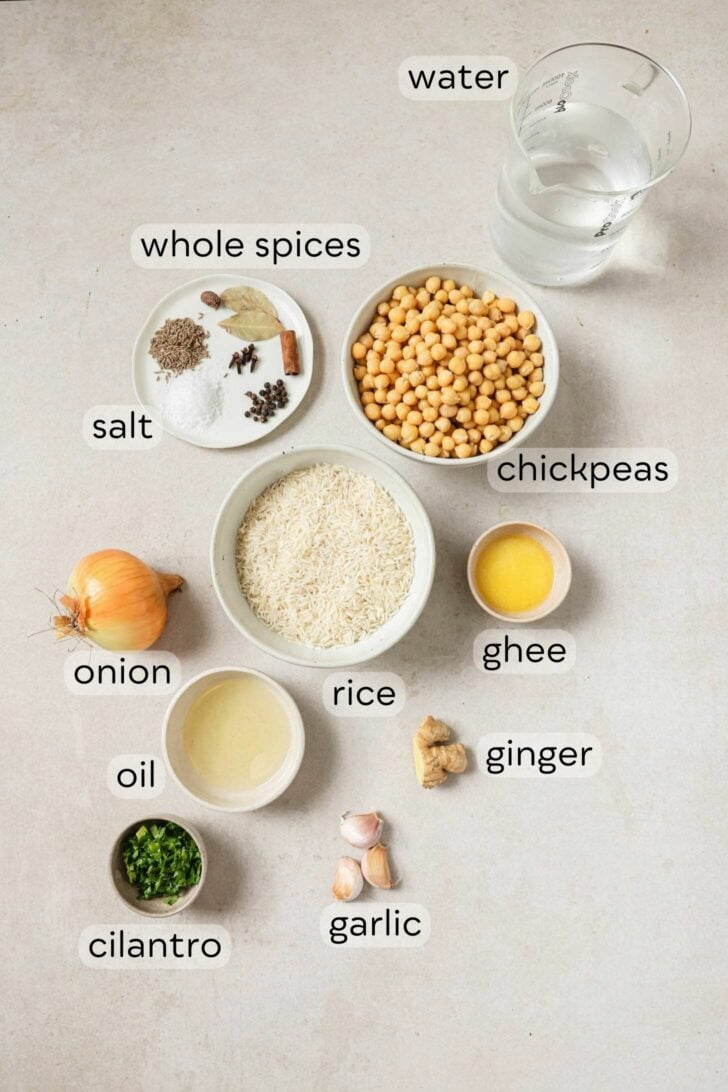
- Canned chickpeas (garbanzo beans): Good quality canned chickpeas are worth it here. Progresso or Bush’s are my favorites.
- Garlic + Ginger: Aromatics to deepen flavor.
- Whole spices: You’ll need classic pulao spices such as a bay leaf, black peppercorns, cinnamon stick, cloves, cumin seeds, and black cardamom.
- Onion: I’ve used yellow onion here but red onion works just as well.
- Oil: Provides fluidity for browning onions to their proper degree and carries flavor.
- Ghee: A pulao essential. You can substitute with butter or replace with more oil to keep it dairy-free.
- Basmati rice: I use Royal’s Chef’s Secret, aged, long-grain basmati rice. Any aged, long-grained basmati will work. More on rice below.
- Green chili pepper: In the newer version, I’ve added an optional green chili (I usually use Serrano) for aroma and a gentle kick. This isn’t a requirement, especially if you’re serving with something spicy.
- Cilantro: Another optional ingredient, for a pleasant garnish.
How to Make Chana Pulao
You can make this on the Stovetop, Instant Pot, and even a rice cooker. Instructions for all three methods are in the recipe card.
Here are the stovetop step-by-step directions:
Prep Rice
- Wash and soak rice before you start cooking so it has time to absorb some water. This makes it softer and fluffier.

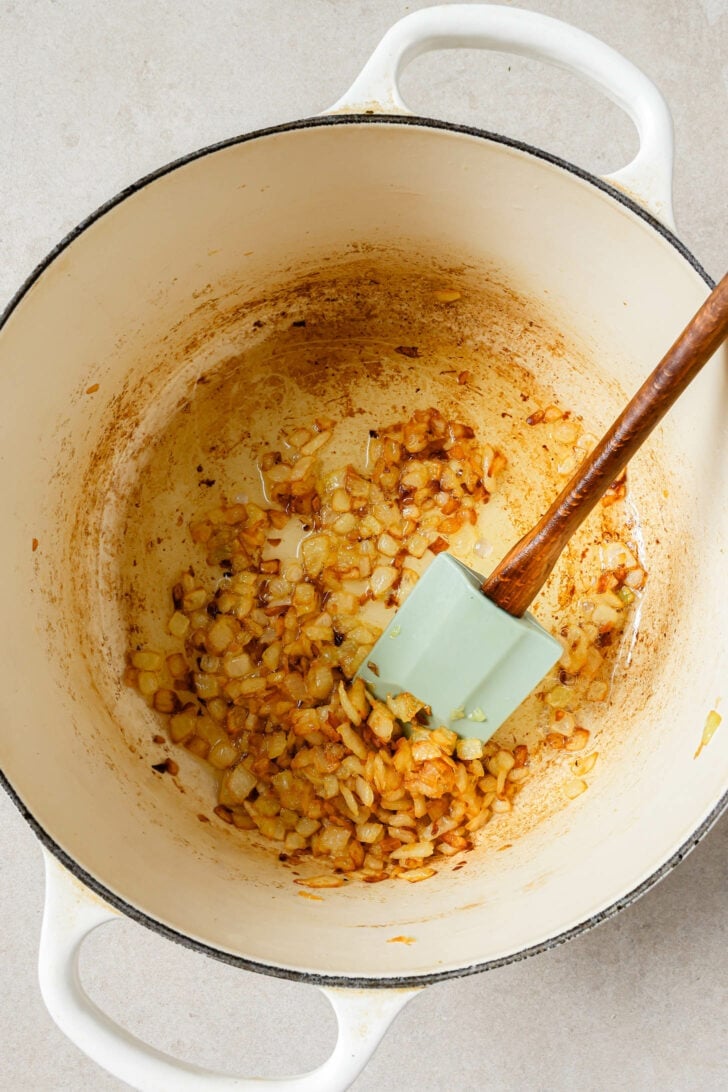
Make the Onion Base
- Brown onions. In all pulaos, the onions will deepen the flavor and determine the color of your rice. It’s important to be patient with them, stir frequently, and deglaze the pan to help them brown evenly.
Note: Though the onions are diced in the pictures, usually they’re thinly sliced in Pulaos. For larger-sized onions, quarter them before slicing so they’re not too stringy.
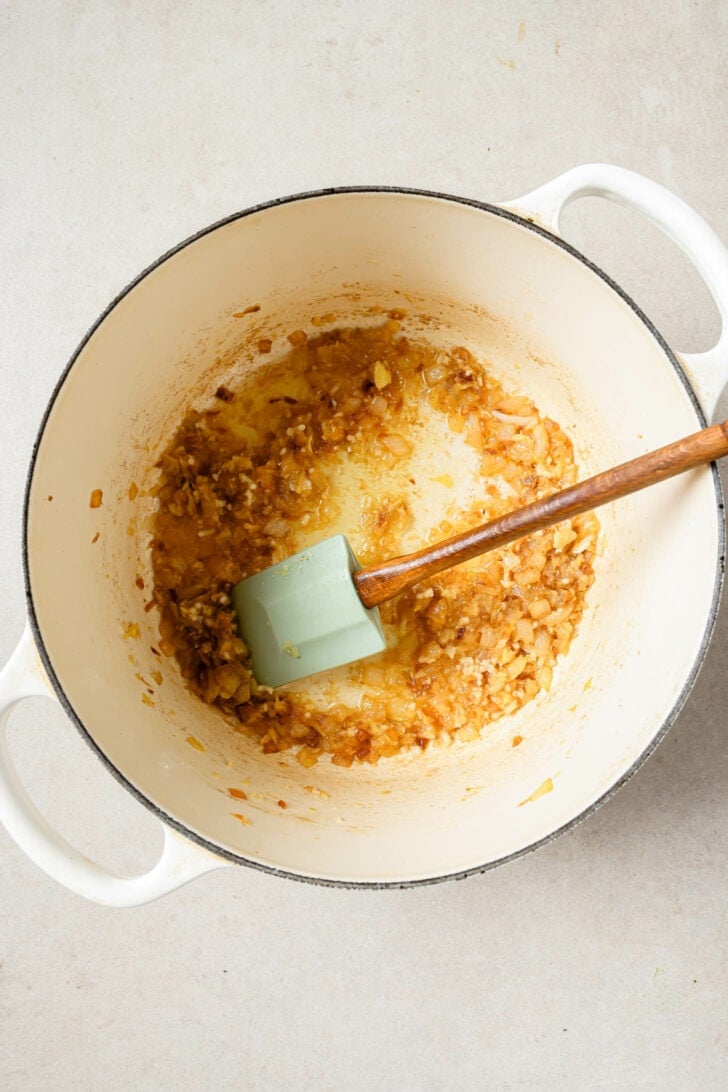
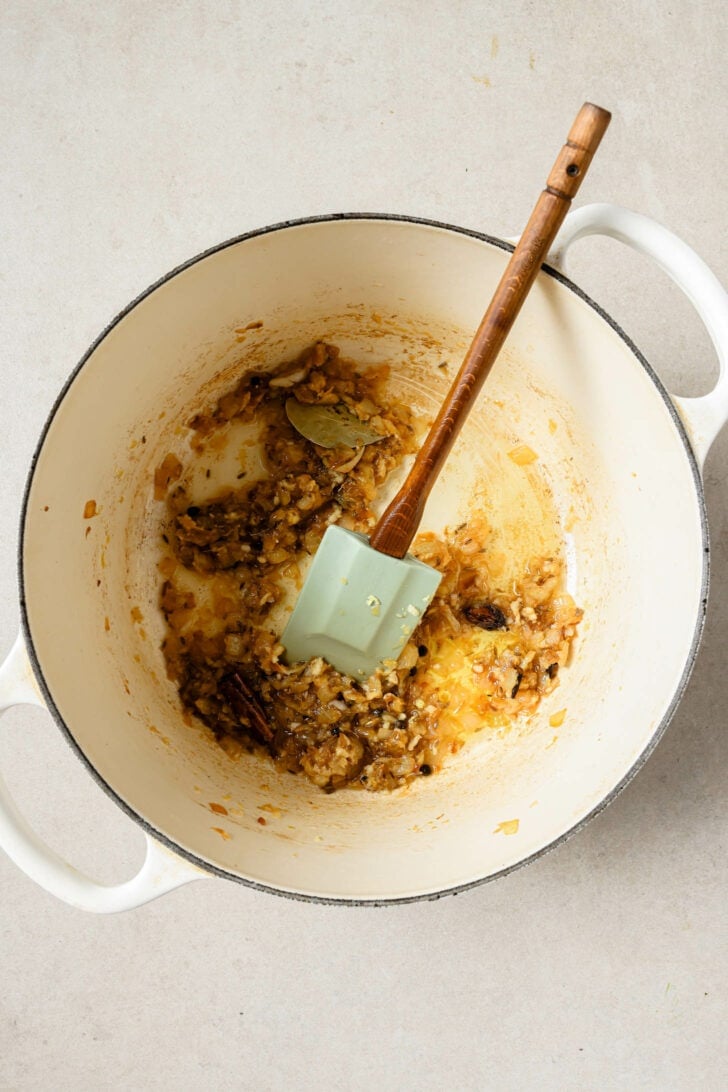
- Add the garlic, ginger, green chili pepper (if using), and whole spices and sauté for 2 minutes, until aromatic.
Cook the Rice
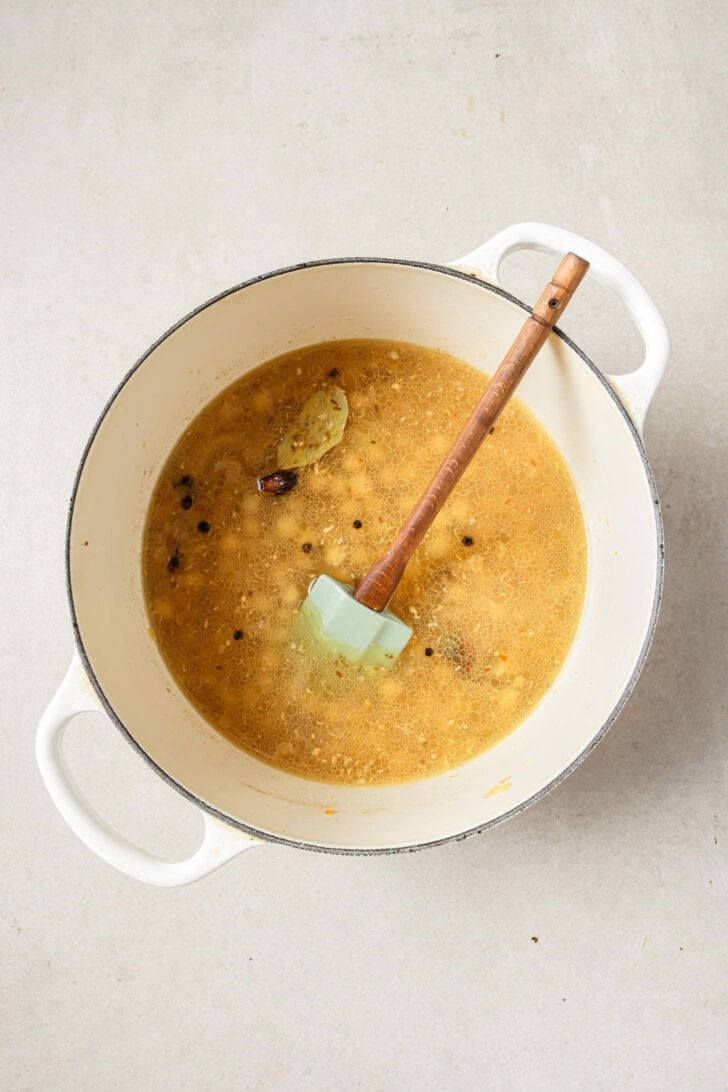
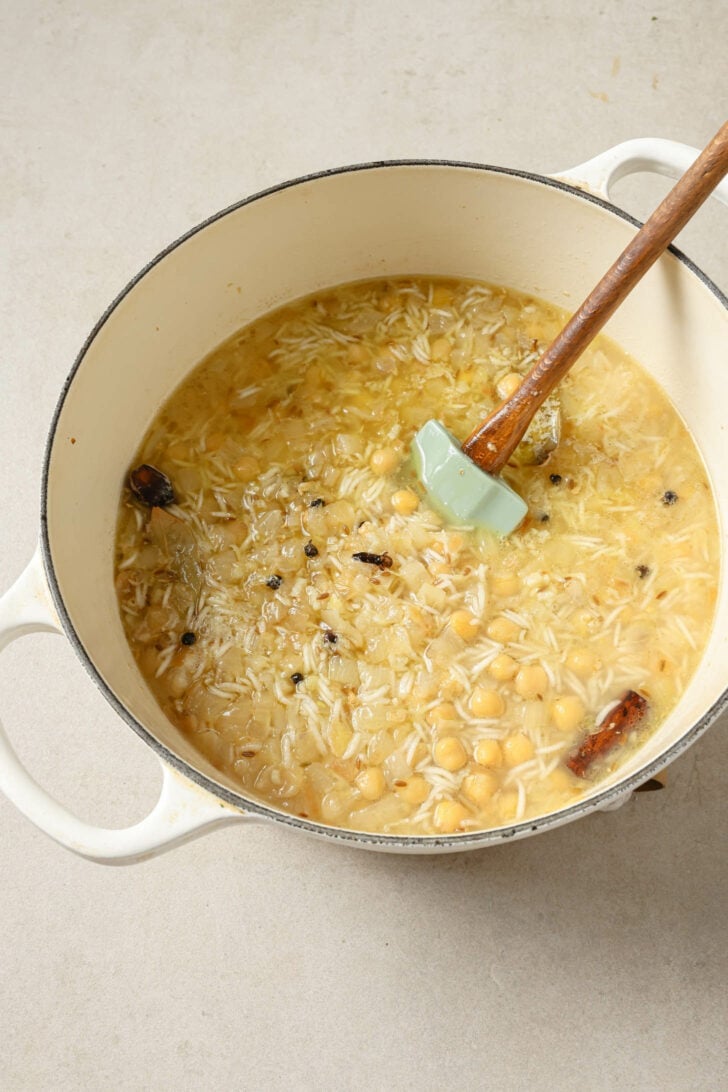
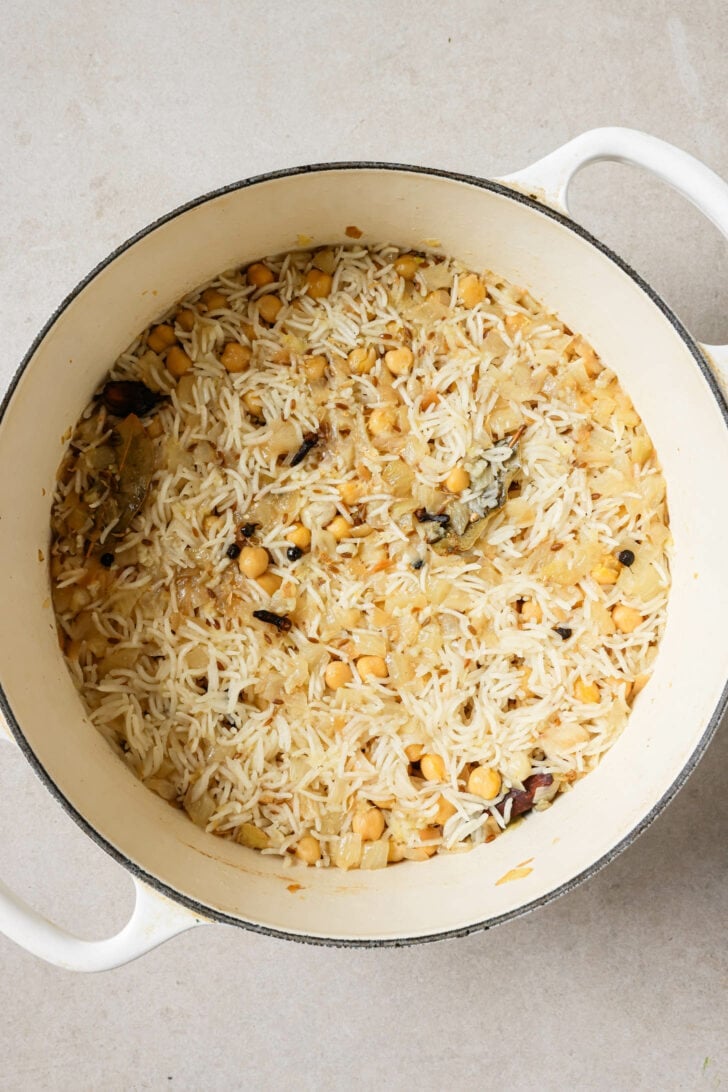
- Stir in the drained chickpeas and salt, then pour in the water. While the water comes to a boil, drain the rice well so you’re not adding any excess water. Add the rice to the boiling water. Stir well to evenly distribute the salt.
- Simmer with a partially covered lid: In Pulaos, you gently simmer the rice until most of the water has absorbed or evaporated, and then turn the heat down for a final steam, or dum. Keep the heat on medium or medium-low so that it simmers, but doesn’t aggressively boil. I partially cover with the lid to give the long grains time to soak up the liquid as it cooks off.
- If most of the water hasn’t absorbed in the time indicated, then completely uncover to allow quicker evaporation.
- If the water is cooking off too quickly, lower the heat and/or sprinkle in 2 tbsp water to give the top layer of rice moisture.
- Tip: While you’re bringing everything back up to a boil, this is a good time to do a final salt test, as the rice has absorbed some of the salt.
- Steam the rice so it cooks gently and evenly to doneness. Keep reading for more in-depth instructions on steaming!
- Workflow Tip: This steaming stage is the perfect time to whip up some raita!
3 Essential Rice Tips
Here are a few tips to ensure fluffy, separated rice grains, every time.
#1: Know your rice
- Rice to water ratio: To cook 1 cup of basmati rice, most people use anywhere between 1.5 to 2 cups of water. 1.5 cups of my rice (Royal Chef’s Secret Extra Long) needs 3 cups to cook on the stovetop.
- If you cook rice often, use your usual ratio. So if you normally use 1.5 cups of water per 1 cup of rice, use 2 1/4 cup broth for 1.5 cups of rice. Again, keep in mind that chickpeas absorb water and you don’t have any tomatoes or ingredients to provide additional moisture (though you’re welcome to add!).
#2: Do Not Disturb
- Avoid stirring while cooking: Once the rice starts cooking, just let it be. Stirring runs the risk of breaking the rice kernels and interfering with the buildup of heat.
- Let it rest even after steaming: Keep the lid on even after you’ve turned off the heat. This final rest helps the rice absorb any remaining moisture and prevents the rice kernels from sticking together.
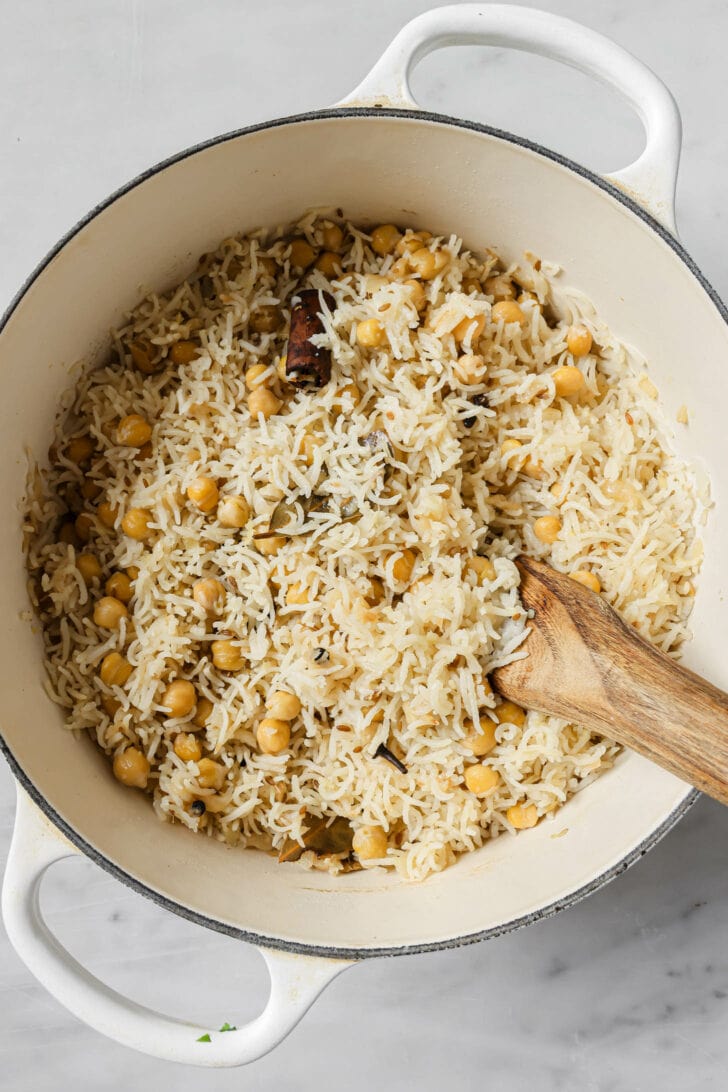
- Gently stir after cooking: The only reason to stir cooked rice is because resting the rice too long can make it clumpy or stick to the bottom. Use a rice paddle (not a fork) to fluff gently.

#3: Steam to Perfection
- How to know it’s ready to steam: When most of the water from the surface has absorbed or evaporated and you begin to see something like potholes forming in the top layer of the rice (see video!), it’s ready for a final steam.
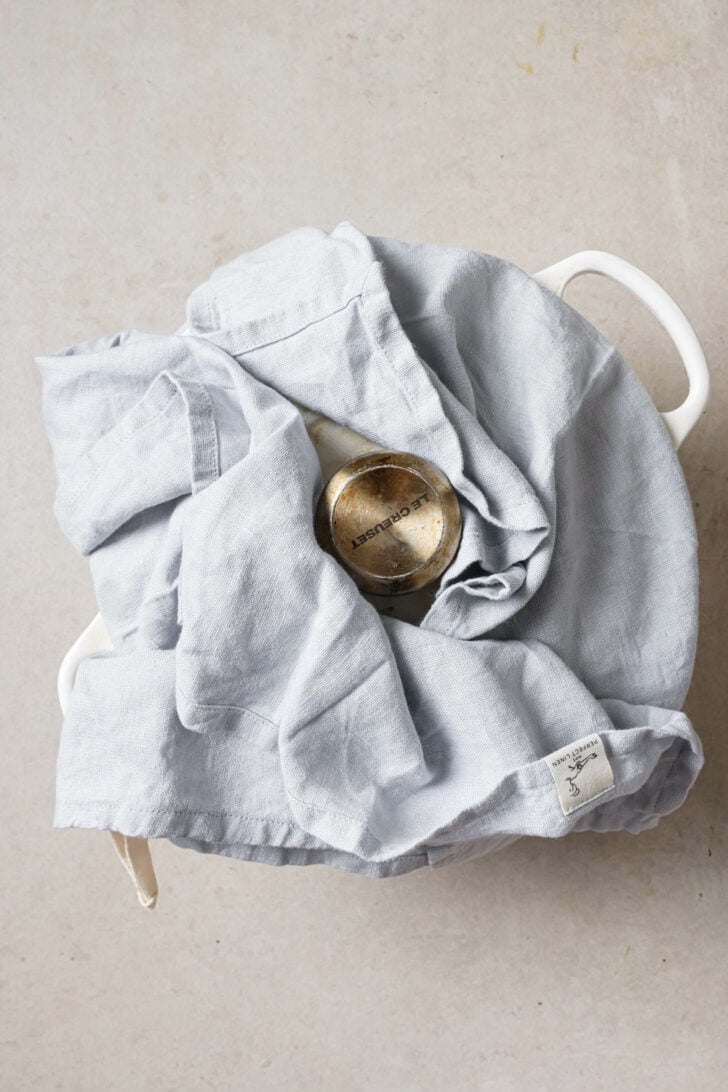
- Cover the bottom of lid with a cloth: I use old kitchen linens or a cotton cloth. The goal is to contain the steam while absorbing any extra moisture that could otherwise lead to soggy rice.
- Lastly, relax: Remember, if you’ve given your rice enough time to cook, even if you steam a little too soon or a little too late, you’ll be fine. There’s plenty of room for error in the steaming with cloth + resting method.
How to Double the Recipe
With all pulao recipes, to double:
- Double all the ingredients, including whole spices and water.
- Use a larger pot (8-10.5 qt).
- Increase the sauté and simmer times by 2-3 minutes.

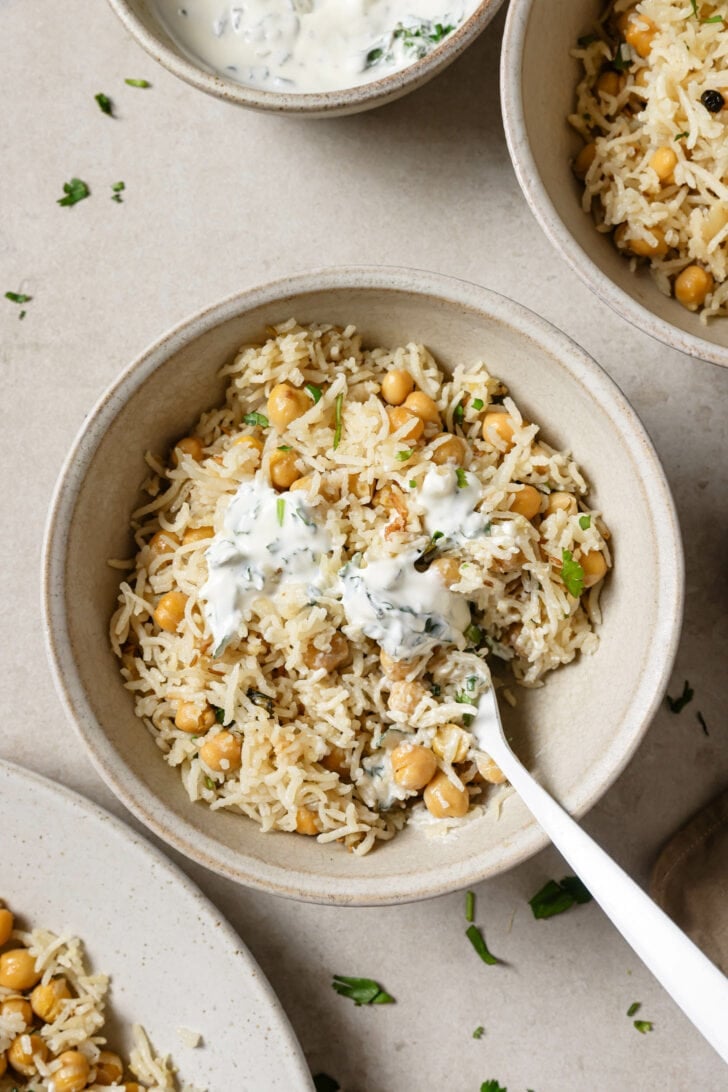
What to Serve with Chana Pulao
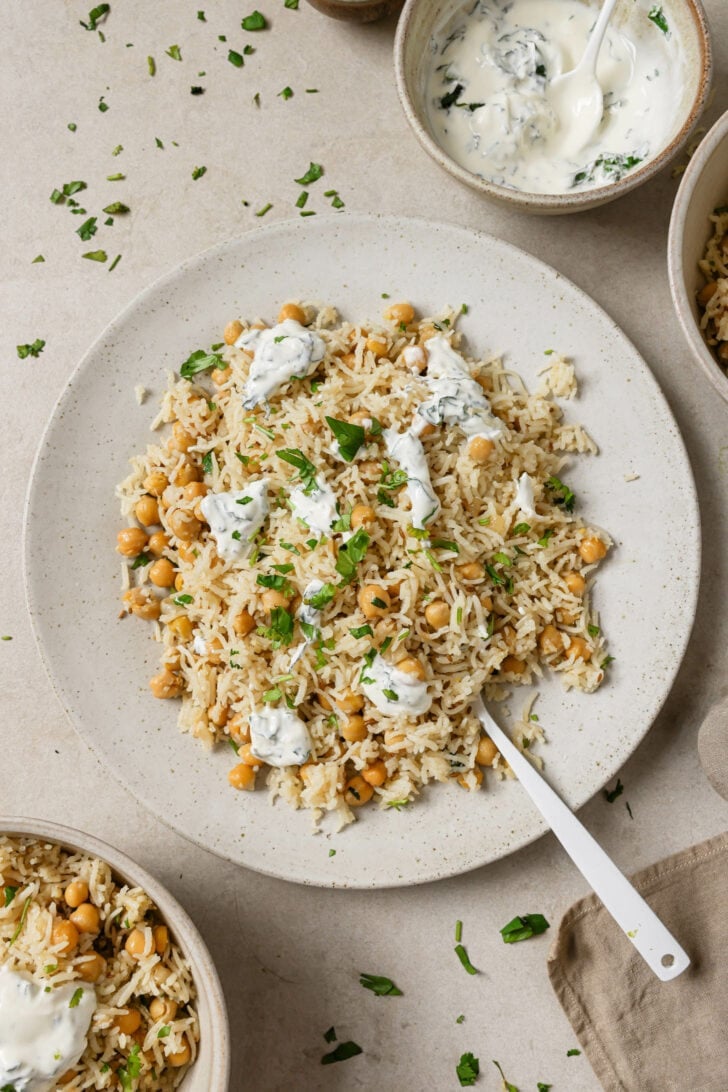
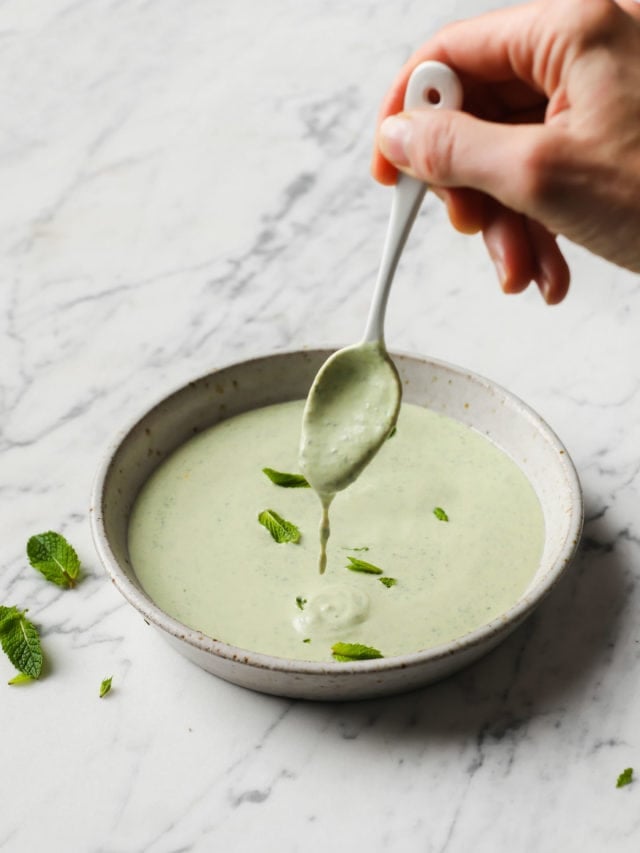
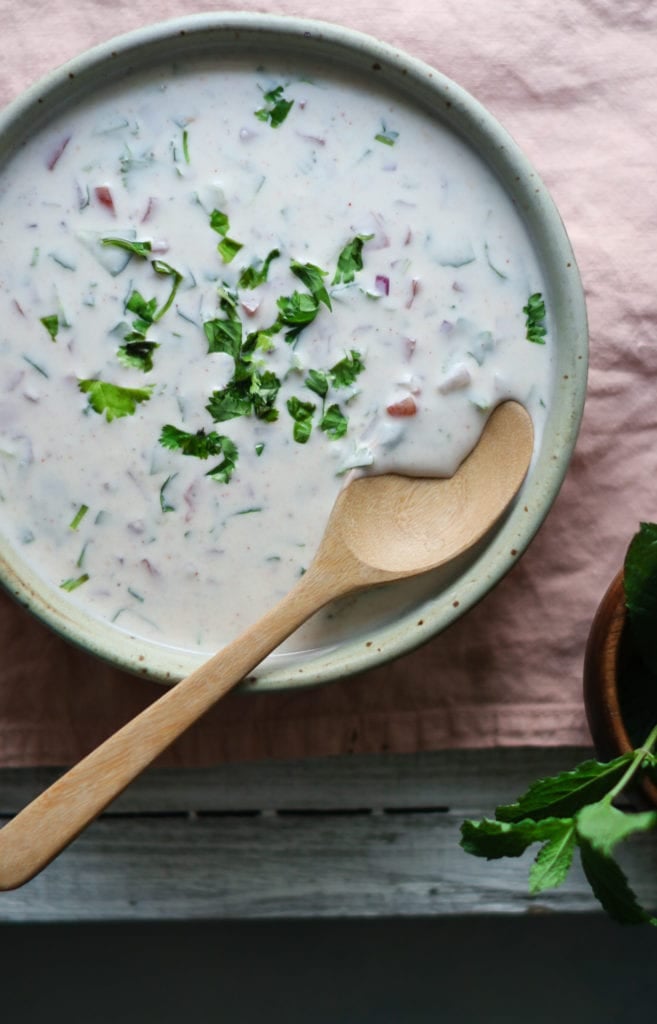
- On the side: I serve all my pulaos with a yogurt component such as Veg/Cucumber Raita or Mint Raita, and often just plain, whole-milk yogurt. You could also serve with Kachumber Salad.
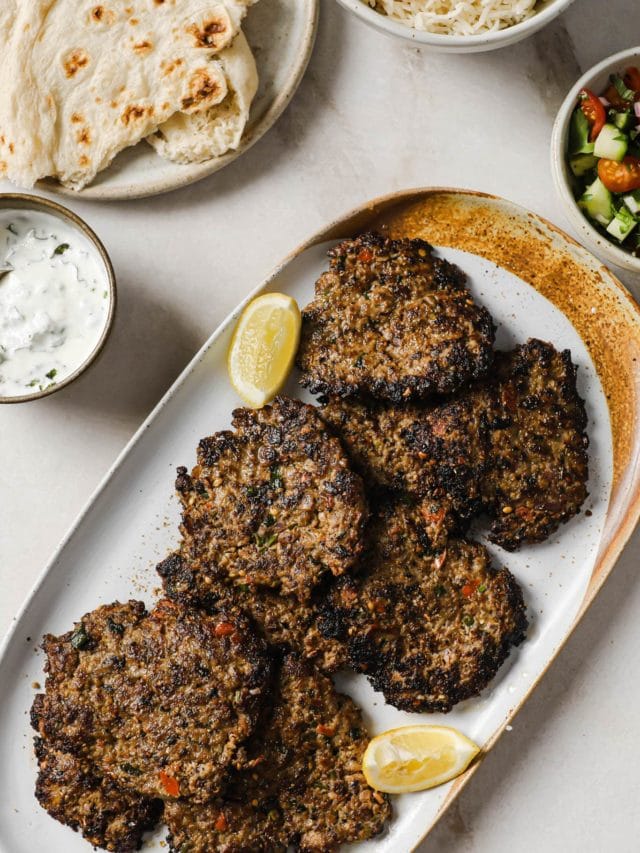
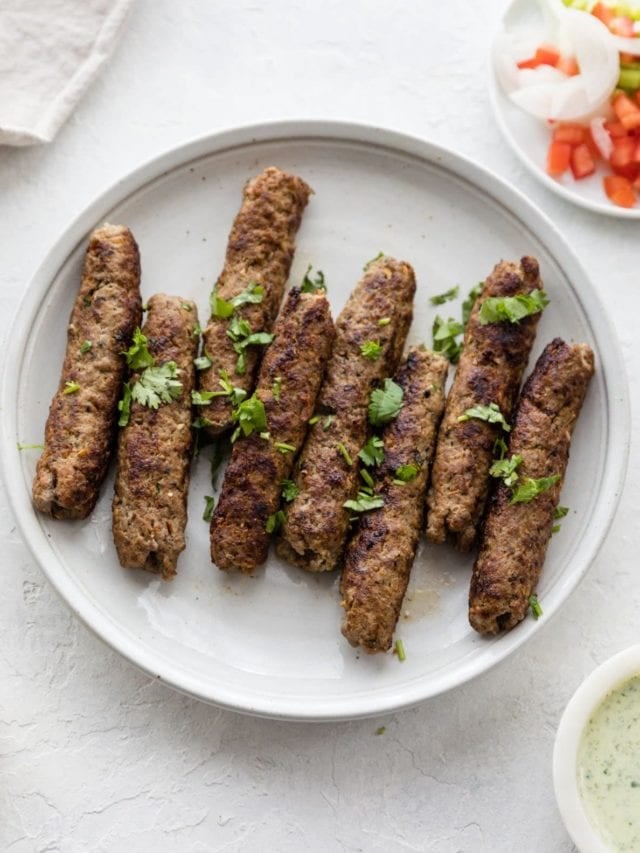
- Pairing: I usually serve Chana Pulao with various Kababs or Aloo ki Tikki, but just about any type of meaty or saucy main dish would pair well.

More Rice Recipes
- Matar Pulao (also 20-Minute Prep!)
- Chicken Biryani
- Instant Pot Chicken Pulao or Stovetop Chicken Pulao (Yakhni method)
- How to Cook Basmati Rice in a Rice Cooker
- Zarda (Sweet Rice)
Tried this recipe? If you have a minute, please consider leaving a comment telling me how it was! You can also take a quick picture and upload it directly into the comments. If you’re on Instagram, please tag me so I can see your creations. I truly love hearing from you. Thank you!
Chana Pulao (Chickpea Pilaf) – 20-minute prep!
Watch the Video
Ingredients
- 1 ½ cups (~275 g) aged long grain basmati rice
- 2 tbsp neutral oil such as grapeseed or avocado
- 1 tbsp ghee, sub butter, or oil to keep it dairy-free
- 1 (~150-200 g) medium onion, thinly sliced – quarter, then slice if your onion is on larger side
- 3 garlic cloves, crushed
- 1/3 inch piece ginger, crushed
- 1/2-1 Serrano or Thai green chili pepper, sliced lengthwise or finely chopped for more heat – optional
- 2 small bay leaves, or 1 large
- 1/2 tsp whole black peppercorns
- 1- inch piece cinnamon stick
- 1 black cardamom
- 5 whole cloves
- 1 tsp cumin seeds
- 15 oz can of chickpeas, drained and rinsed
- 2 tsp (1 1/2 tsp heaped for Instant Pot) sea salt/table salt, or to taste
- 3 cups (2 cups for Instant Pot) water
- finely chopped cilantro, optional – for garnish
Equipment
- Nonstick Dutch Oven (or Instant Pot)
Instructions
Stovetop
- Wash rice: Place the rice in a small bowl and gently wash the rice until the water runs mostly clear. Soak in water and set aside while you proceed with the recipe.
- Heat oil and ghee in a nonstick Dutch oven over medium heat. Add the onion and sauté, stirring often, until golden brown (~10 minutes). The onions will determine the color of the pulao so you want them deeply and evenly golden-brown. Deglaze the pan with ¼ cup water. Once the water dries up, add all the garlic, ginger, green chili pepper (if using), and whole spices and sauté for 2 minutes, until aromatic.
- Add the drained chickpeas and salt and stir to combine. Pour in the water.
- Increase the heat to high and cover to bring to a boil. Meanwhile, drain the rice thoroughly. Once the water comes to a boil, add the drained rice and stir gently to mix. Taste the broth. It should taste saltier than you prefer because it’ll mellow out once rice is cooked. If it's not, add a bit more salt.
- Cover to bring to a boil again, then reduce the heat to medium or medium-low. Cover partially with the lid. Allow to gently simmer, undisturbed, for about 5 minutes. The water level will reduce and the rice will rise to the surface. (See Note 1.)
- Steaming (‘Dum’): Layer the lid with a kitchen cloth or tea towel and seal tightly. Allow the pulao to develop steam for a few seconds. You’ll be able to feel the steam escaping from the sides of the pan.
- Reduce the heat to the lowest setting and allow it to cook for 15 minutes. Turn off the heat and allow it to rest for another 10-15 minutes. (Do not peek or stir throughout this process.)
- Use a rice paddle to gently lift the rice from the edges and fluff. Transfer onto a serving tray (or your plate!). Garnish with cilantro, if desired. Serve with veg raita, mint raita, or plain yogurt.
Instant Pot
- Wash rice: Place the rice in a small bowl and gently wash the rice until the water runs mostly clear. Soak in water and set aside while you proceed with the recipe.
- Turn Instant Pot to high Sauté Mode. Once hot, add the oil, ghee, and thinly sliced onion. Sauté, stirring often, until the onions are golden, about 8-10 minutes. The color of the onions will determine the color of the rice so you want to get them even and golden.
- Add the garlic, ginger, and green chili pepper (if using) and sauté for another minute or until the raw smell disappears. Deglaze the pan with 2 tbsp of water and continue to sauté.
- Add the whole spices and drained chickpeas and stir to combine.
- Drain the soaked rice and add it to the Instant Pot along with 2 cups of water and salt. Mix gently and press down the rice and chickpeas so that they are submerged in the water. Taste the water – it should be saltier than you would normally prefer. If it's not, add a bit more salt.
- Cancel sauté. Cover and pressure-cook on high for 6 minutes. Let naturally release for 15 minutes. Use a rice paddle to gently lift the rice from the edges and fluff. Transfer onto a serving tray (or your plate!). Garnish with cilantro, if desired. Serve with veg/cucumber raita, mint raita, or plain yogurt.
Notes
- If most of the water hasn’t absorbed in the time indicated, then completely uncover to allow quicker evaporation.
- If it’s cooking off too quickly, lower the heat and/or sprinkle in 2 tbsp water to give the top layer of rice moisture.
This is an update of my Instant Pot Chana Pulao recipe that was originally published in October of 2018. Since then, it’s been updated with stovetop instructions, plus new pictures and video!
130 Comments on “Chana Pulao (20 minute Prep!)”
Thank you for making cooking so easy and enjoyable with these simple, quick, and delicious recipes!! I just made this one and scarfed down the leftovers today.
What a wonderful compliment! Thanks for trusting my recipes, Faiza!
Dear Izzah
I tried this recipe and it turned out so well that the 4 servings that I cooked were polished off by 3 people. The pulao disappeared in no time. Your spices and seasonings are always just right. I also made ‘Matar Pulao’ using the same recipe and it turned equally good. Thank you!
Kind regards
Aamna <3
So kind. Thank you, Aamna! And thanks for the tip!!
Can I make this in a normal pot and if so what do I need to change?
Hi Zainab! You could certainly make it in a normal pot. For basmati rice, I always stick to 1 cup rice to 2 cups water over the stovetop. I can give a rough guideline: bring the rice to a boil over med-high heat, allow it to boil for a couple minutes, then cover and reduce heat to low. Cook for about 15 minutes, undisturbed. Then allow it to rest for another 5-10 minutes. Hope you get a chance to try it!
Thanks, I tried it out and it is THE BEST channa Pulao I ever made. I recaptured the taste of my time in Pakistan and brought back childhood memories to me. Simply awesome! Thank you so much for this recipe.
So wonderful to hear that, Zainab. I’m honored you thought so. Thank you so much!
This is SO delicious and comes together so quickly. a perfect weekday lunch or dinner! I’ve made it several times now and the rice is always fluffy and the palao is very flavorful. Thank you!
YAY! Thank you, Azka! So nice of you to come back and review!
I just made this and it was absolutely lip-smacking. Plus bonus is how quick it is. This is going to be in our menu often now.
That’s wonderful to hear, Verena! Thank you!
Hi!
I tried making this today and I followed every step but when I put the instant pot on pressure cook, it said burning food and I had to open it and wasn’t able to make it properly. I’m not sure what I did wrong? I’m thinking maybe it was too hot from saute mode?
Hi Sid! I’m sorry to hear that. Could it be that the IP wasn’t deglazed properly before pressure cooking? Any small bits stuck to the bottom can cause the burn error.
Love this recipe of yours & have made it a couple of times exactly. This time I want to make double the quantity for guests. I feel i can double everything else safely but not so sure about salt, water & pressure cook time. Would it be simply doubled. for 3 cups of Basmati White Rice..?
Kindly guide me about the :quantity & time for:
Salt
Water
Pressure Cook time
Thanks in advance….????????
Thank you, Faryal! Keep the salt & water at double, but pressure cook for the same time. I’d recommend fluffing promptly because the bottom may get mushier if the quantity is doubled.
Hi, I hope it’s not dim to ask; did you use an accurate cup measurement for the rice and water, or was it a standard drinking mug/cup? Looking forward to trying this!
Accurate measuring cup (1 cup = 8 oz). Hope you get a chance to try it!
I find that as long as I use the same cup for water and rice, it doesn’t matter which size cup I use. When we need more I use a 3 massive mugs, but when we need less I use 3 kids cups. (we have big family aH :). I also just press the rice button on the instant pot- which usually sets it to 12 mins on low pressure (I think!). I wonder if you have tried this against manual pressure 6 mins and found any difference in the final result? Sorry I’m here so much haha…. I just love your blog so much mA xx
I’m so happy to have you here, Sana! Thank you for sharing that! I did test this recipe with the rice setting and preferred the pressure cook setting. I believe the rice setting may be better for a different ratio or type of rice, but I stuck to what worked for me.
This was such a great recipe and so incredibly simple! I’m always wary of IP recipes with rice, but everything was absolutely spot on!
So great to hear that, Saba! Thank you for trying and reviewing! 🙂
Thanks to your simple yet superb recipe my Insta Pot Chana Pulao turned out absolutely Yumm…????
So glad my friend Sana shared it with me so Thanks to both of you lovely ladies now I can cook it..;)
Thanks so much, Fay!
How much water we should put if we want to make 2 cups of rice?
Hi Sana, a little less than 3 cups should be good!