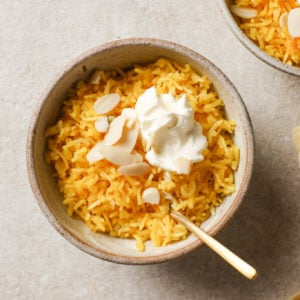
Zarda (Meethe Chawal – Sweet Rice)
Here’s a traditional Zarda recipe that takes the guesswork out of classic Meethe Chawal (or Sweet Rice). Yes to old-school, nostalgic flavor without fear or fuss. This recipe requires 6 ingredients, one pot (if you’d like), and around 15 minutes of active time. Tested to perfection!
Want to save this post?
Enter your email below and get it sent straight to your inbox. Plus, get recipes & tips every week!
One of most the thrilling parts of blogging is demystifying those nuanced, aspirational recipes like biryani, dahi bhallay, or kashmiri chai. I’m here for transforming ideas into concrete formulas, turning the art into science, making a recipe run like a code that you won’t have to debug.
Case in Point: Zarda.
It’s taken me years to figure it out, and now that I have, I realize how simple it was all along. So allow me to shorten your Zarda learning curve and share a few tips I’ve gleaned after dozens (yes, this number is embarrassingly accurate) of trials.
Zarda Demystified
- The Rice: The key to a good zarda is well-cooked rice. At first, I’d parboil the rice like I would for biryani, cooked but with a bite to it. After several trials of less-than-perfectly-soft rice, I realized this: When making Zarda, boil the rice until it’s cooked enough so that you could eat it that way. More details, including timing, below!
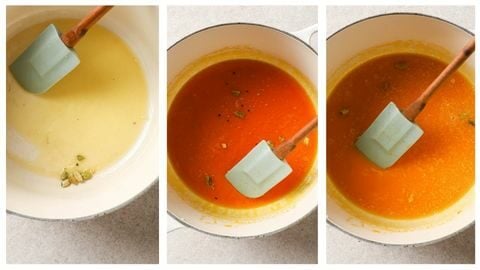
- The Sugar Syrup: The Chashni, or sugar syrup, is what makes Zarda so elusive. But it’s actually quite simple. You’re looking to dissolve the sugar, but not thicken the syrup. More below!
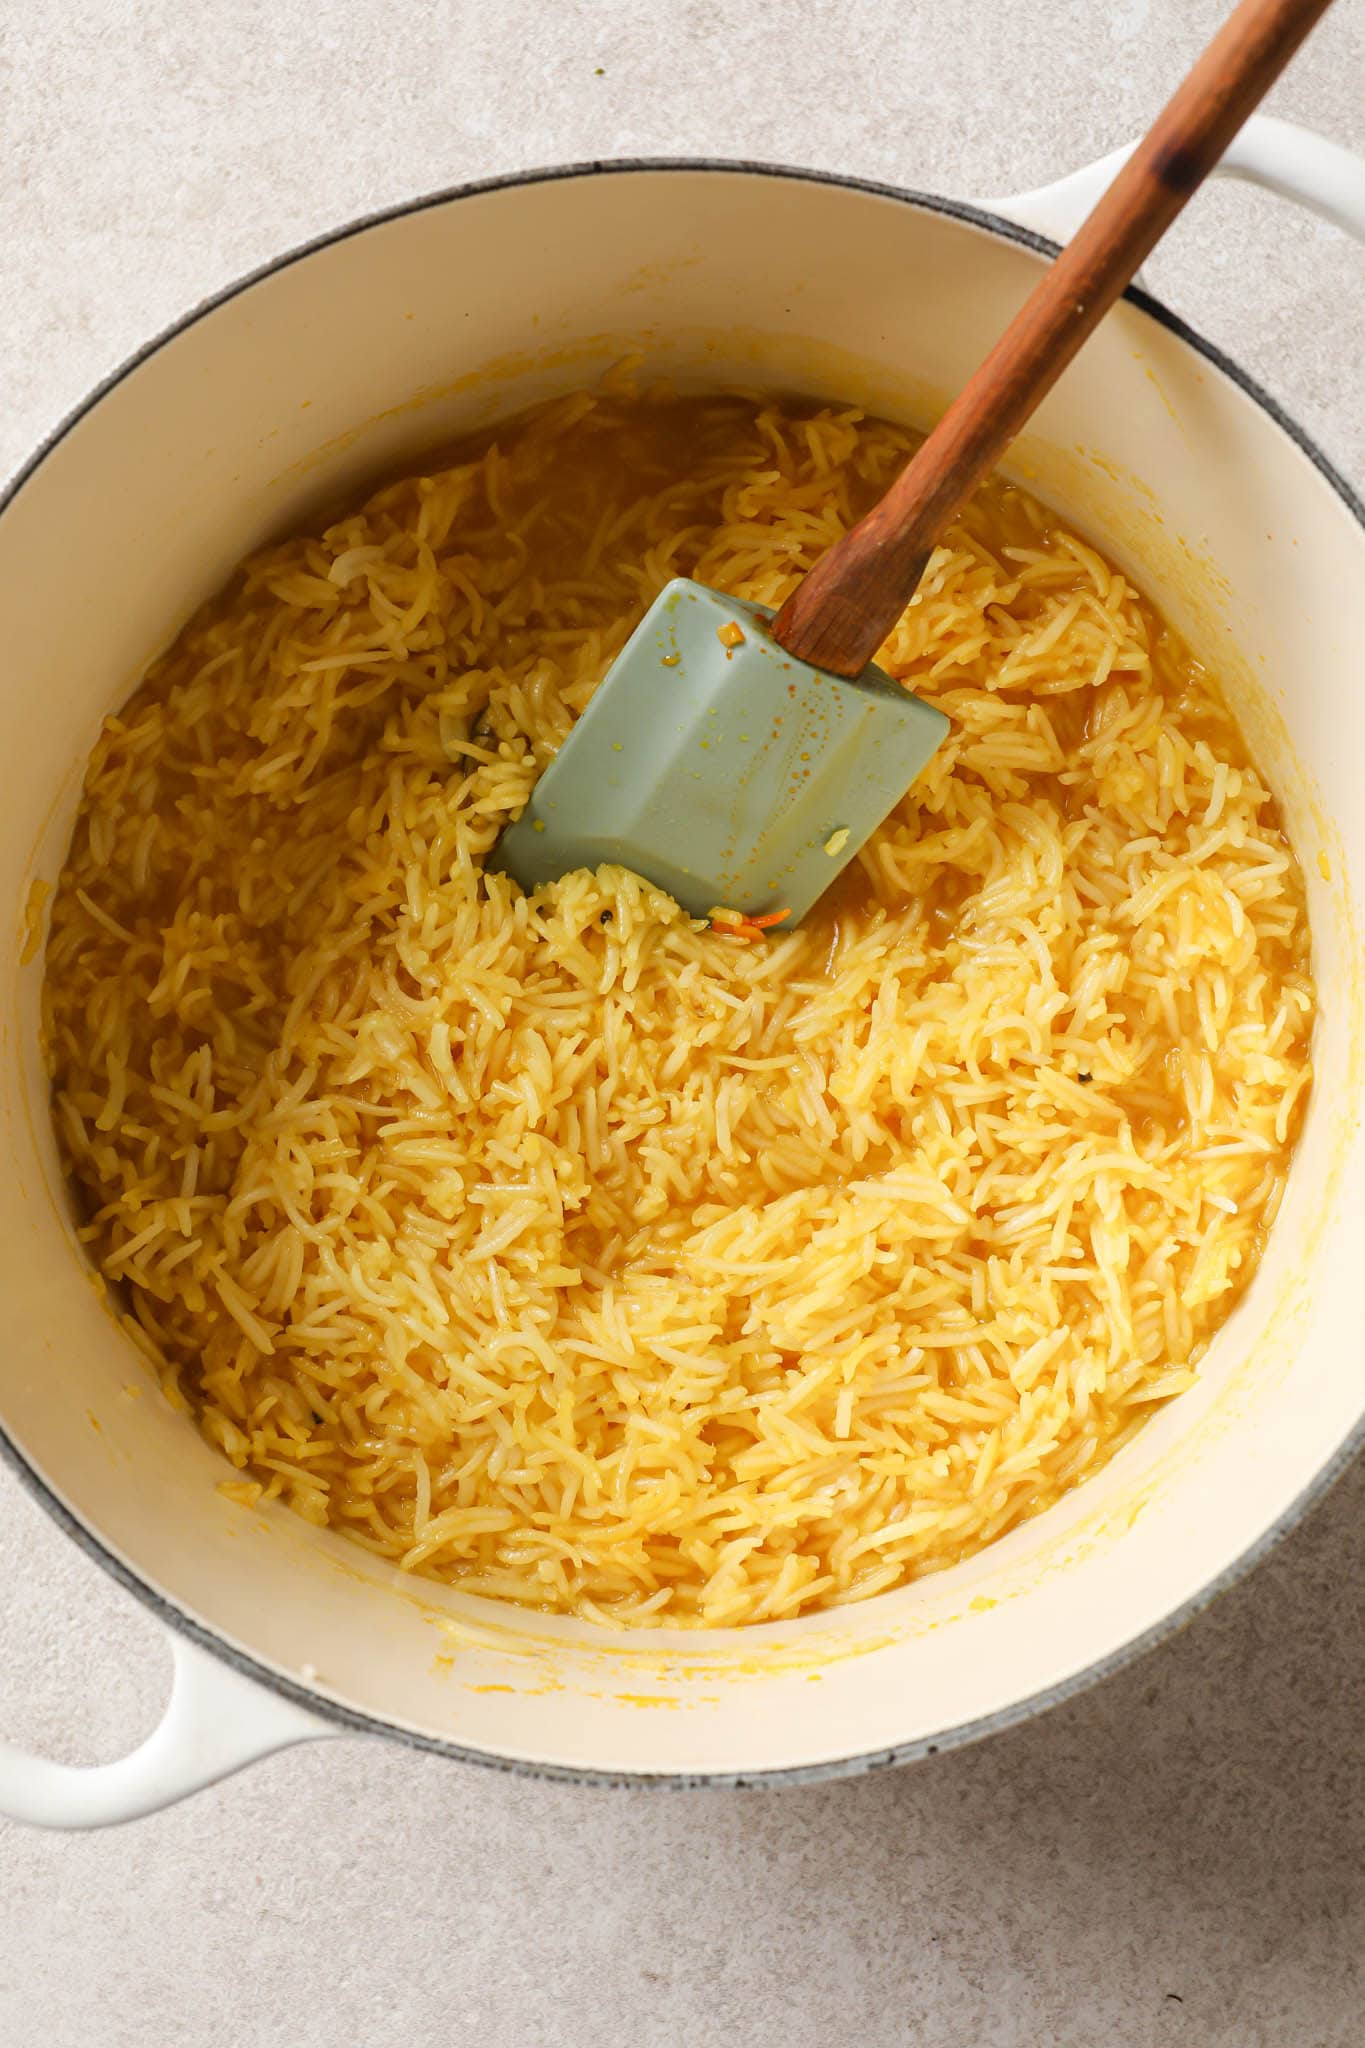
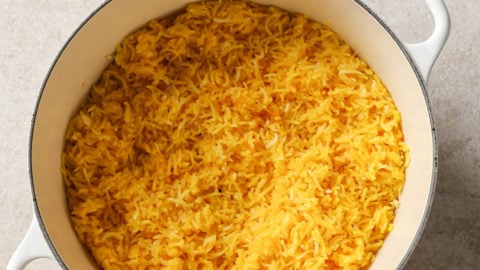
- The Steam: The last Zarda conundrum – when to start the steaming, or ‘dum‘. Along with details, timing, pictures, and video, it all comes down to this – You want to see more rice than water at the surface. And once cooked, just let it be for another 10 minutes.
What is Zarda (or Meethe Chawal)?
Zarda is an iconic Pakistani and Indian dessert. It’s often served as a celebratory dish for special occasions such as festivals, weddings, or holidays such as Eid. Distinguished by its deep-yellow color, Zarda gets its name from the word zard, which means “yellow” in Urdu. (If you are looking for another popular Eid Dessert, check out my 20-Minute Seviyan (Sheer Khurma) recipe).
Zarda is made with simple ingredients like rice, sugar, and milk, and is often (very aptly) called ‘Meethe Chawal’, which directly translates to Sweet Rice. Another common name for it is Zarda Pulao, which alludes to the rice being infused with ghee, sugar, spices, and nuts. (For another simple and quick dessert that uses only 6 ingredients, check out my Crushed Pineapple Dessert.)
History & Origins
Zarda’s Persian roots are evident in its saffron yellow color and the use of nuts (called dry fruit in Pakistan & India).
As seems to be the case with biryani, Zarda’s saffron-infused color was slowly replaced by the cheaper and more readily available food coloring called ‘zarda rang’.
Ingredients you’ll need
I’ve kept this recipe simple with only the essentials:
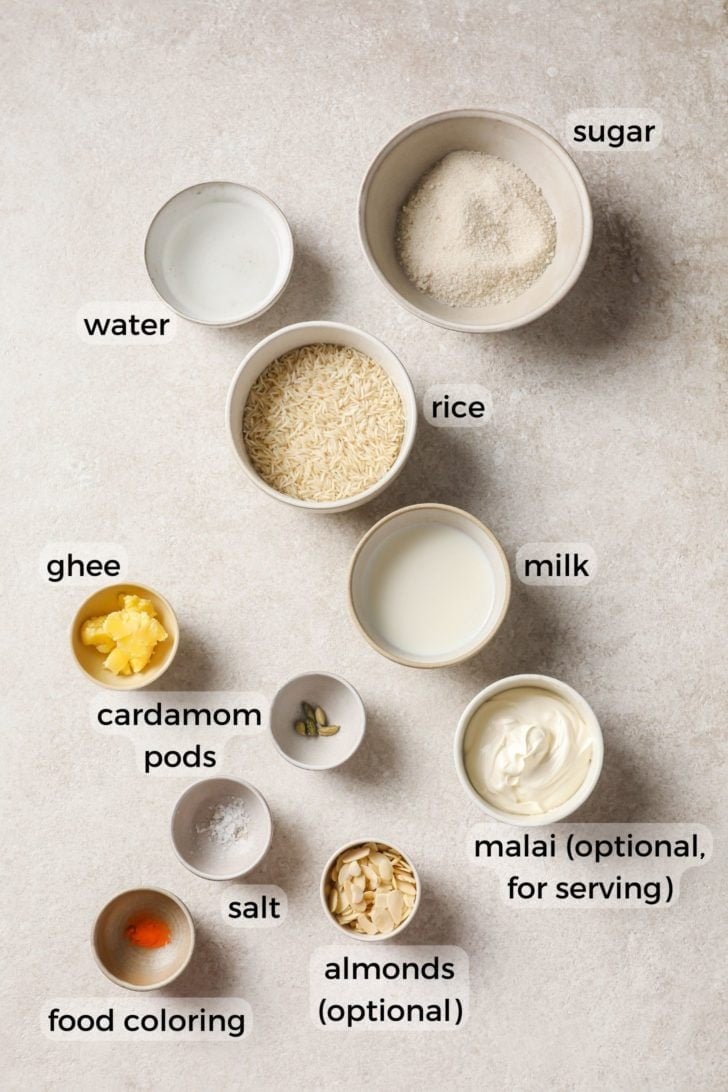
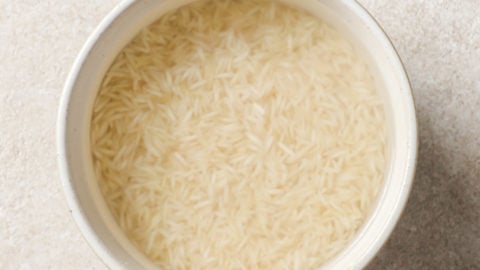
- Aged, long-grain basmati rice – I use Royal’s Chef’s Secret Basmati Rice. Another good option is Sella Basmati rice, which is steamed while still in its husk. This variety is sturdier and can withstand a bit of overboiling better than traditional basmati. Sella rice requires longer boiling and soaking than regular basmati rice.
- Whole Milk – I love the creaminess and flavor that the milk adds. See variations for dairy-free options.
- Food coloring – This is the powdered form of food coloring found at Desi stores. I usually use yellow but you can also use a saffron-orange color.
- Ghee – Ghee is obviously the most authentic choice, but you can substitute it with butter or even neutral oil. Note that butter has more water content than ghee, which means you may have to boil out the excess water for 1-2 minutes longer before steaming the rice.
- Cardamom pods – If you’d rather not use whole green cardamom pods, you can substitute a pinch of ground cardamom.
How to make Zarda – 3 Main Steps
Here’s how to make it and tips on what to look out for at each stage:
Parboil the Rice
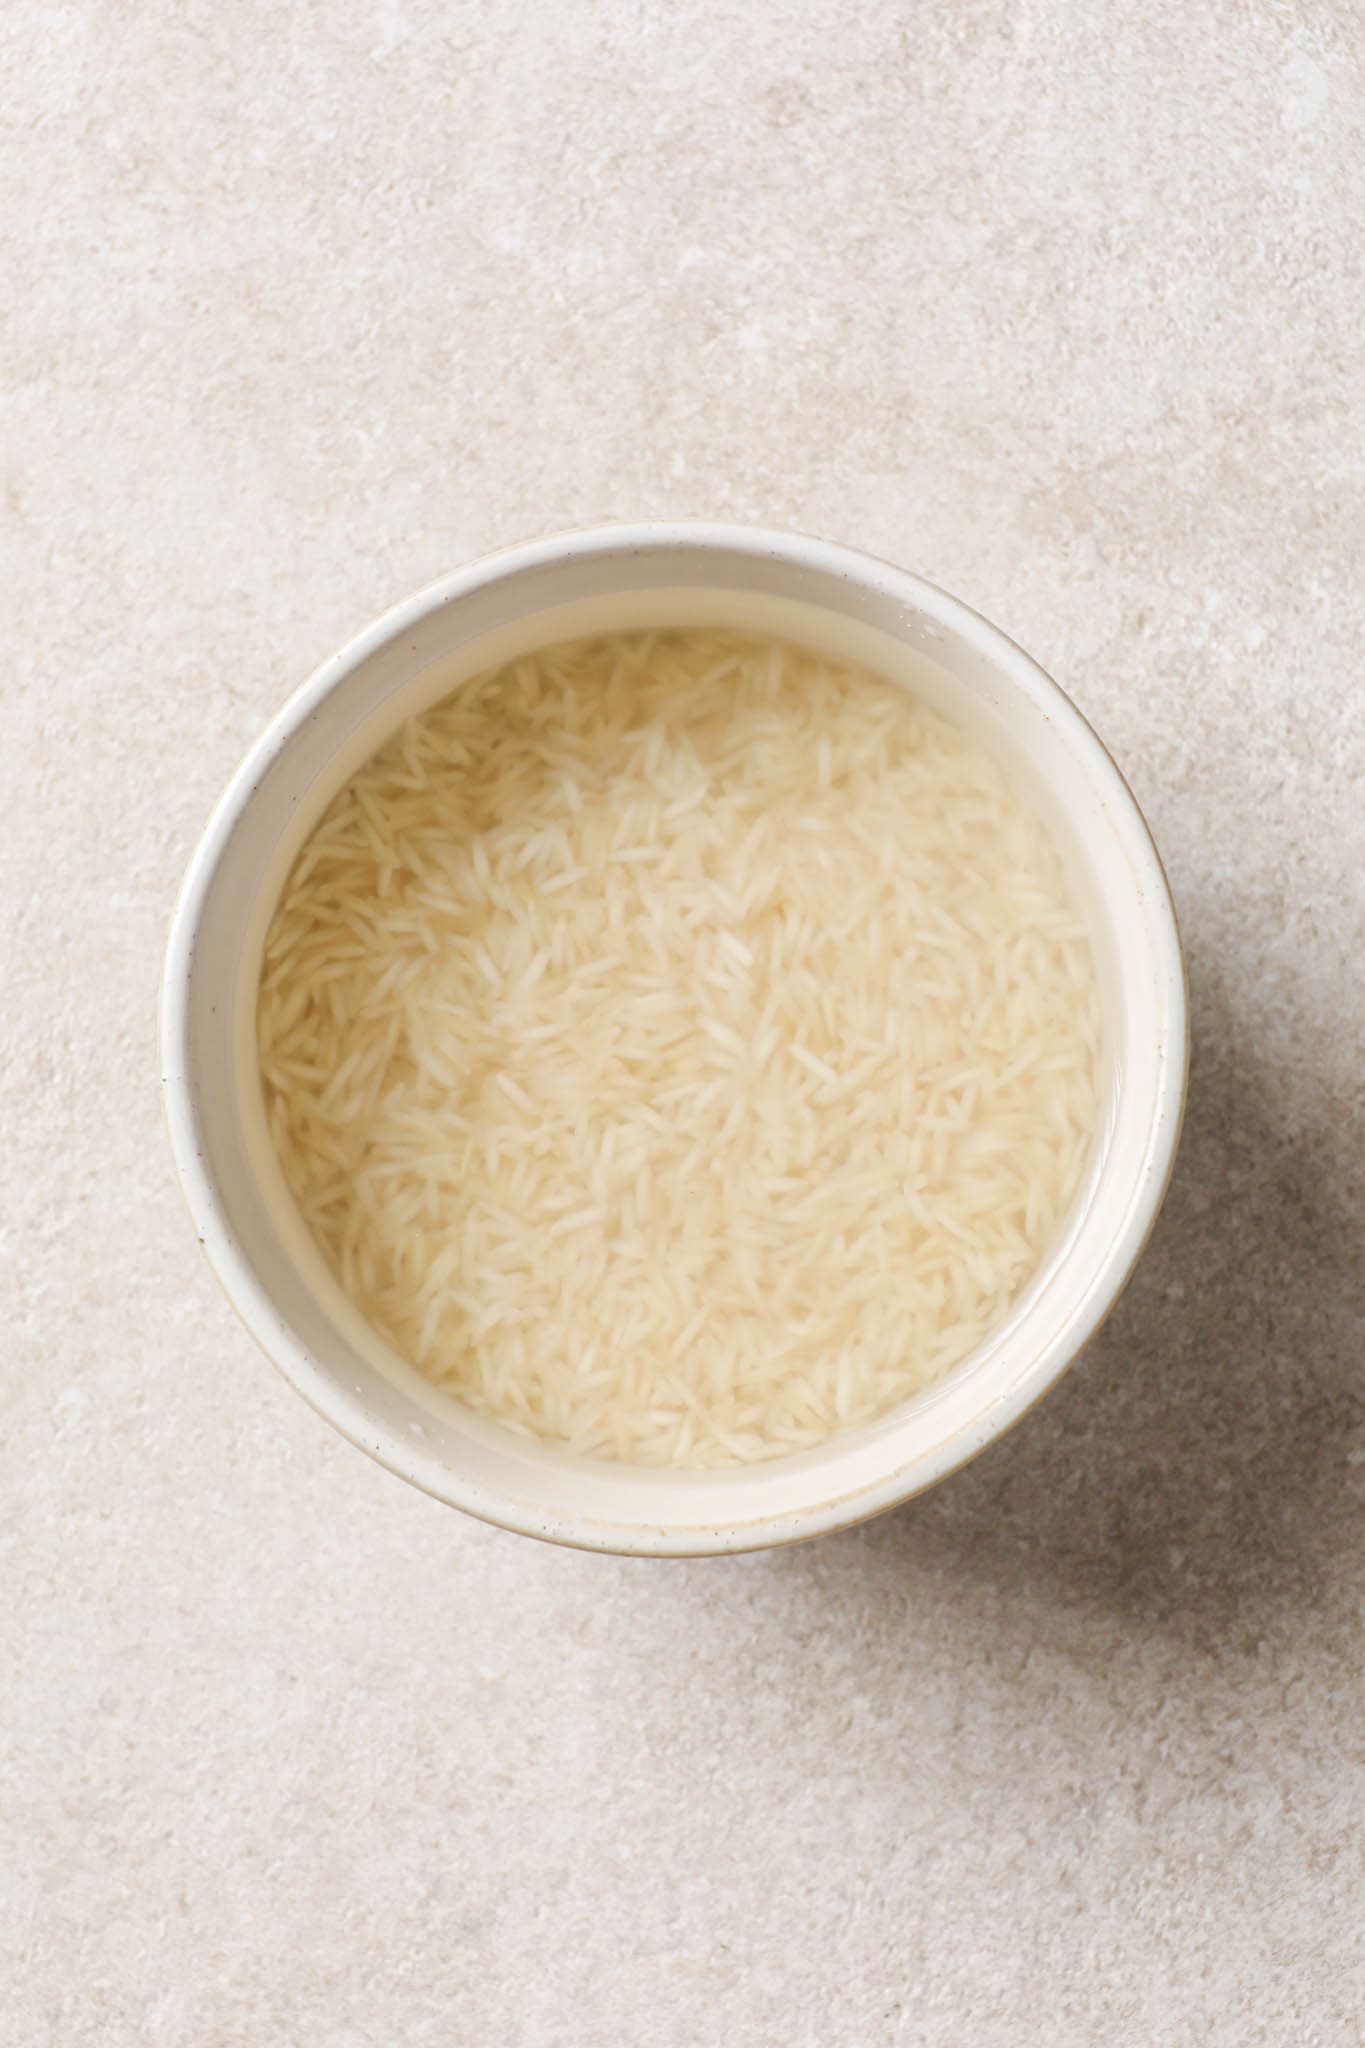
- Soak the rice: This helps create softer, fluffier rice. If you don’t soak it for long enough, you’ll have to boil it longer. And if you soak it for too long, boil for less time.
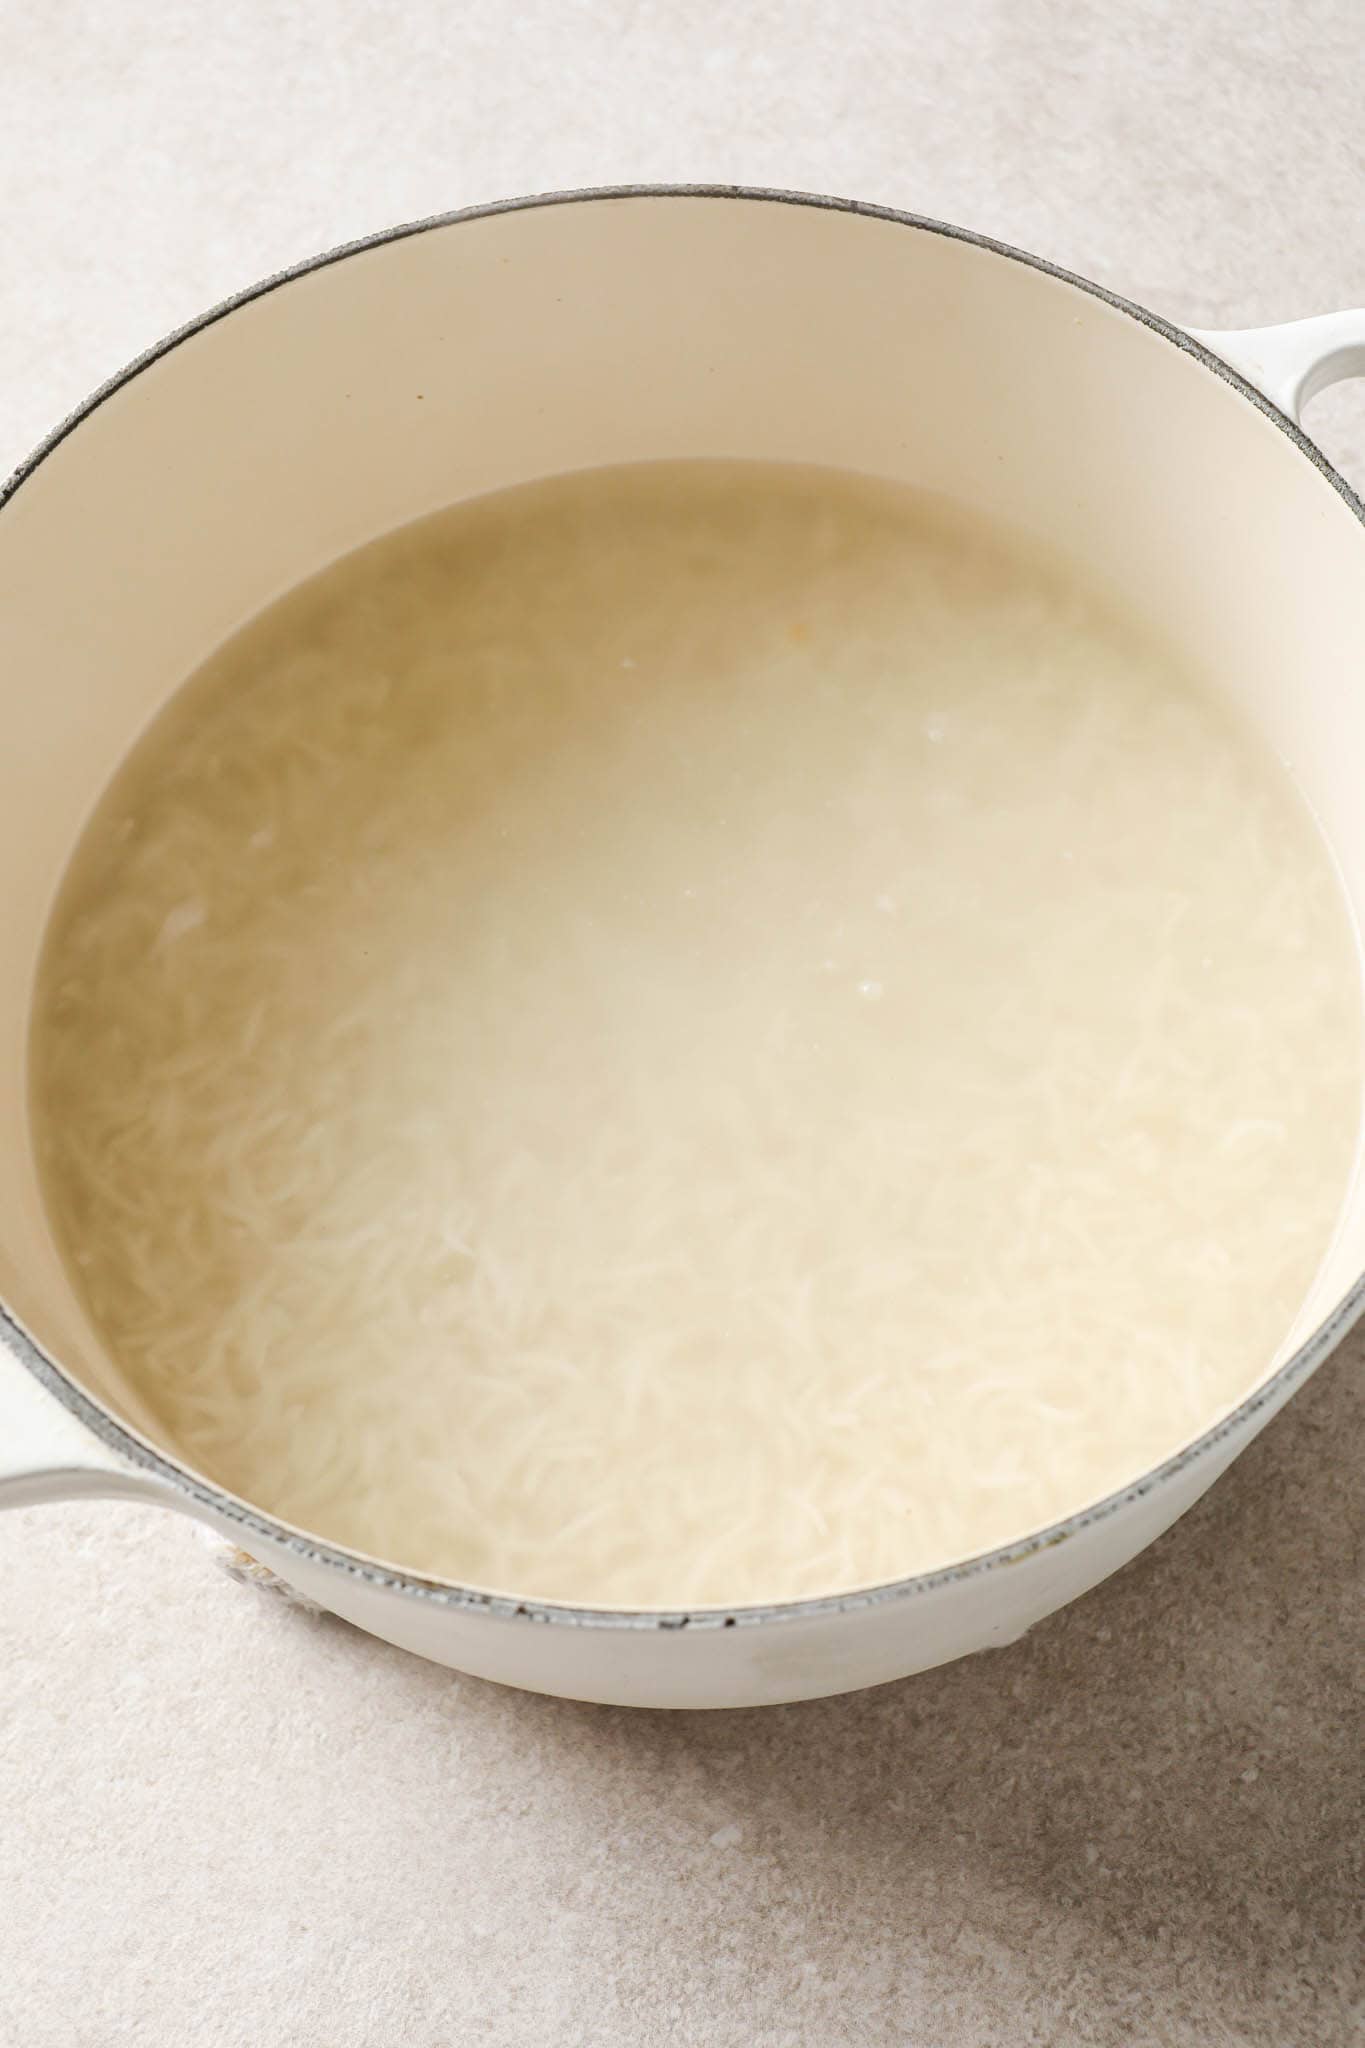
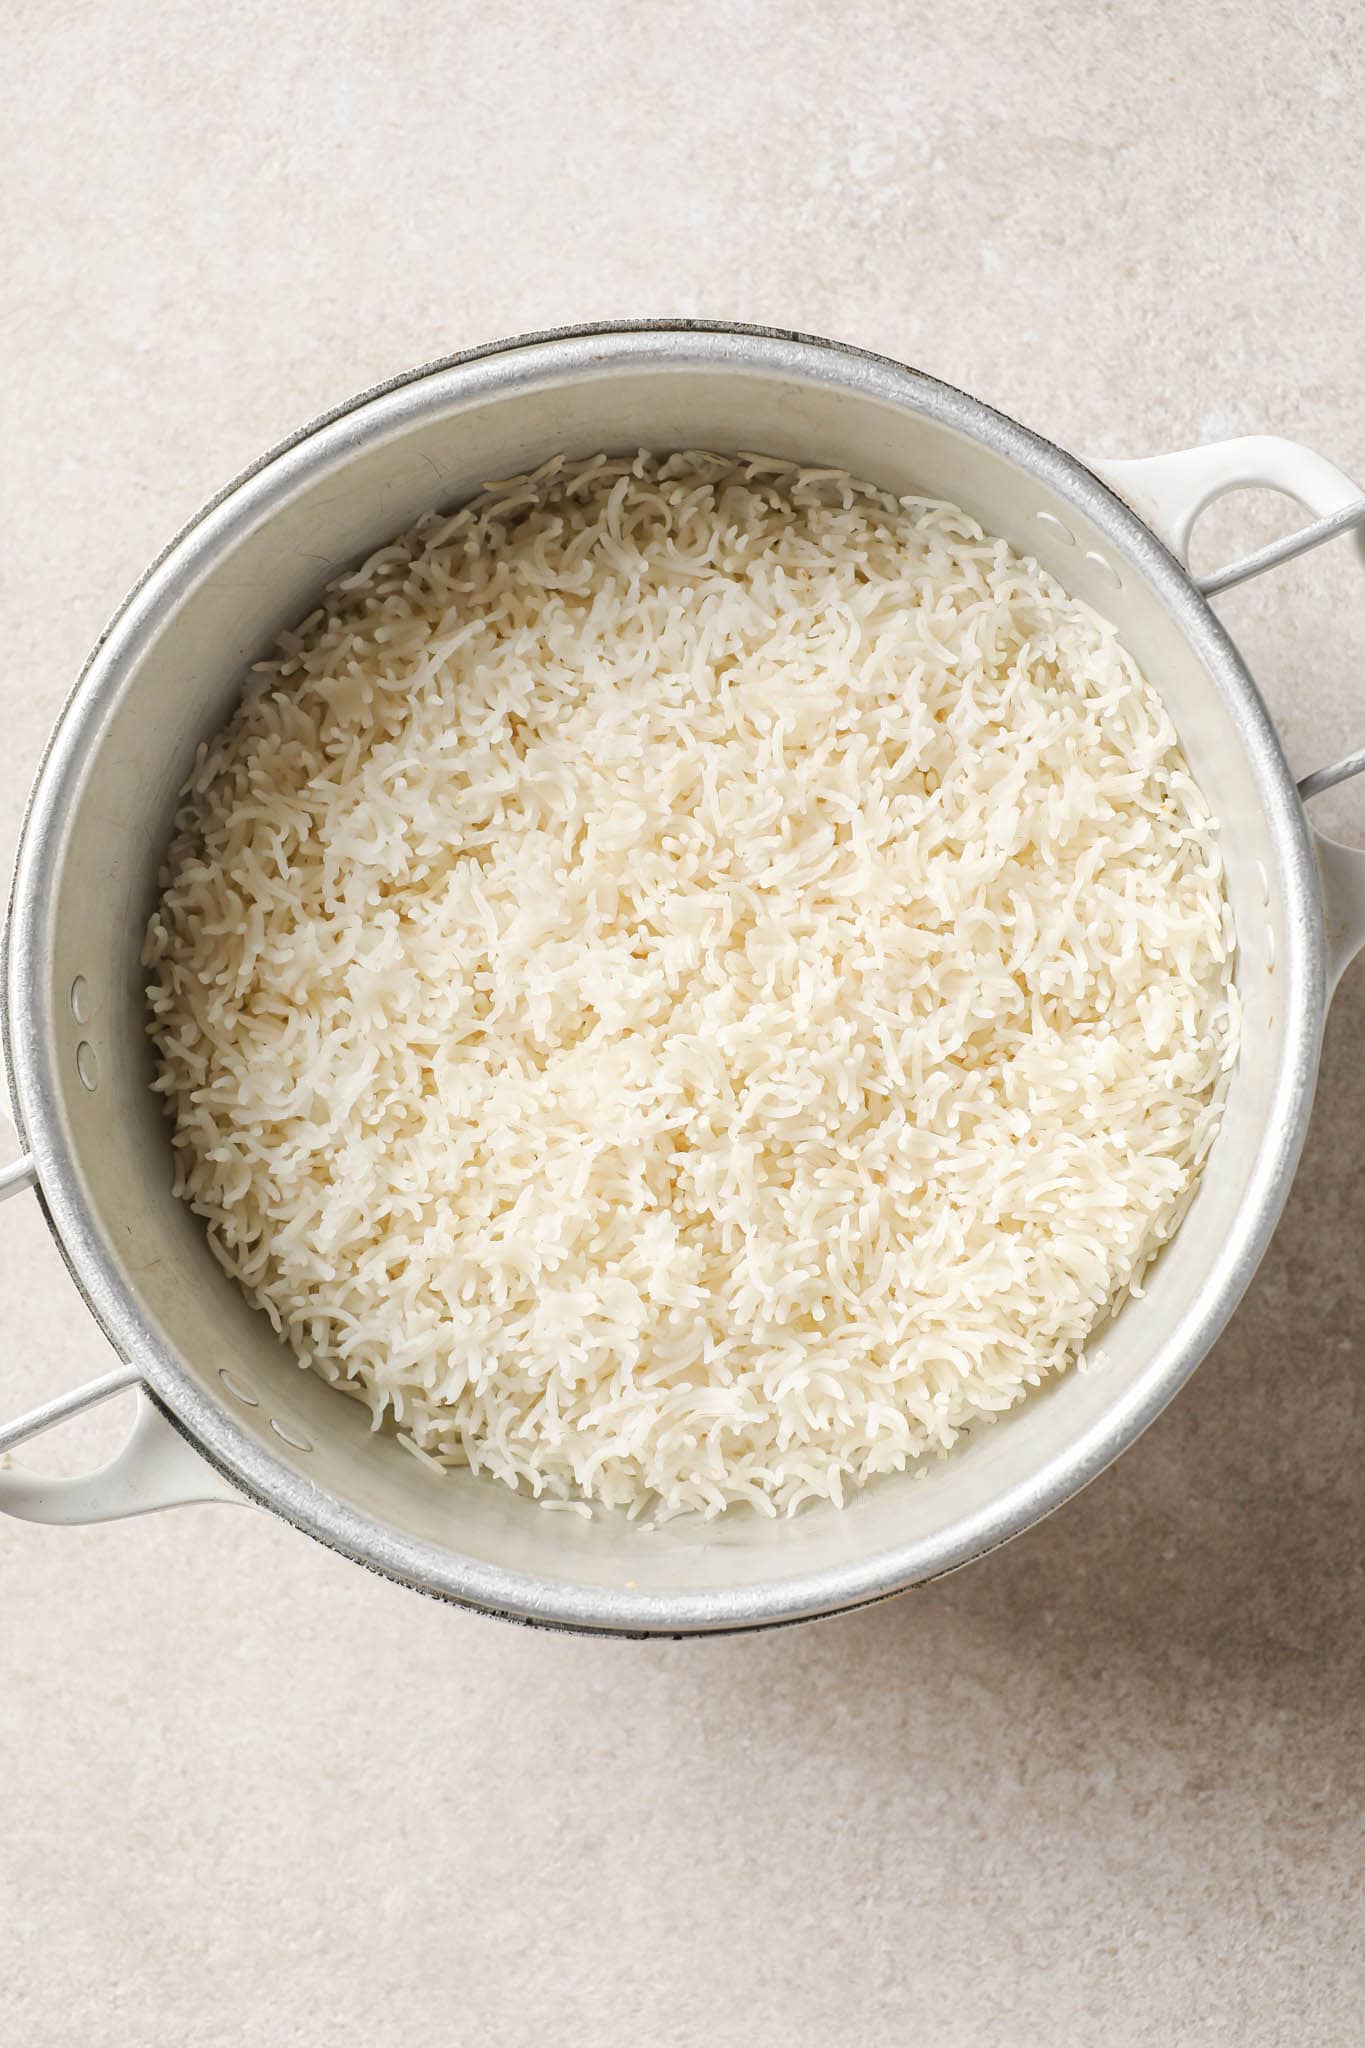
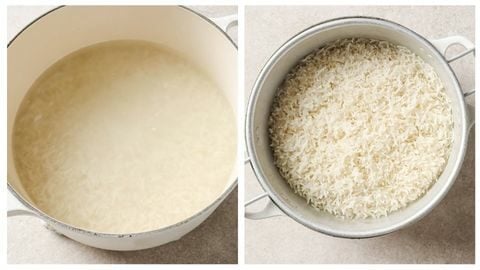
- Parboil the rice: As I mentioned earlier, the rice needs to be boiled until you would be fine eating it.
For reference, here’s how my rice acts minute-to-minute:
- At 3 minutes, the rice still has a raw center.
- At 4 minutes, the center has mostly cooked, but the rice kernel is still tough.
- Around 5 minutes, the rice starts to swell and the rice is just-cooked.
- At 6 minutes, the rice is cooked, but starts to break easily without getting mushy.
- At 6-7, the rice starts to get slightly mushy when pressed between your fingers. This is when you’ll want to drain the boiling rice.
Tip: In Biryani, you need the rice to be cooked about 70-80% and then the curry is layered and the whole thing is put on dum. For Zarda, the rice needs to be almost fully cooked – about 95% – before draining the water.
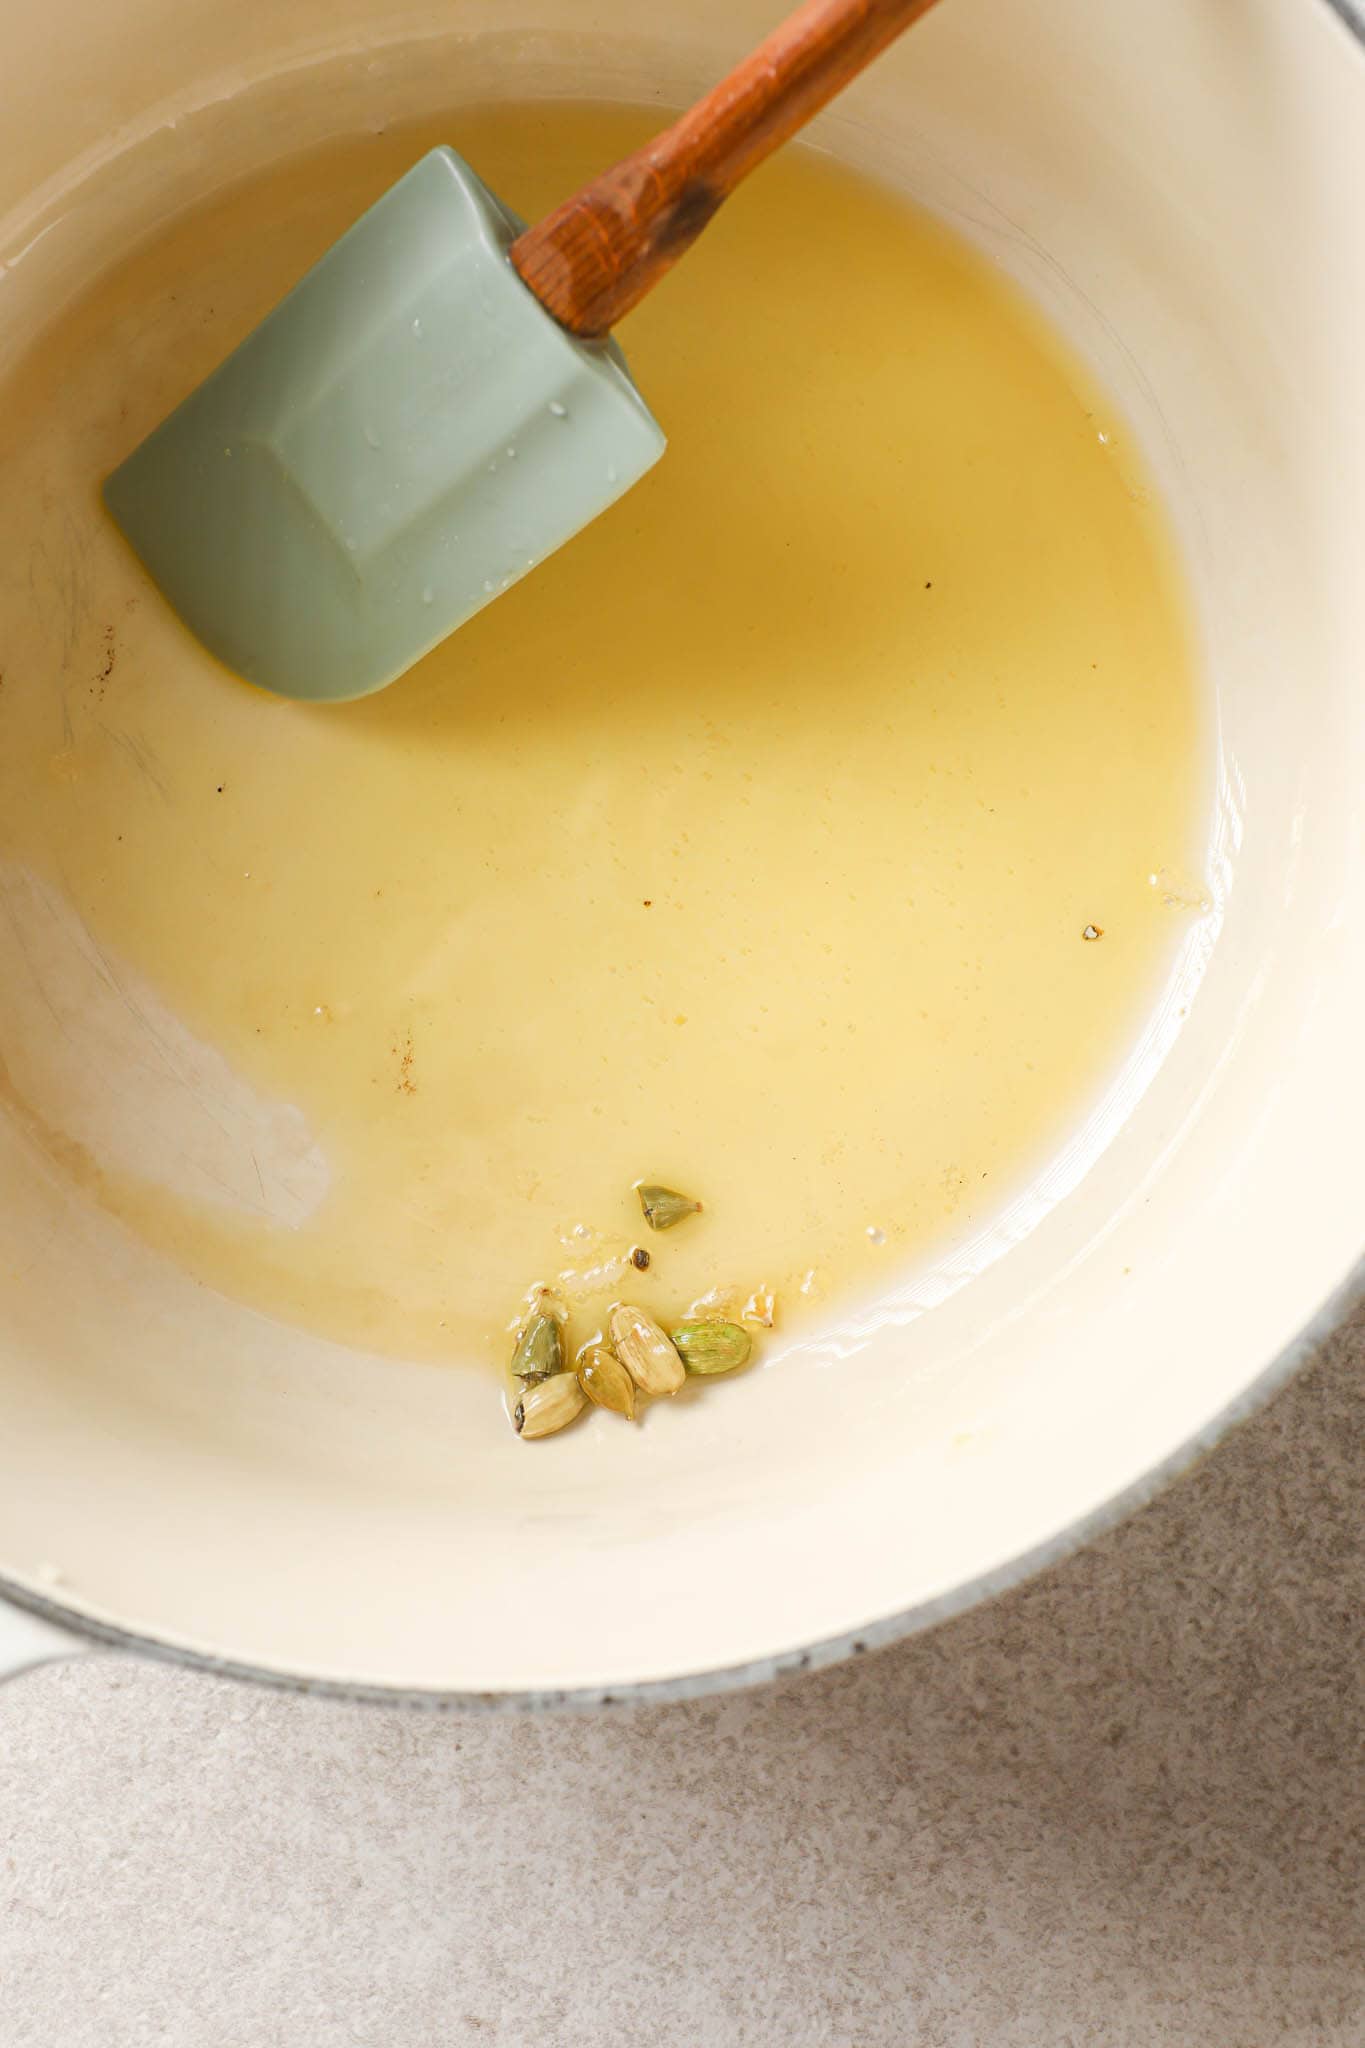
Make The Sugar Syrup (Chashni)
Making the sugar syrup goes by quickly, so try to have your ingredients prepared nearby.
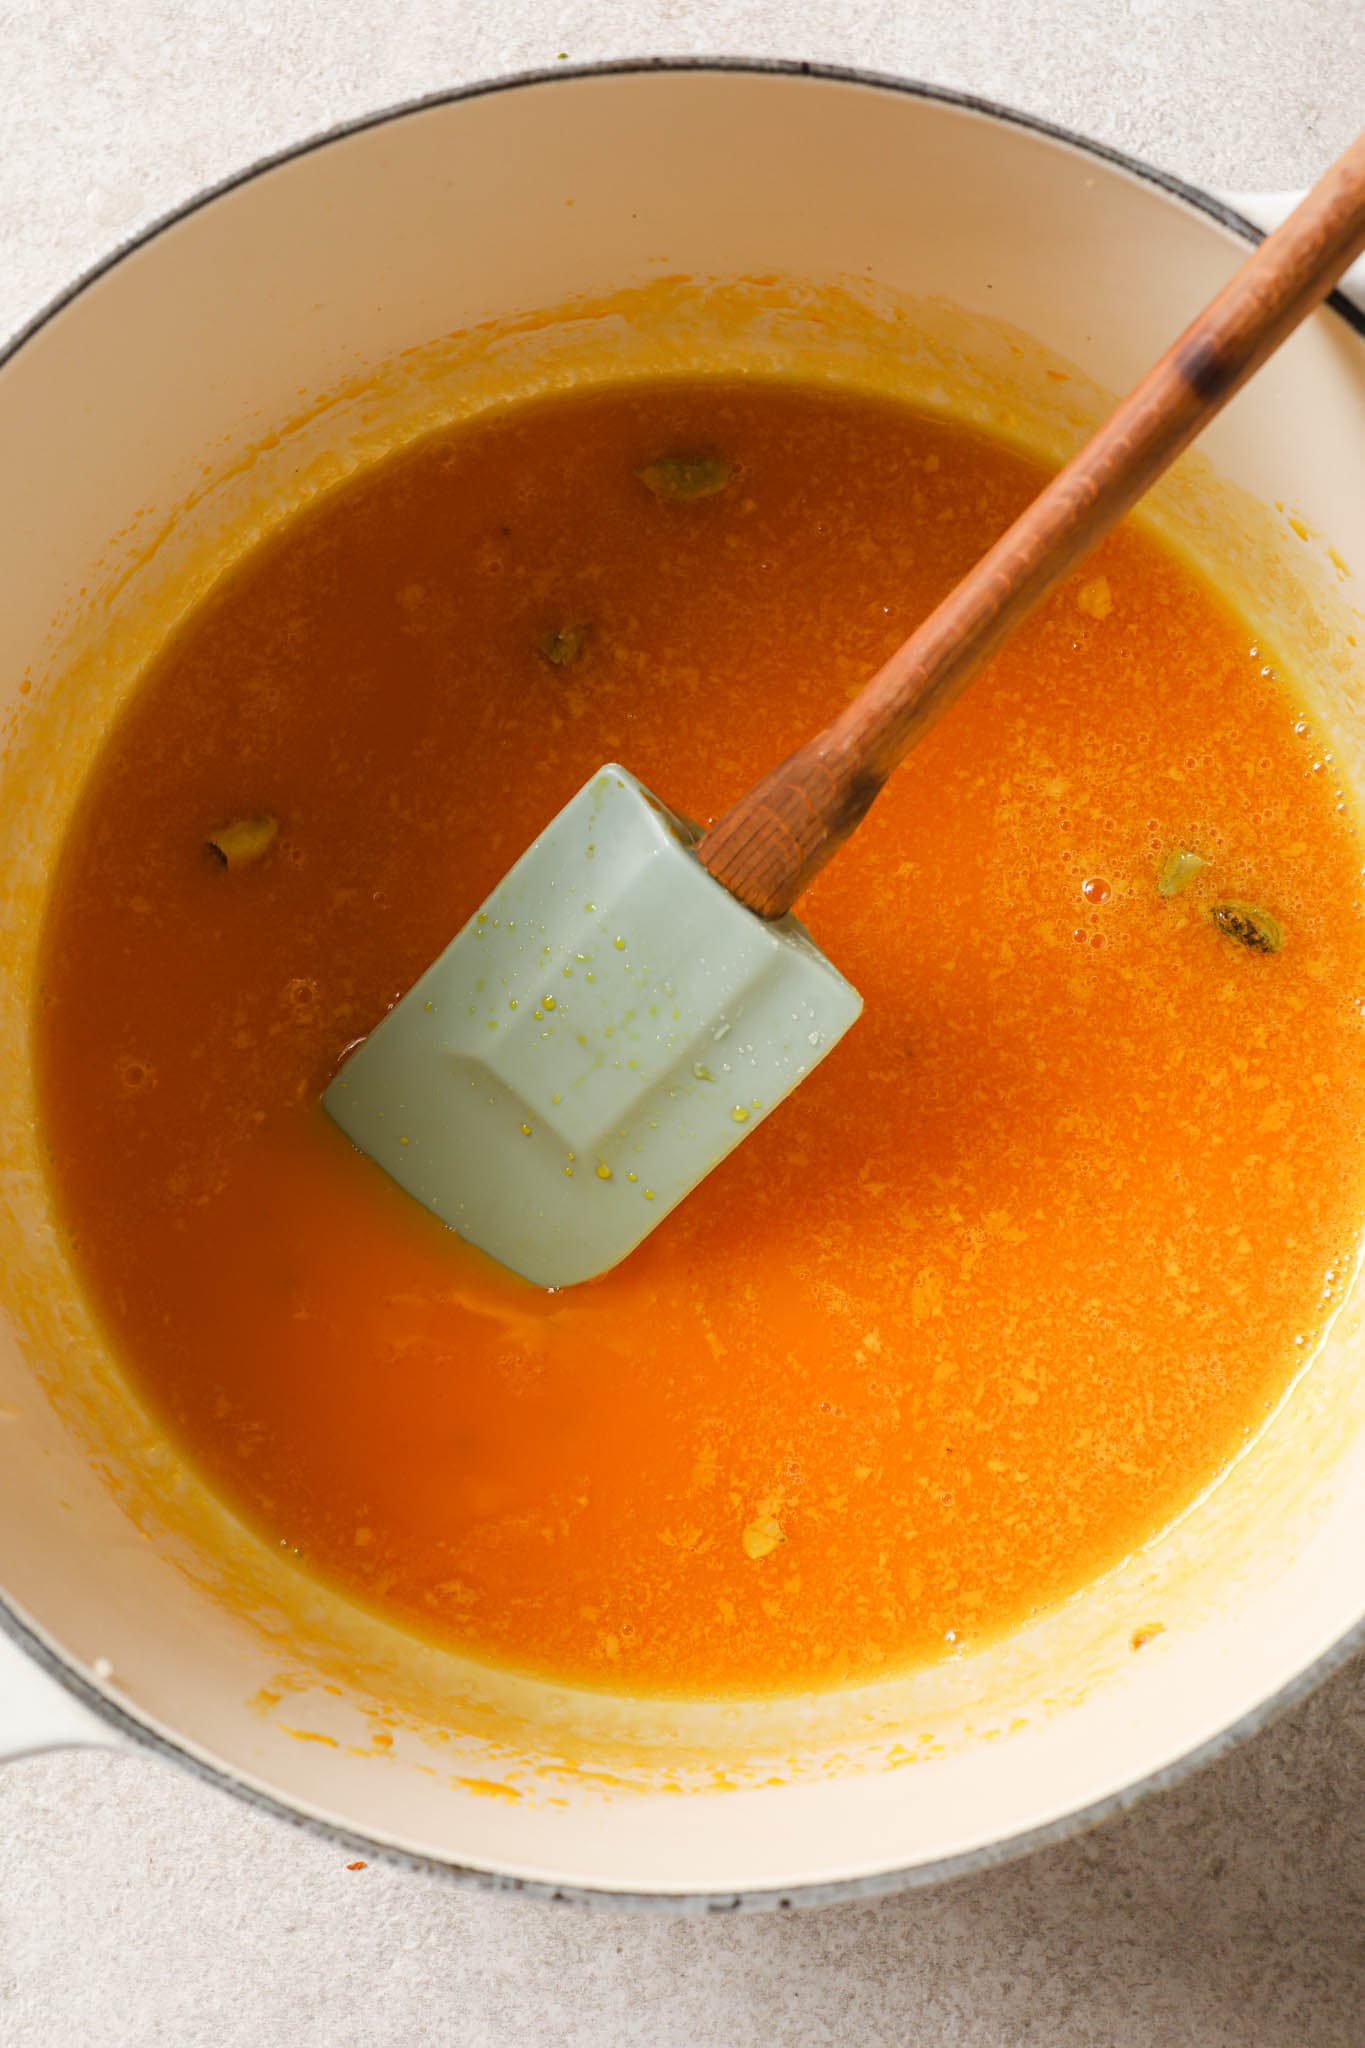
- Once the sugar dissolves in the water, add the milk and bring it to a simmer. You’ll notice it becoming foamy & frothy. That’s when you add the rice. If the sugar syrup thickens too much, it goes into hard-candy territory. Instead of absorbing the sugar syrup, the rice will be be coated in it, making it stiff.
- Undercooking the rice syrup is a better problem to have. All you’ll need to do is boil the water from the rice for a bit longer.
Cook the Rice
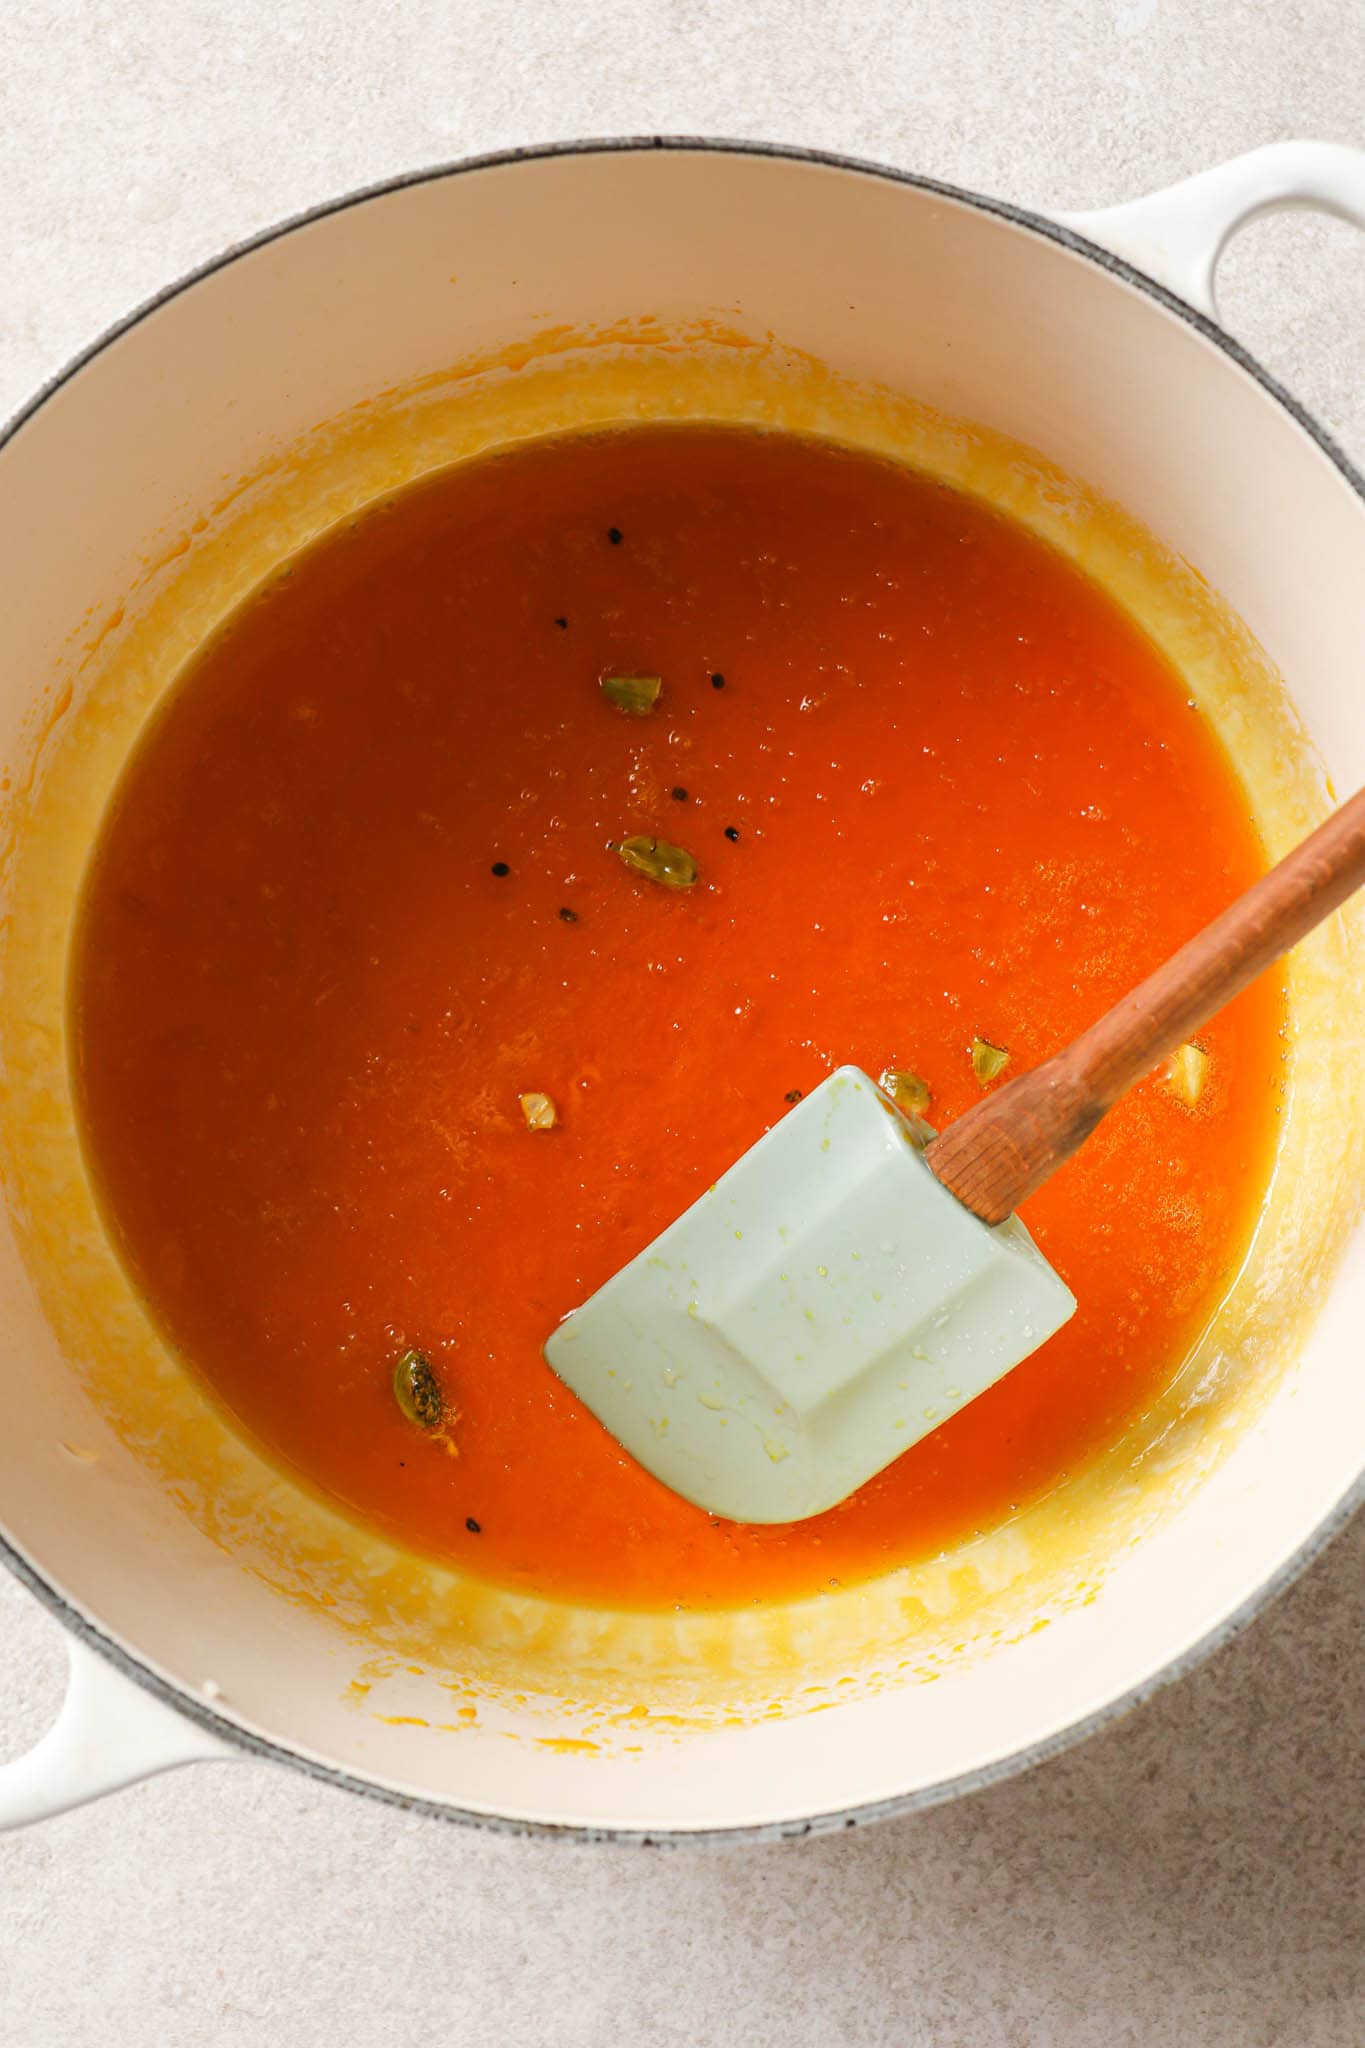
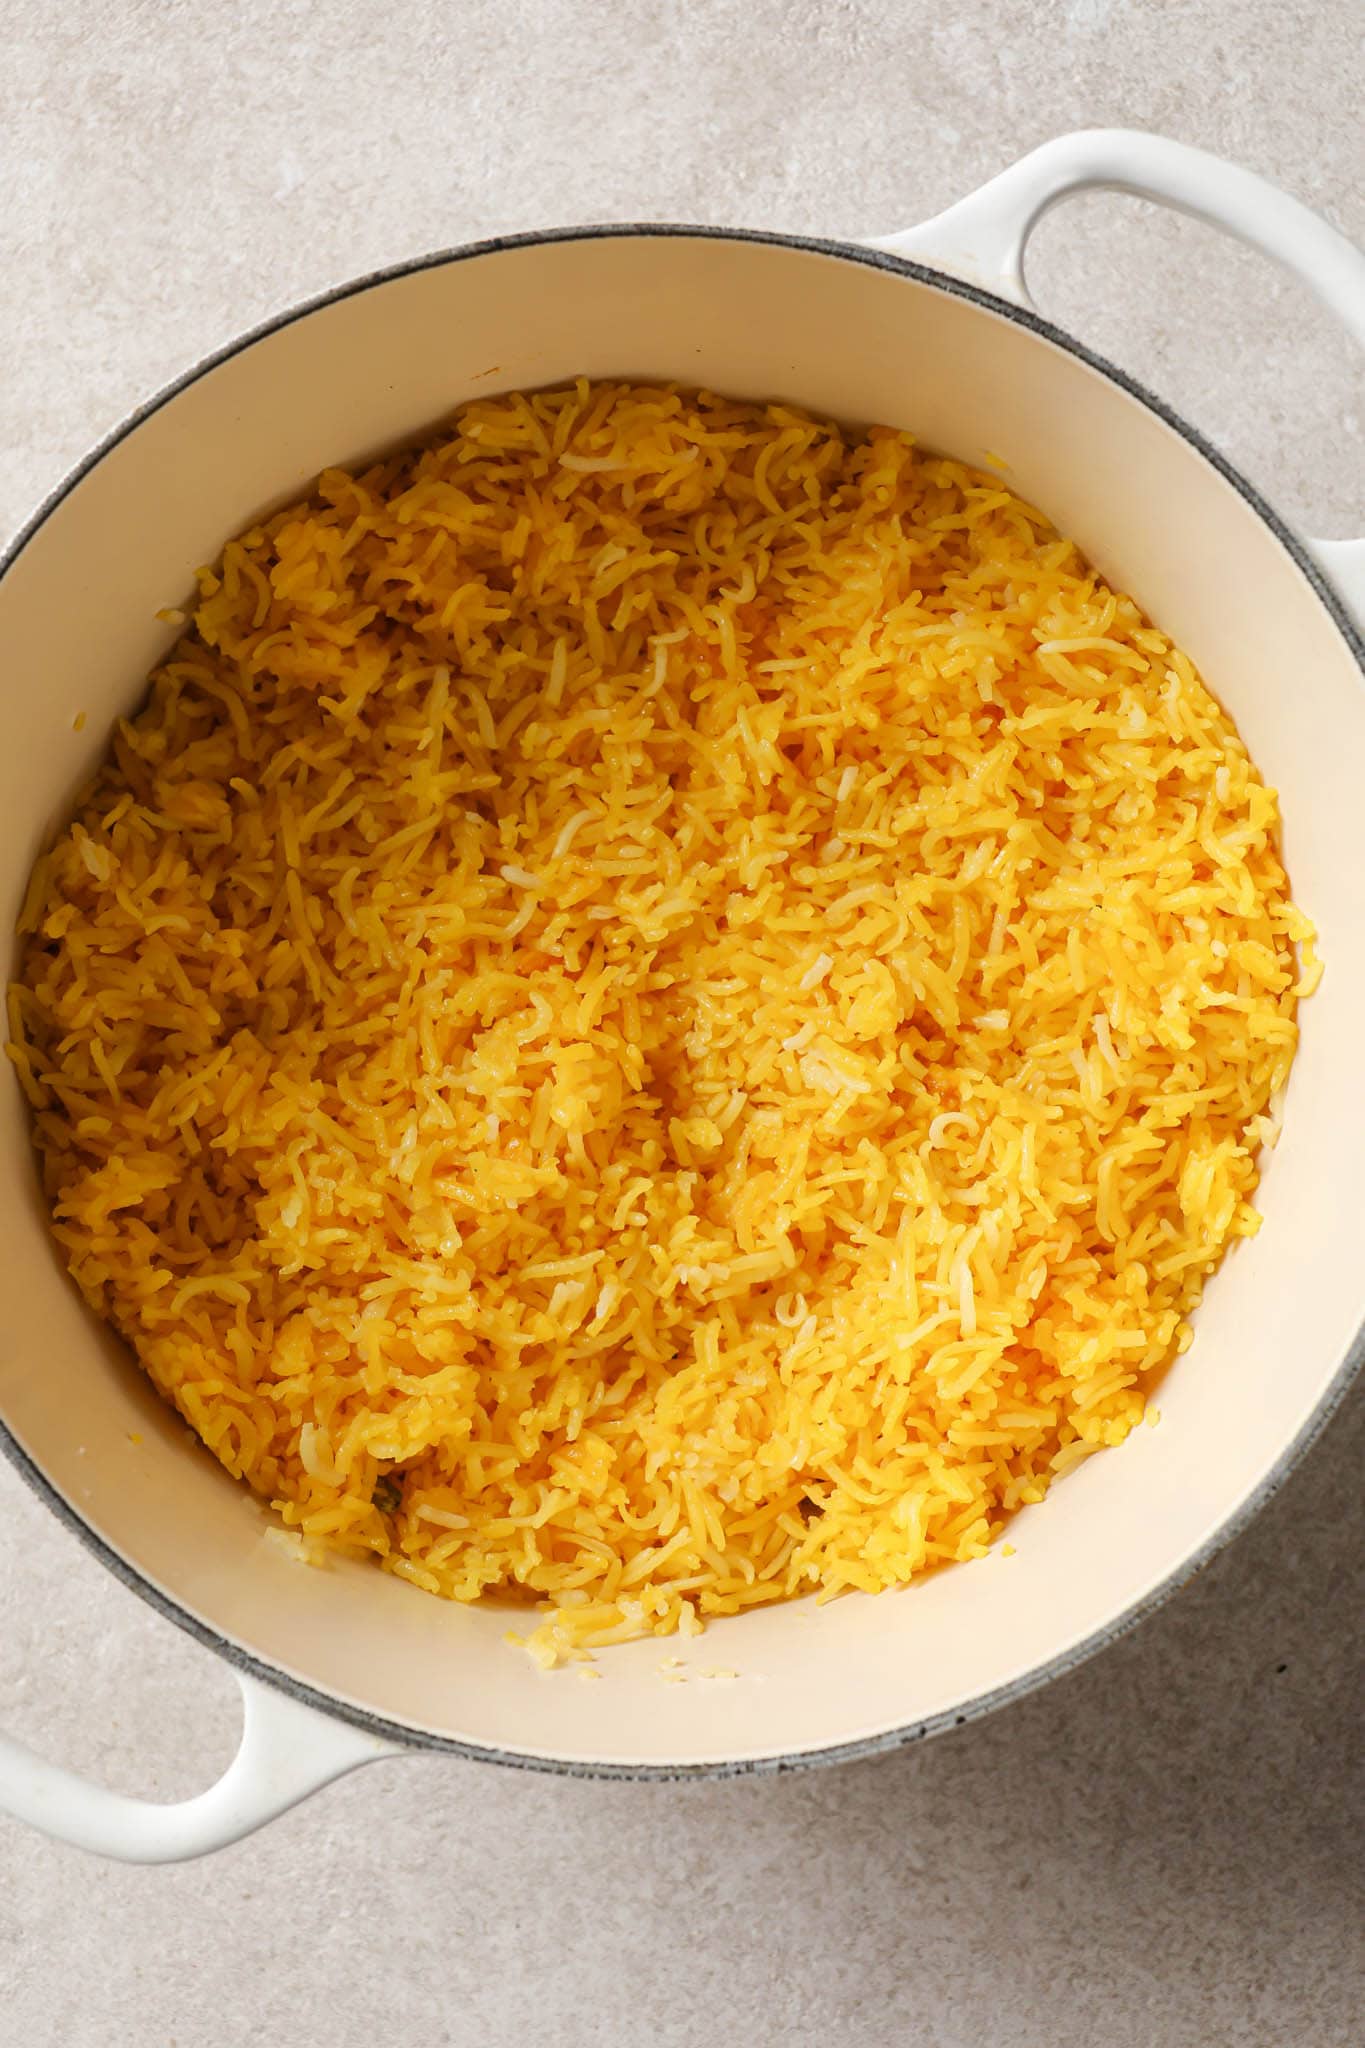
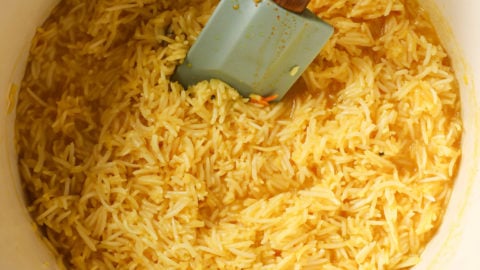
- Carefully mix in the rice. Bring to a gentle boil and allow to simmer, undisturbed, for 2 minutes, until the sugar syrup has reduced and the Zarda is no longer watery. You want to see more rice than water at the surface. Sprinkle in orange blossom/kewra water, if using.
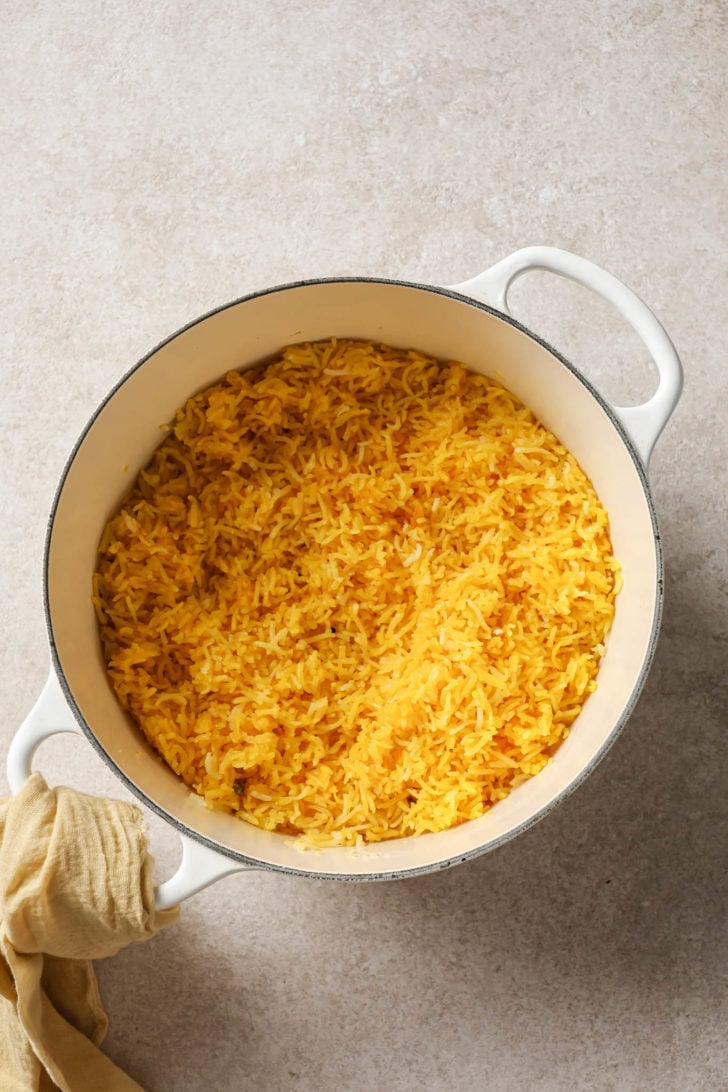
- Wrap the lid in cloth or foil to contain steam as much as possible, then cover and steam (‘dum‘) for 15 minutes. The liquid should be absorbed and the rice fully cooked.
- Turn off the heat and let it sit with the lid on for another 10 minutes. This helps the rice rest and soak in any remaining moisture.
- Tip: If you’re worried your rice will stick to the bottom of the pot, place a heat diffuser, flat griddle, or tava underneath the pan to diffuse the heat.
Traditional Add-ins
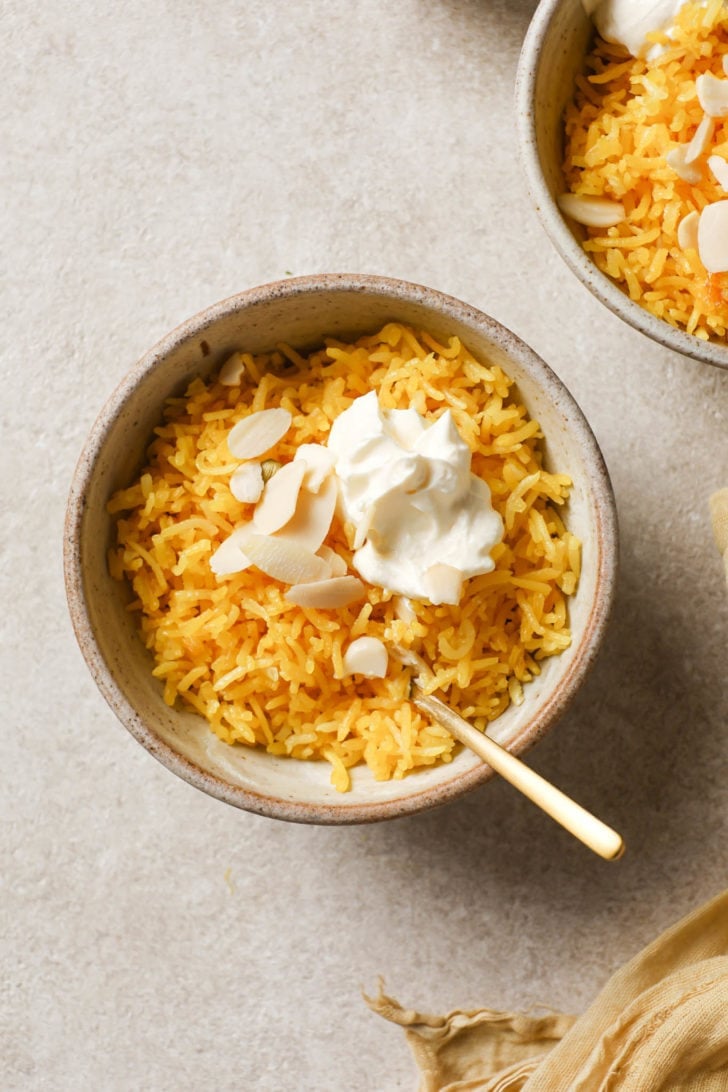
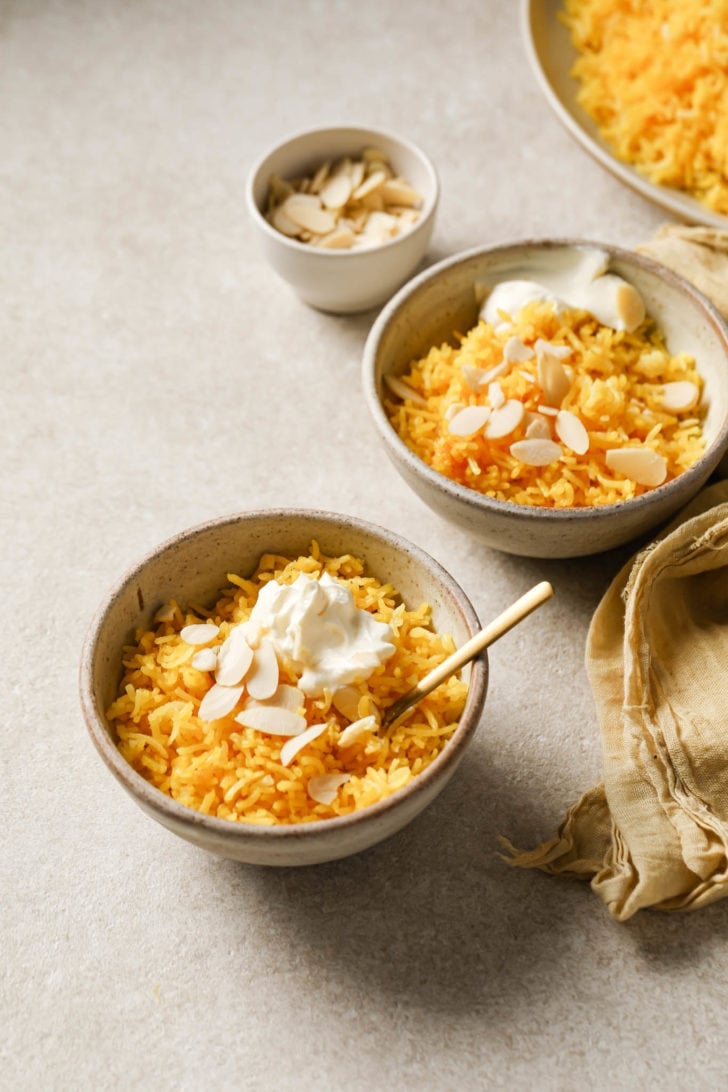
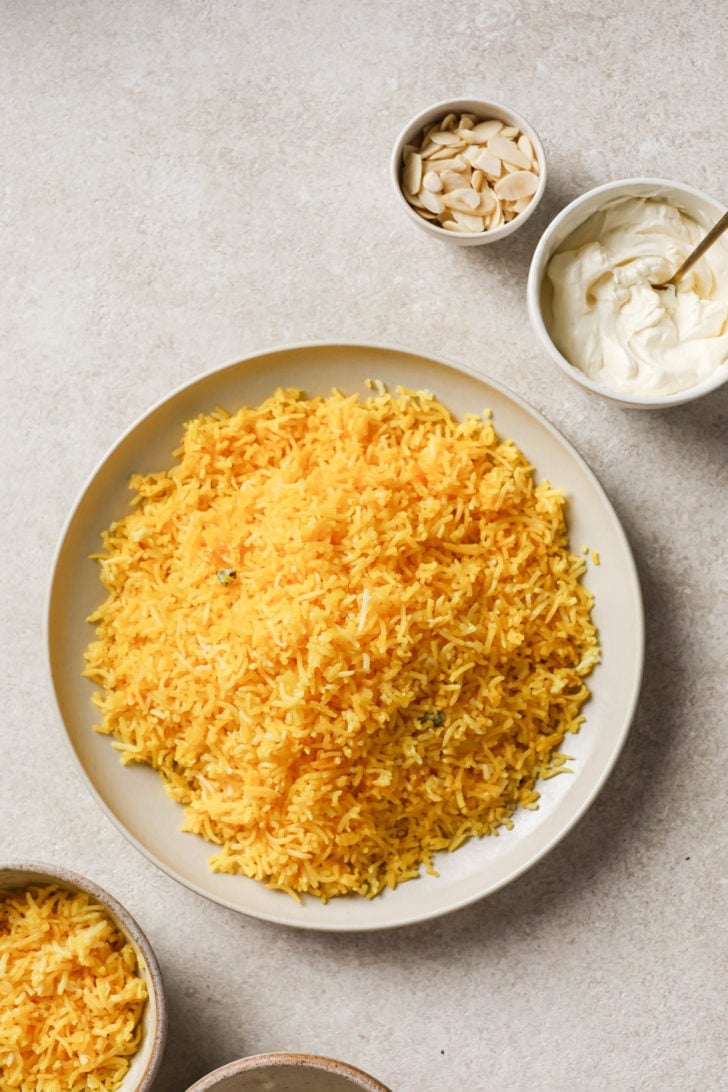
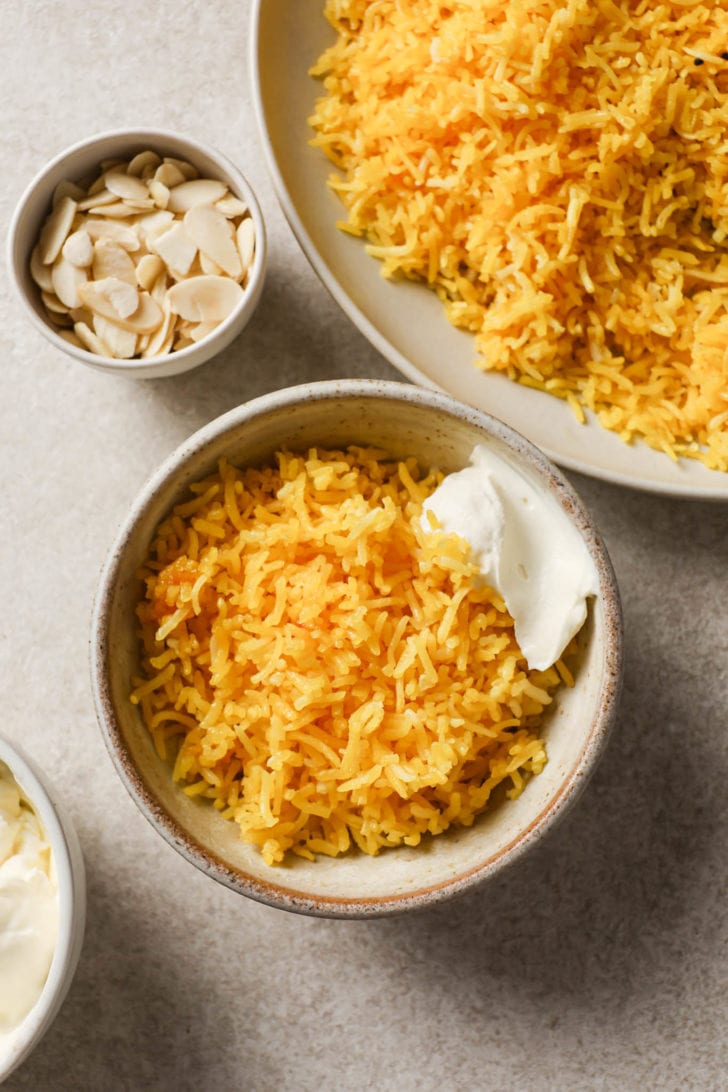
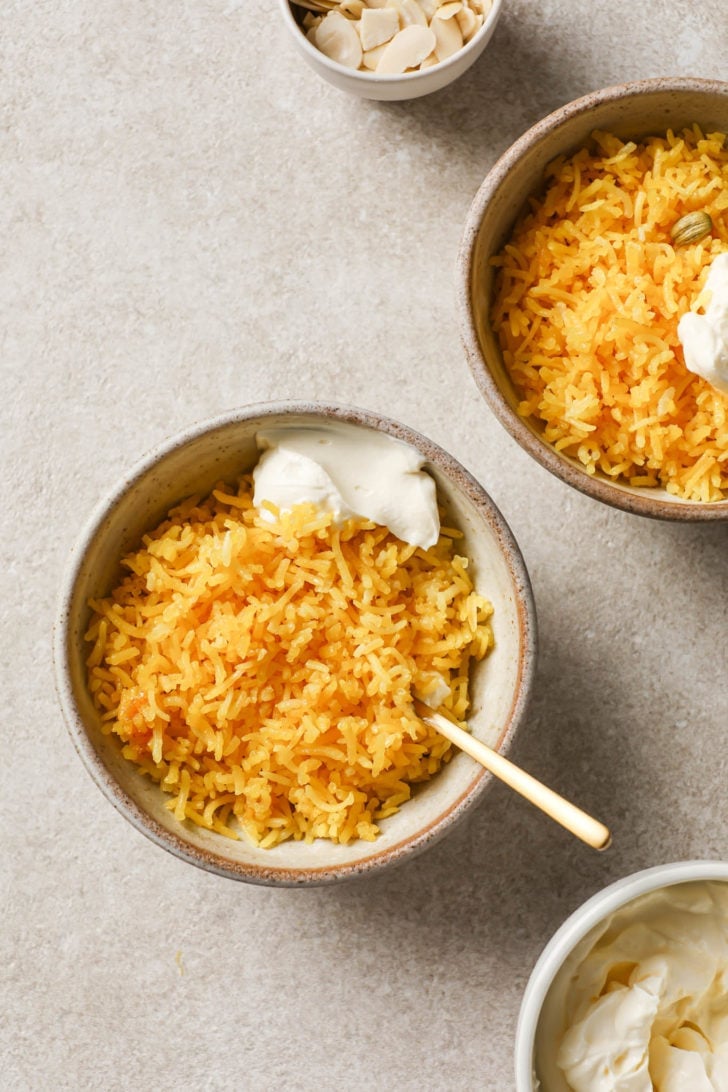
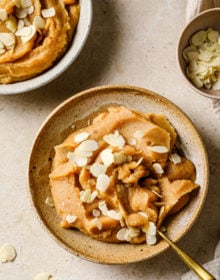
- Nuts: The most commonly used nuts in Zarda are blanched, slivered almonds, cashews, and pistachios.
- Coconut: Coconut flakes or crushed coconut.
- Make it festive: Zarda can be dressed up or down. Top with crumbles of khoya/mawa, golden raisins, or pieces of sweets/South Asian confectionaries.
When to add: You can add the nuts and other add-ins right before the ‘dum‘ to soften them or add them at the end for garnish (as I’ve done.) If you want to enhance their flavor and fragrance, you can roast the nuts, raisins, coconut, etc. (as you would for Sheer Khurma) before adding them.
Variations
- Spices: You can use ‘sweet’ spices such as cloves or a cinnamon stick along with the cardamom.
- Marmalade + Orange Juice: For an orange flavored Zarda, replace milk and water with orange juice and add a tablespoon or 2 of marmalade.
- Lemon or Orange zest: Add while boiling of the rice to add a hint of citrus flavor & aroma.
- Dairy-free: Make this Zarda vegan by using oil instead of ghee and replacing the milk with your favorite dairy-free milk (coconut milk sounds amazing!), juice, or more water.
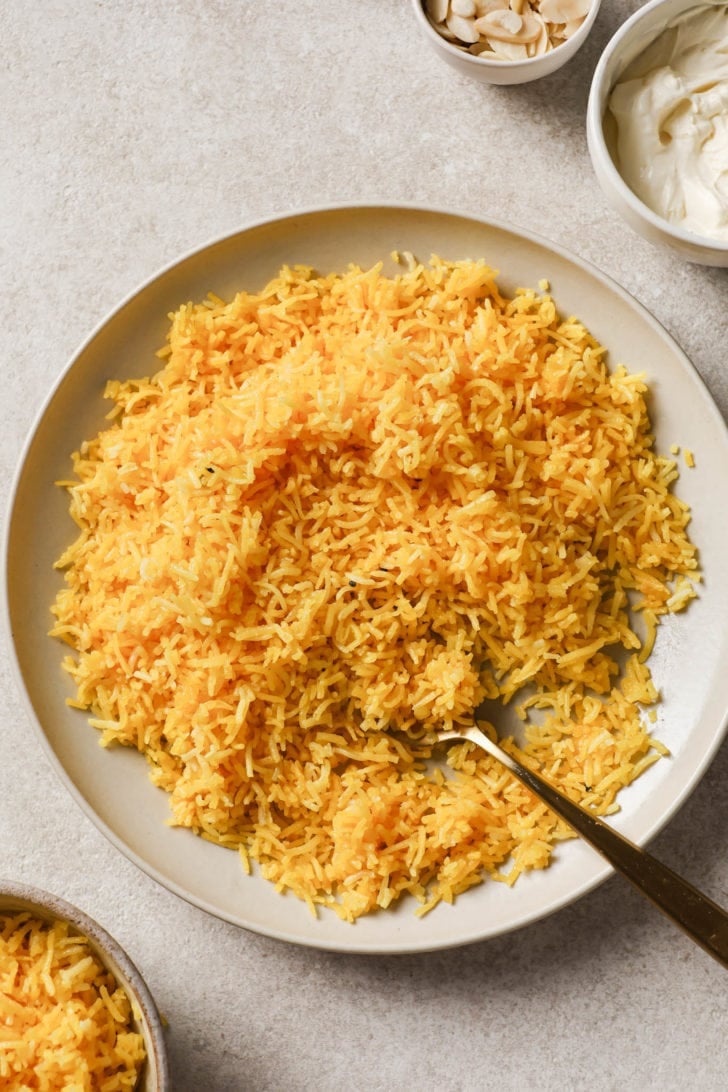
How to Serve Zarda
Zarda is served warmed up. Serve with either:
- Cream: Malai (or South Asian-style cream) is the classic choice to serve alongside Zarda.
- Yogurt: If cream isn’t available, yogurt can serve as a cooling, albeit more tart, substitute for cream.
How to Store & Reheat Zarda
- Store: Zarda keeps well in the fridge for up to 3 days. You can also freeze it in an airtight container up to a month.
- Reheat: Sprinkle 2-3 tablespoons of water, depending on how firm the rice is. You can also place a moist paper towel over the rice. Microwave until heated through. To add freshness, sprinkle some nuts or kewra water just before reheating.

More Pakistani Dessert Recipes You’ll Love
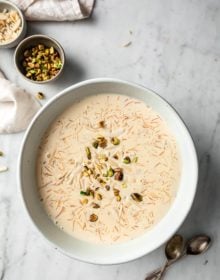
- 20-Minute Seviyan (Sheer Khurma)
- The Best Instant Pot Kheer
- Instant Pot Carrot Halwa (Gajar ka Halwa)
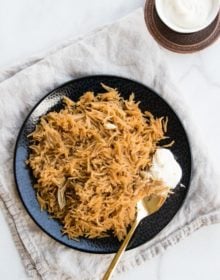
- Easy Jaggery Rice in the Rice Cooker (Gur Wale Chawal)
- Sooji Ka Halwa (Semolina Halwa) – 20-Minute Recipe!
Tried this recipe? If you have a minute, please consider leaving a comment telling me how it was! If you have a photo of your dish, please feel free to upload it and share with others. If you’re on Instagram, please tag me so I can see your creations. I truly love hearing from you. Thank you!
Zarda (Meethe Chawal – Sweet Rice) – Foolproof!
Watch the Video
Ingredients
- 1 cup (~185-190 g) aged long-grain basmati rice
- 2 tbsp ghee, or butter (salted or unsalted)
- 4-5 green cardamom pods, slightly cracked open
- 1/4 cup water
- 1/3 cup whole milk
- 3/4 cup (150 g) raw cane sugar, or regular white sugar
- 1/8 tsp yellow or orange food color
- 1/4 tsp kosher salt
- 1/4 tsp orange blossom water or kewra essence, depending on how strong it is – optional
For serving:
- Malai, Indian/Pakistani Cream or any thick cream (optional)
- Slivered almonds, to garnish (optional)
Equipment
- Lightweight nonstick Dutch oven – less chance of sticking to bottom
Instructions
- Place the rice in a bowl and thoroughly wash until the water runs clear. Soak in water for 30 minutes, then strain.
- Parboil the rice: Place a medium pot or nonstick Dutch Oven over high heat and bring 5 cups (1.25 quarts) of water to a rolling boil. (Cover the pot with a lid to speed this up.)
- Add the rice and bring it back up to a boil. Once it comes to a boil again, boil for 6 minutes and 30 seconds (no more than 7 minutes), or until the rice is fully cooked but has a slight bite to it. Instead of breaking into pieces, it should get slightly mushy when pressed between your fingers. (See Note 1) Drain and set aside.
- Heat a medium nonstick Dutch oven over medium-high heat. Once hot, heat ghee and add the cardamom pods. Stir for a few seconds to infuse the oil. Then add the sugar, water, food coloring, and salt. Stir and allow the sugar to completely dissolve (1-2 minutes). Add the milk and bring the mixture to a simmer (~1-2 minutes). The thickness of your pot will affect this timing. You’re looking to dissolve the sugar, but not thicken the syrup.
- Add the rice and use a rice paddle to fold very gently until all the rice is coated evenly in sugar syrup. (Careful here not to break the rice. If you can, lift the pot and swirl around to mix.) Bring to a gentle boil and allow to simmer, undisturbed, for 2 minutes, until the sugar syrup has reduced and the rice is no longer watery (see photo + video). Sprinkle in orange blossom/kewra water, if using.
- Layer the lid with a kitchen cloth (or aluminum foil) and seal tightly to contain the steam. At first, keep the pan on medium heat to allow to build steam for 1-2 minutes. You’ll start to feel the steam escaping the sides of the pot. Then turn down to the lowest heat and allow it to cook in its steam (‘dum’) for 10-15 minutes. The liquid should be fully absorbed and the rice fully cooked.
- Turn off the heat and allow it to rest with the lid on for another 10 minutes. Serve with malai (cream), if desired.
Notes
- If the rice is firm or still has room to cook (i.e. your rice still has bite to it), it likely needed to be boiled longer initially. To fix, sprinkle 2-4 tbsp of water on the rice. Cover and allow it to cook on low heat for another 5-10 minutes.
- If the Zarda rice is fully cooked but has a bit of moisture/water left, cover and cook on medium heat for another 5 minutes, then lower the heat to low and cook until the moisture has absorbed.
- Store: Zarda keeps well in the fridge for up to 3 days. You can also freeze it in an airtight container up to a month.
- Reheat: Sprinkle 2-3 tablespoons of water, depending on how firm the rice is. You can also place a moist paper towel over the rice. Microwave until heated through.

8 Comments on “Zarda (Meethe Chawal – Sweet Rice)”
Forgot to add a photo! Prefer mine brightest yellow like my mums!
Wow! The grains are so perfect and love the color. Glad to hear it’s been working out in different ways. Thank you so much for sharing your review and picture. 🙂
Love this recipe honestly! I’ve doubled it halved it and made it original way and it’s come out amazing! Quick and easy to follow thank you! The tips really do help especially when there’s moisture left etc. Overall 10/10
So simple and satisfying!! I added some roasted cashews, a bit of shredded coconut and chopped dates for texture and we devoured it!!!
Thank you Izzah for always making our childhood favourites so approachable. I always appreciate how thoughtfully you research and perfect your measurements and instructions for everyone!
Hi Serena, your additions sound heavenly. This isn’t a recipe people try often so I’m always thrilled to hear when someone does. And thank you for your kind, thoughtful comment. I’m truly grateful to be able to help in this way.
Hi Izzah! What’s the traditional way to make it yellow? Would it be using saffron? I really want to avoid food colorings. Thank you and love your website! 🙂
Yes, saffron is the traditional way to go. You can soak it in the water that you’ll be using.
Zard translates as Amber in English
It would be called Zard Palao and not Zarda Palao