The BEST Instant Pot Kheer
All the classic flavor of Kheer without the fuss. This restaurant-inspired recipe has been rigorously tested and perfected until I can confidently call it the BEST Instant Pot Kheer. Incredibly quick and easy to make, this Kheer recipe is a sure crowd-pleaser.
Want to save this post?
Enter your email below and get it sent straight to your inbox. Plus, get recipes & tips every week!
“I made this today and it’s a HUGE hit. Husband said it’s better than restaurants Kheer. Hands down the best kheer recipe ever and super easy to make.”
Shaista
Word on the street is you can make kheer in an Instant Pot. Throw in some milk, rice, and sugar, hit that “porridge” setting.
Tried it. Decent. Tastes like rice pudding, not kheer. Admittedly, you can’t go wrong with milk, rice, and sugar, but kheer is on another level.
There are two kheers I’ve tasted that I recall as outstanding. One – uncle Mir’s kheer that we used to have every Eid. And two – the kheer from my wedding and my sister’s, brother’s, etc…a most revered kheer that we often look forward to more than the wedding itself.
After a couple generic kheer trials, I knew it was missing that something. And my night wakings would continue unless my kheer tasted more like kheer kheer and less like Asian Buffet kheer.
On a whim, I called my wedding caterers, Kababesh Grill, to see if I could get some clarity. The owner answered and not only generously shared the recipe but gave me duas and well wishes as good uncles do.
This recipe is an easy, lightened up version of his kheer while staying true to its creamy, show-stopping, wedding-worthy taste. It’s a rich and indulgent dessert without being overly sweet or heavy.
Navigation
- What Is Kheer?
- Ingredients For Instant Pot Kheer
- What Kind Of Rice To Use For Instant Pot Kheer
- How To Make Kheer In The Instant Pot
- How Long Does It Take To Make Kheer In The Instant Pot?
- Tips To Make Kheer In The Instant Pot
- How To Make Kheer On The Stovetop
- How To Make Dairy-Free Vegan Kheer
- How To Serve Kheer
- The BEST Instant Pot Kheer Recipe
What is Kheer?
Kheer, also called chawal ki kheer, is a South Asian style rice pudding made with milk, sugar, and rice. Traditionally, the milk and rice is reduced down for hours which results in a beautiful taste and texture.
More Quick and Easy Desserts: 20-Minute Sheer Khurma, 20-Minute Sooji Ka Halwa, Crushed Pineapple Dessert
Ingredients for Instant Pot Kheer
This kheer only requires 6 ingredients. In addition to milk, rice, and cane sugar, I use half & half and condensed milk to give it that essential depth and flavor. Optionally, you can add nuts, saffron, and kewra or rose water.

What kind of rice to use for Instant Pot Kheer
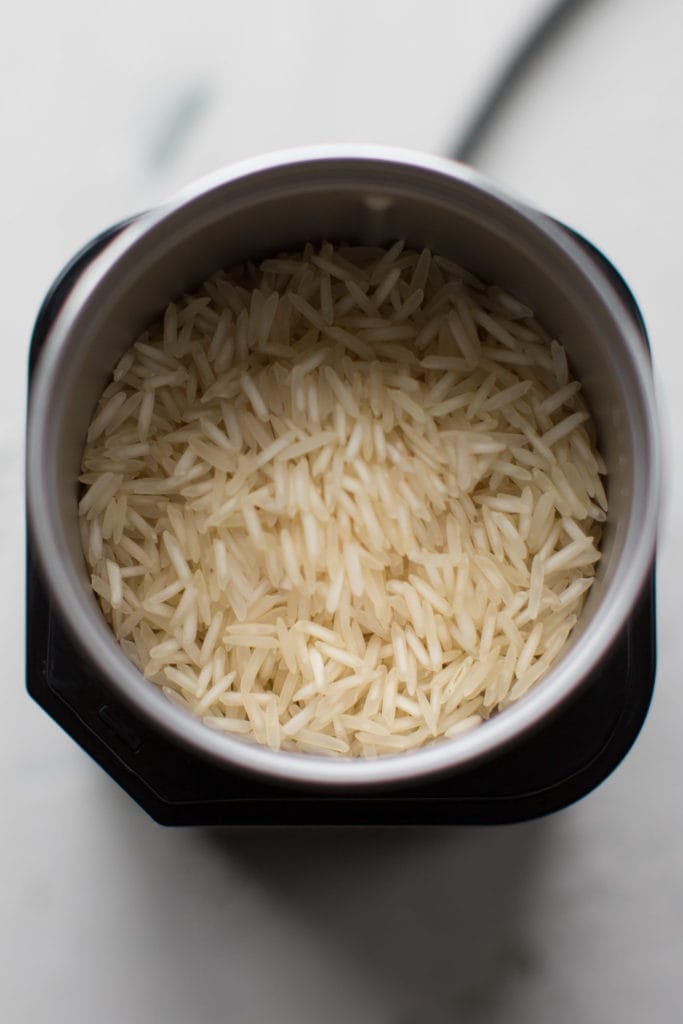
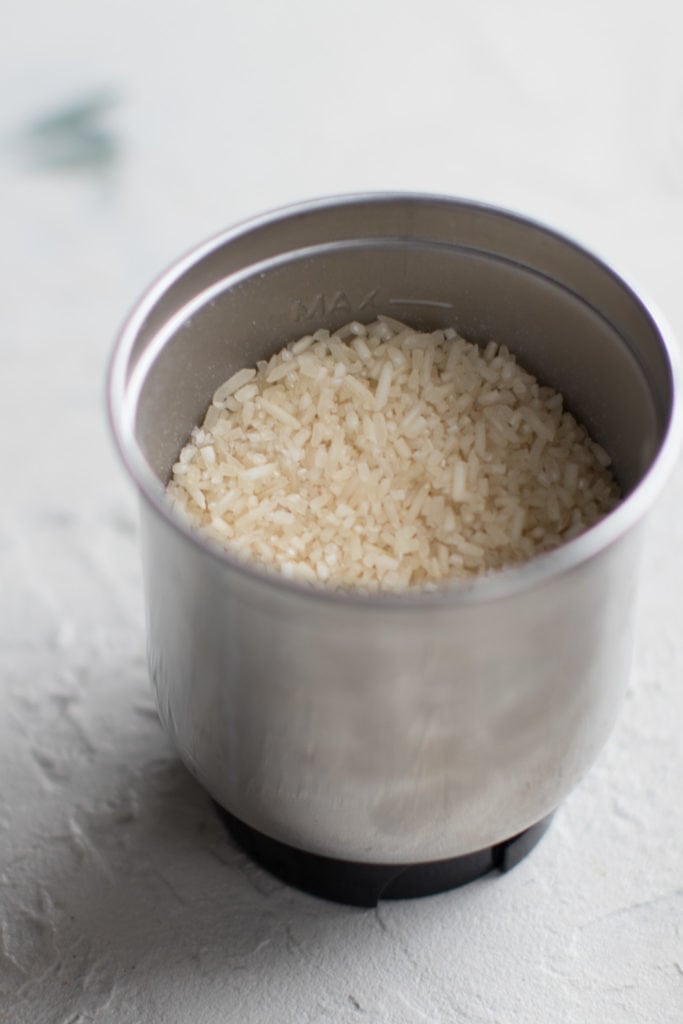
I use basmati rice, but you can use whatever rice you have on hand. In this recipe, we use a spice grinder or food processor to break the rice prior to adding it in the recipe.
Should you rinse the rice?
Though I usually wash and rinse my rice, I don’t when making kheer. I find the starch actually helps enhance the creamy texture (plus, dry rice is just easier to work with). If you prefer, you can certainly rinse.
How to make Kheer in the Instant Pot
This kheer is so easy to make, it almost seems unfair. All you do is:
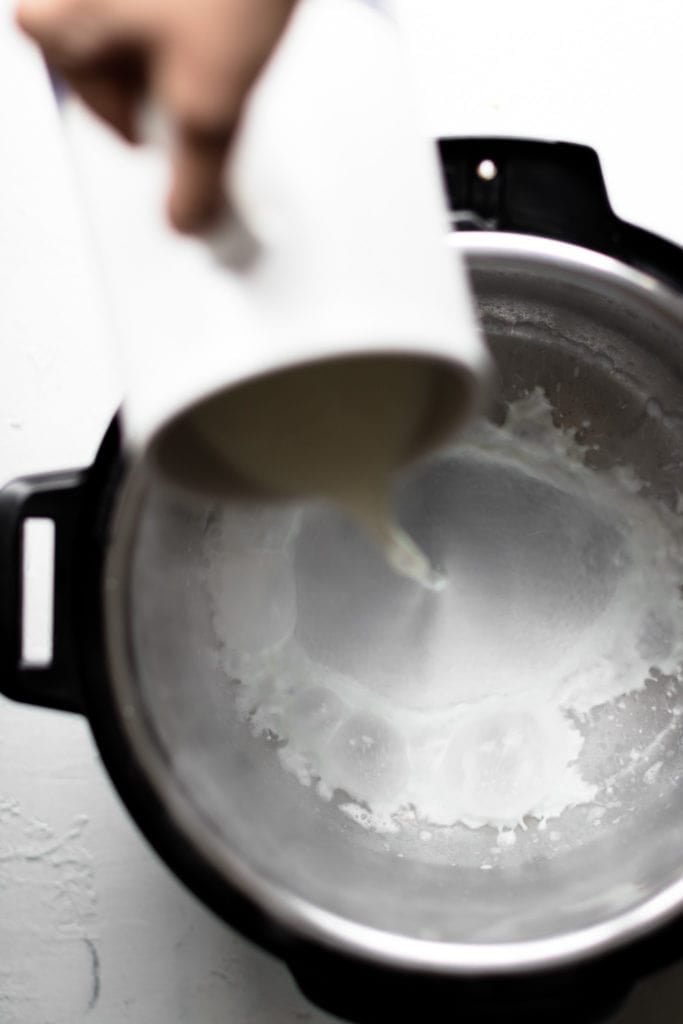
- Pour in the milk, half and half, and cardamom pods and bring everything to a light boil. Stir frequently, but you don’t have to stir constantly. It’s important to allow the milk to come to a boil because if you just dump and go, the milk is likely to stick to the bottom.
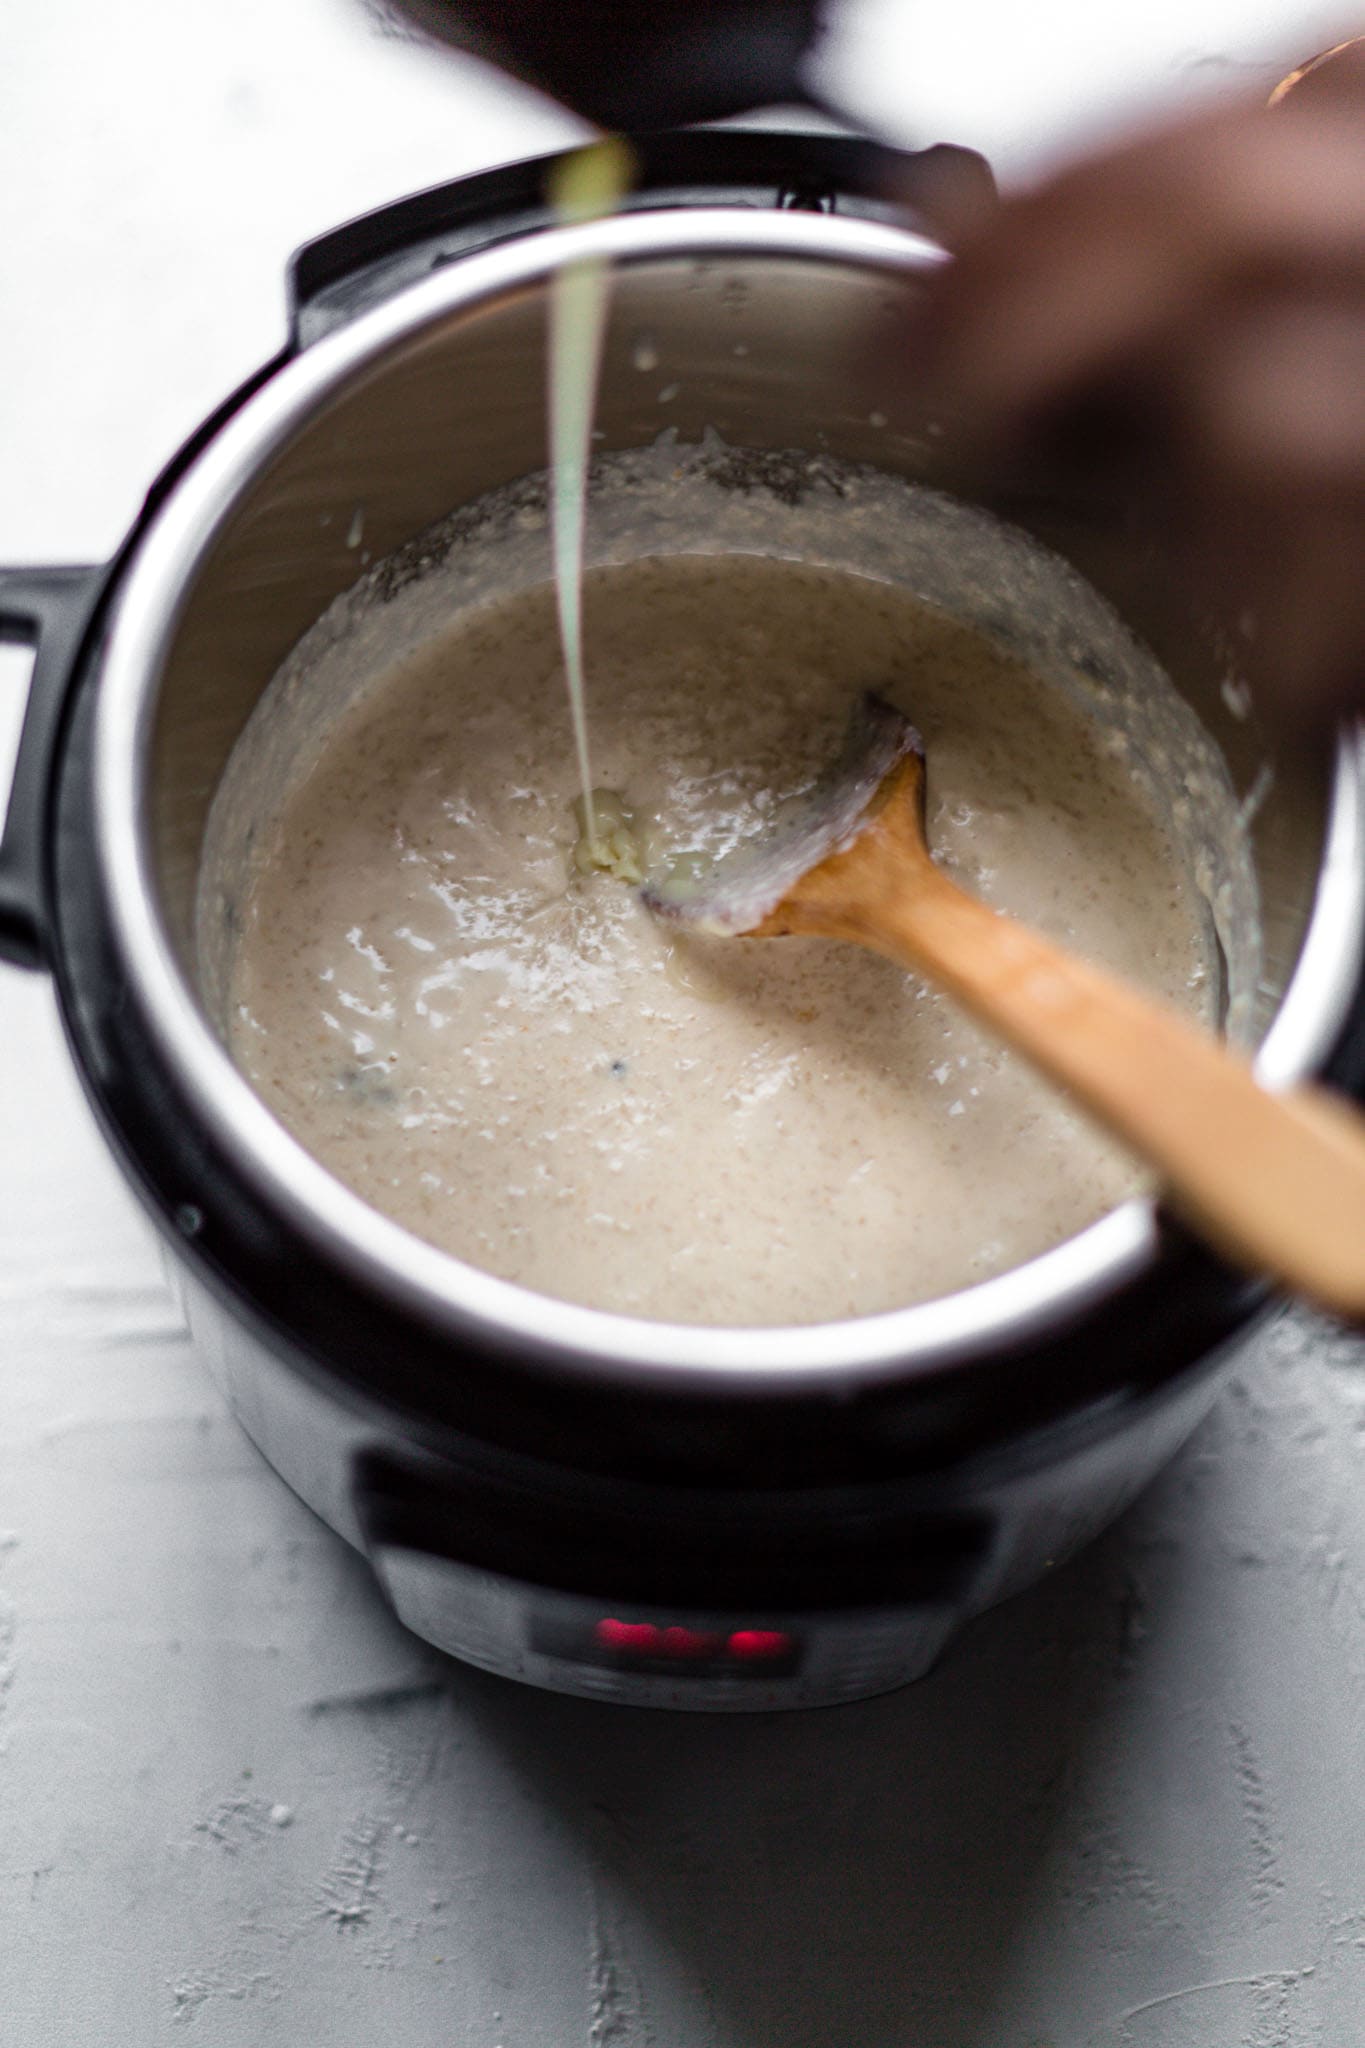
- Mix in the pre-ground rice. Then close the lid, press Porridge Setting, and walk away. Allow the pressure to naturally release. Manually releasing will cause the kheer to splatter all over (guilty).

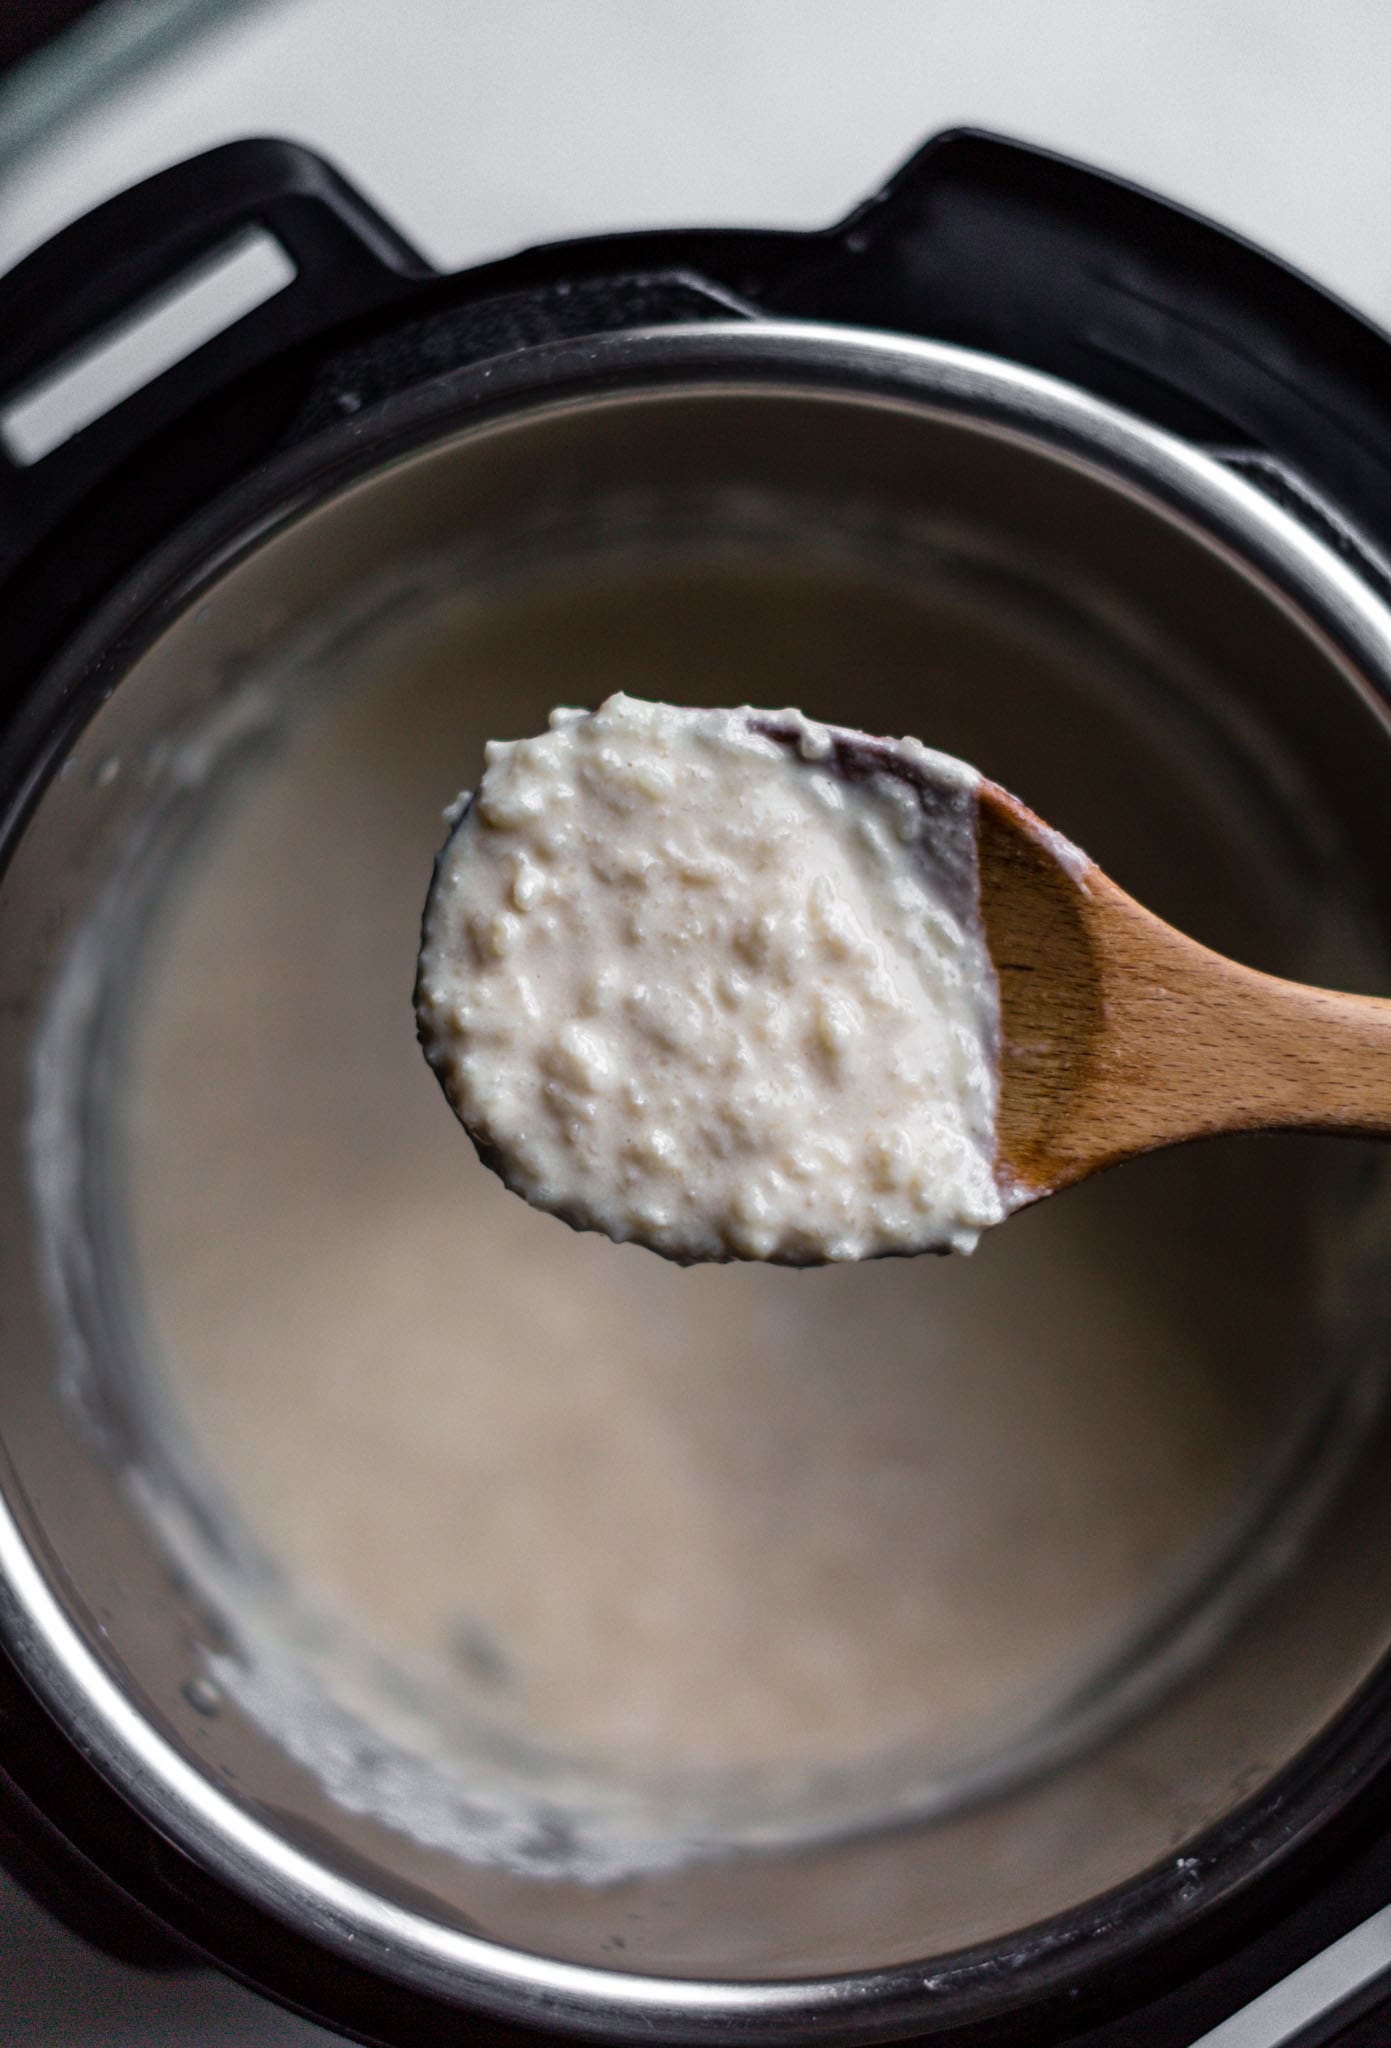
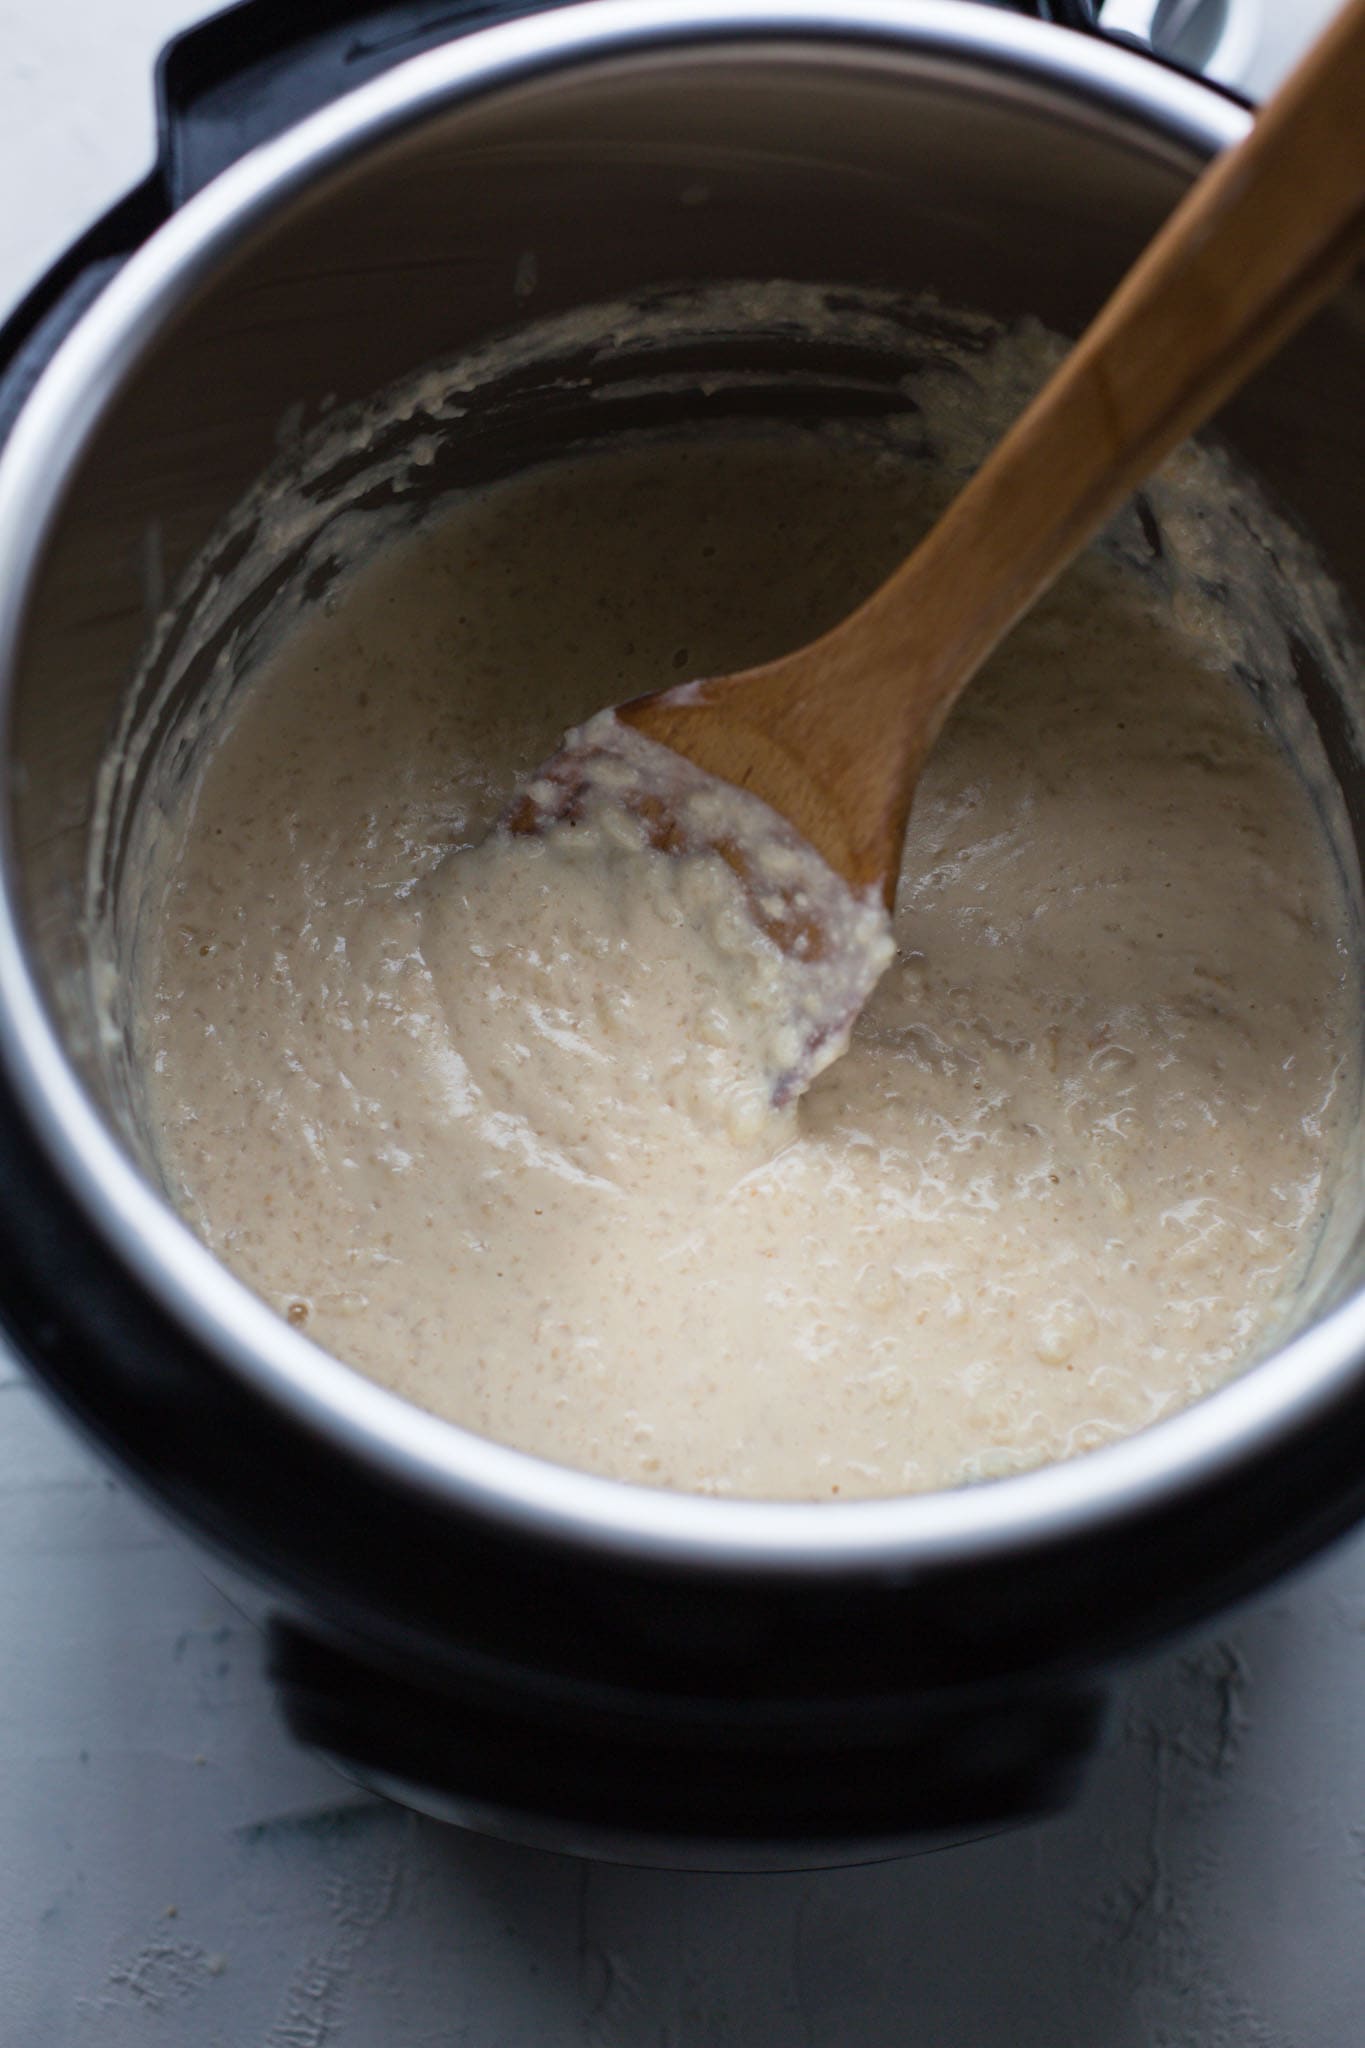
- Once you remove the lid, stir in the sugar and condensed milk. Then sauté down depending on how thin or thick you’d like the kheer.
The rice will absorb the liquid once it’s removed from the heat, and it’ll thicken up even more once chilled. I generally sauté down for 3-5 minutes. If you prefer runnier kheer, sauté for 1-2 minutes.
- Use a wooden spoon to mash the rice against the sides for a creamier texture. It’s crucial for to dissolve into the kheer.
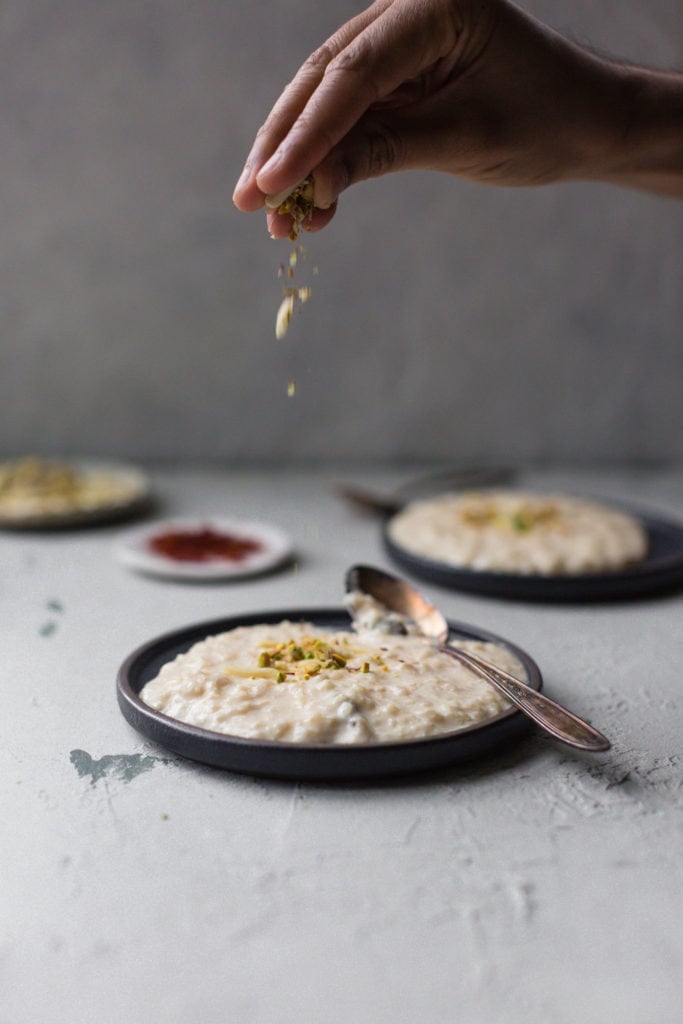
- Add kewra essence or rose water and garnish with nuts, if desired. And you’re done!
How long does it take to make Kheer in the Instant Pot?
It takes 45 minutes for the Instant Pot to build up pressure, cook, and naturally release. Other than that, there are only 15 minutes of active hands-on time before and after.
Tips to make Kheer in the Instant Pot
- To get the proper texture: It’s important to grind the rice prior to cooking. Don’t worry if the rice is not completely homogenous after being ground. After cooking, make sure you use your wooden spoon to mash the rice against the sides of the Instant Pot.
- If you prefer, you can use cardamom powder instead of whole cardamom. If so, add the cardamom powder at the end with the sugar and condensed milk.
- To double (or halve) the recipe, simply double (or halve) the ingredients, but pressure cook for the same amount of time.
- Half & Half is half milk, half cream. So if you don’t have it or can’t find it, you can replace it with one cup heavy whipping cream and one cup whole milk. You can also try using a blend of half and half and heavy whipping cream. Feel free to play around with these ratios and make it richer to your liking.
How to make Kheer on the Stovetop
I’ve tested this recipe many times (and then had my sister, cousin, and friend test it for good measure), but I still haven’t gotten around to trying it on the stovetop.
Since there is no evaporation when pressure cooking in the Instant Pot, you’ll need to add more liquid to achieve the same ‘cooked down’ taste. You’ll also need to stir more frequently to ensure it doesn’t stick to the bottom of the pot.
How to make Dairy-Free Vegan Kheer
Though I haven’t tried it myself, you can easily make this kheer vegan by substituting the milk and regular half & half with soy milk and dairy-free half & half. You can also use all soymilk and add coconut cream after cooking in the Instant Pot. (I have tried using a can of coconut cream after cooking and it worked beautifully to thicken while adding a light coconut taste.)
To replace the condensed milk, you can use vegan condensed milk, or just use more sugar or sweetener of choice.
For a lightened up, healthier Kheer
For a lighter version for every day, you can replace the half & half with more milk and add more sugar or sweetener of choice in place of the condensed milk. It won’t be as complex in flavors, but you’ll get your kheer fix.
How to serve Kheer
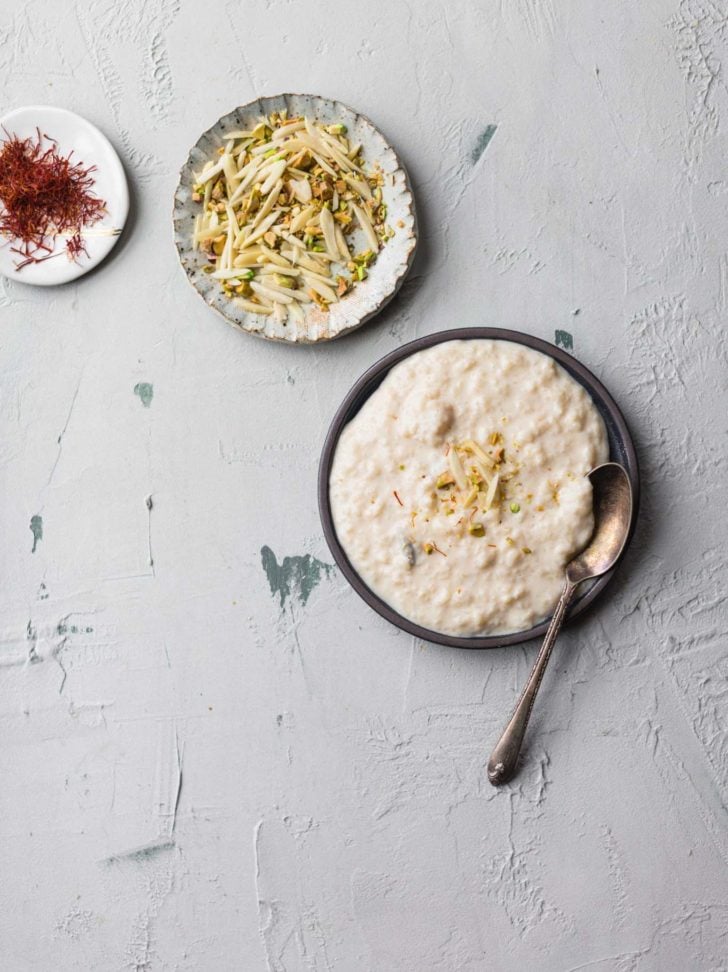
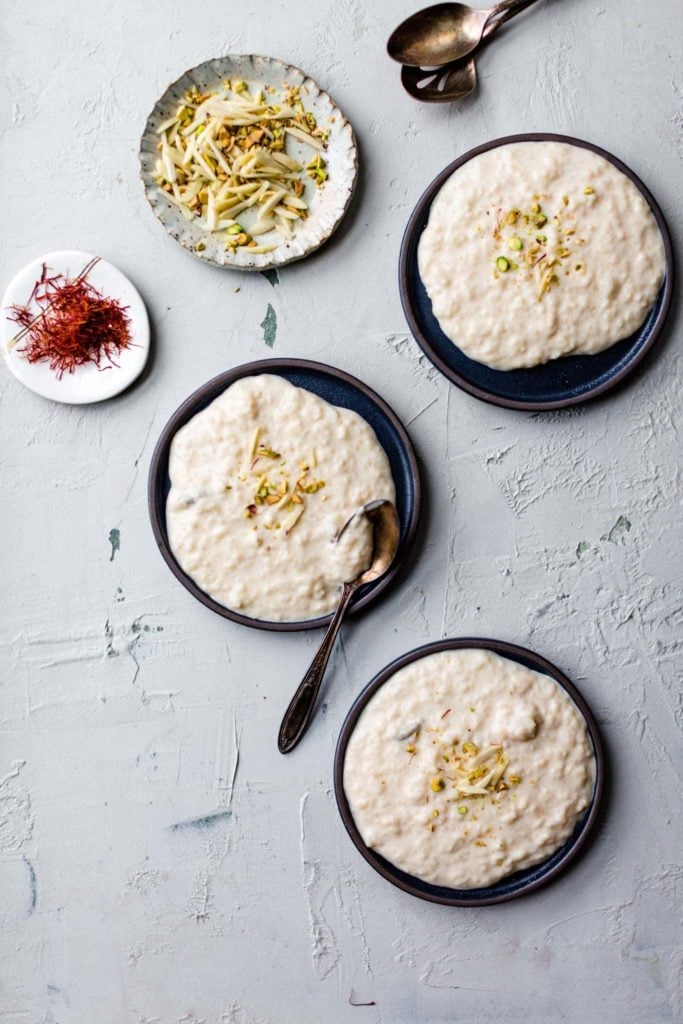
Kheer is usually served either hot or chilled.
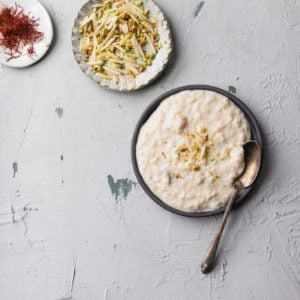
I prefer leaving it plain with a simple garnish of nuts, but you can make it extra fancy with ghee-sauteéd nuts, golden raisins, or coconut flakes.
So without further ado, here’s my self-proclaimed best kheer recipe. I hope you try it and see for yourself! If you are looking for more milk based Pakistani desserts, you’ll love my recipe for 20-Minute Seviyan (Sheer Khurma)! If you do, please drop a rating/comment below. I always love hearing from you!!
More Pakistani and Indian Dessert Recipes
Instant Pot Carrot Halwa
Easy Jaggery Rice in the Rice Cooker
Sooji Ka Halwa (Semolina Halwa)
For more Instant Pot Recipes, here are 10+ Easy Pakistani Instant Pot recipes.
The BEST Instant Pot Kheer
Watch the Video
Ingredients
- 1/3 cup + 1 tbsp basmati rice
- 3 cups whole milk
- 2 cups (1 pint) half and half (see Note 1), or sub 1 part milk + 1 part heavy whipping cream
- 10 green cardamom pods (see Note 2)
- 1/4 cup + 2 tbsp pure cane sugar, or more to taste
- 3 tbsp condensed milk, or more to taste – may sub more sugar
- ¼-1/2 tsp kewra essence or rose water, depending on strength (optional)
- 2-3 tbsp finely chopped or slivered nuts such as almonds, pistachios, etc., (optional)
Equipment
- Spice Grinder or Food Processor
Instructions
- Select the Sauté (More/High) setting on the Instant Pot. Meanwhile, in a spice grinder or food processor, pulse to grind the rice about 10-12 times, or until the consistency resembles steel cut oats. Shake the spice grinder in between to help distribute the rice. Be careful not to pulse too much as you don’t want a powder.
- Once the Instant Pot turns to Hot, add milk, half and half, and cardamom pods. Bring to a simmer, stirring more often as time goes on to ensure it doesn’t stick to the bottom (~8-10 min). Add the rice and stir to mix.
- Cancel Sauté, close the lid, and set the Pressure Release Valve to Sealing. Select the Porridge setting, with a timer set for 20 minutes on High Pressure. When the timer is up, allow the pressure to naturally release (~20 minutes).
- Remove the lid, press Cancel to turn off the Instant Pot. Select the Sauté (More/High) setting. Stir in the sugar and condensed milk. Sauté, stirring constantly until the mixture reduces down slightly, depending on how runny you prefer the kheer (see Note 3). Use a wooden spoon to mash the rice against the sides to further crush the rice as much as possible.
- Cancel Sauté to turn off the Instant Pot and continue to stir, using your spoon to mash the rice against the sides. Add kewra water and stir. Remove from the Instant Pot and onto your serving platter. Garnish with nuts, if using. Serve hot or chilled in the refrigerator.

121 Comments on “The BEST Instant Pot Kheer”
The taste was great but I’m not sure why my kheer was brown in color. I think the bottom layer burned but I followed the recipe as instructed and it didn’t taste burnt. Any tips on keeping it white would be greatly appreciated as the taste was right on. Only thing I changed was adding some extra sugar to my taste.
Hi Salma! Glad the taste was on point! Was the bottom brown after pressure cooking? It could be that the milk didn’t heat through as much as it needed to. If it wasn’t brown immediately after pressure-cooking, it could be that it required more stirring to prevent it from sticking.
This recipe is an absolute treat! It’s a crowd pleaser! However when I’ve made it in large quantities the milk doesn’t really boil in the pot, which you need it to before putting other ingredients. I boil the milk on stove pot and then put it in IP. Maybe I need to wait more for it to boil in IP?
In any case, this is the only kheer recipe you’ll ever need.
So glad to hear that, Samina. Thanks for sharing the milk tip. Makes sense for large batches. Thank you so much for your review!
It is criminal how EASY this recipe is and how AMAZING it turns out each time. I make it for dinner parties and turns out perfect each time and is a huge hit. People can’t believe it was made in the IP. So grateful to have found this recipe. Thank you Izza for developing such a foolproof recipe. You’re a genius!!
haha love this! Thank you so much, Uzma! So happy it comes in handy. 🙂
This is a lovely recipe… I used a tub of cream and milk only and it came out really nice. I sautéed for much longer and kept stirring every now and then and it came out as very authentic kheer that had that extra punch
So glad to hear. Thanks so much for sharing your tips!
Made this for the first time just before guests arrived for lunch as found out that one of them needed gluten free food. Was super easy and a major hit! Will be a regular dessert option now
Thank you, Amina! So happy to hear it came to the rescue!
Hello. Can I use evaporated milk instead of cream?
Thank you so much for this recipe. Can I use a traditional Pakistani pressure cooker to make this? If yes, how much time should I put the pressure for?
Hi Areeba! Great question. I haven’t tried it myself so I can’t say much. Just note that because the IP retains a lot more liquid than traditional pressure cookers, you’ll need more liquid than called for in this recipe. I’d also pressure cook on low. I suppose you can find something on Youtube that’ll me more helpful than I can be here. Hope that helps!
Speechless… this is just wow, I didn’t want to share it!! Doubled it for guests and they thought it was shop bought!
That’s amazing. Thank you so much, Ukhti!
Dear Izzah,
Thank you for this quick version of an otherwise time consuming, but oh-so-totally-worth-it Pakistani dessert! Made it on impulse today and here’s my take on it:
Definitely, and as also suggested by you, wait for the float valve (the metal pin) to go down naturally. I got impatient and there was milk spraying everywhere on my countertops 🙈. Not pretty.
I did double the recipe and increased the sugar a bit more to my liking.
The taste was pretty good! When my kids and husband tasted this, they really liked it. It was thick, ultra creamy and rich, just like it’s supposed to be. So, all in all, it was pretty successful in my home. Thank you again! ❤️
Oh no! Sorry about that lol. I know it’s so tempting to manually release. Thank you for sharing, Nazish. Glad you all enjoyed it!
Hi Izzah, can I make 3X of this recipe in 6 qt instant pot?
Hi Anaya. I think it should be fine, but you may to wait longer for the pressure to naturally release. Previously, a commenter who tripped the recipe said that it made a mess when pressure released after 20 min. Hope that helps!