Punjabi Kadhi Pakora (Stovetop or Instant Pot)
This classic Punjabi-style Kadhi recipe is easy-to-follow but delivers on homestyle flavor. If you’re new to Kadhi, you’ll love this detailed, fool-proof recipe. Includes Instant Pot and Stovetop instructions!
Want to save this post?
Enter your email below and get it sent straight to your inbox. Plus, get recipes & tips every week!
“Amazing recipe. It was my first time making karhi and I was a bit intimidated. Followed the recipe to a T and it turned out amazing! Thank you!”
Abeer
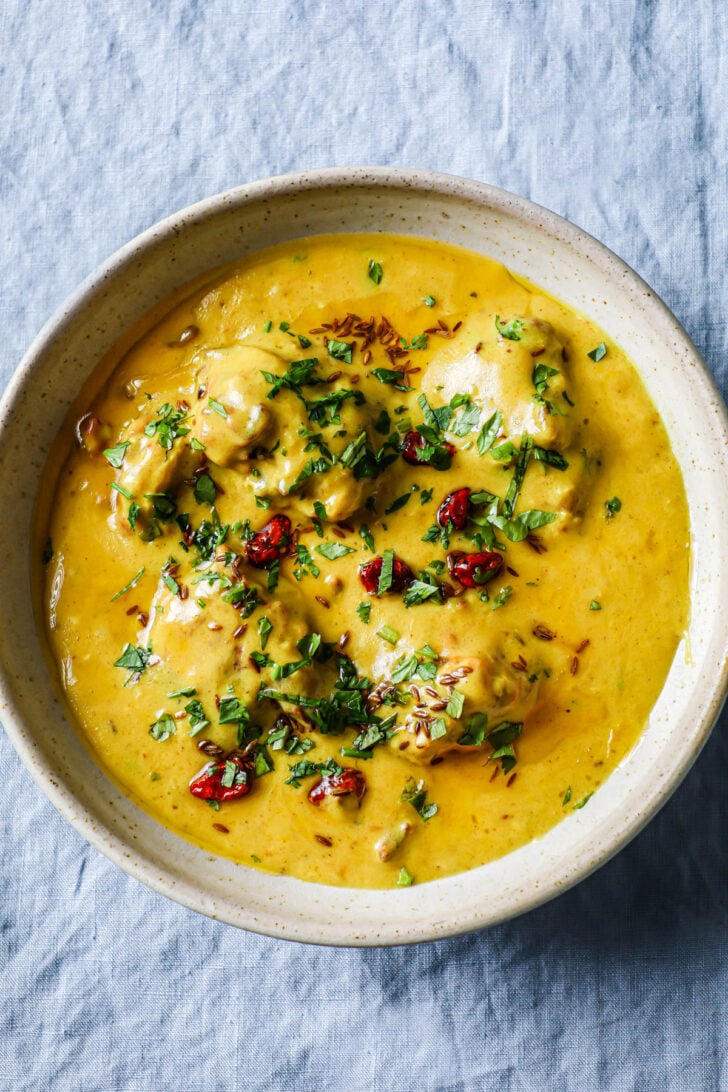
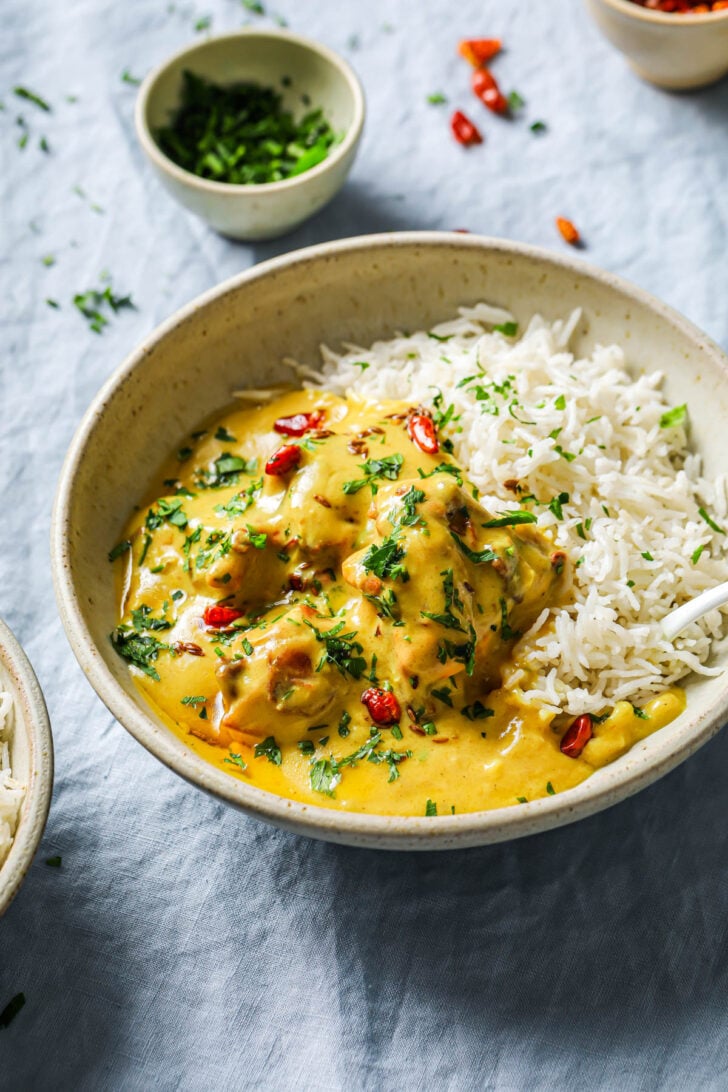
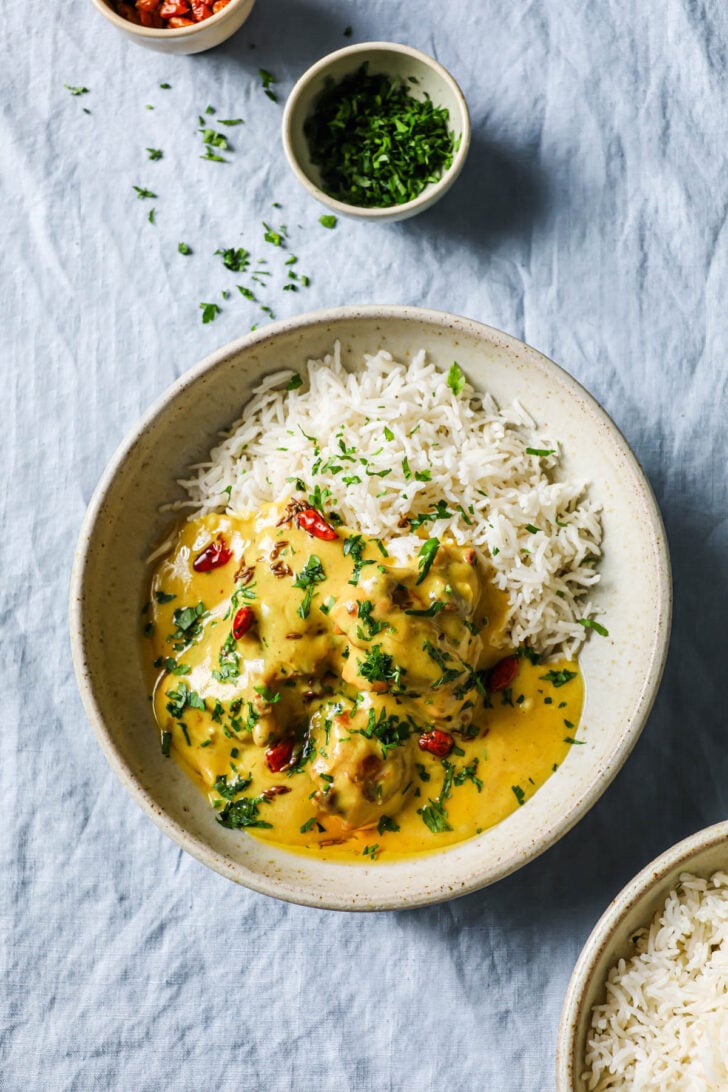
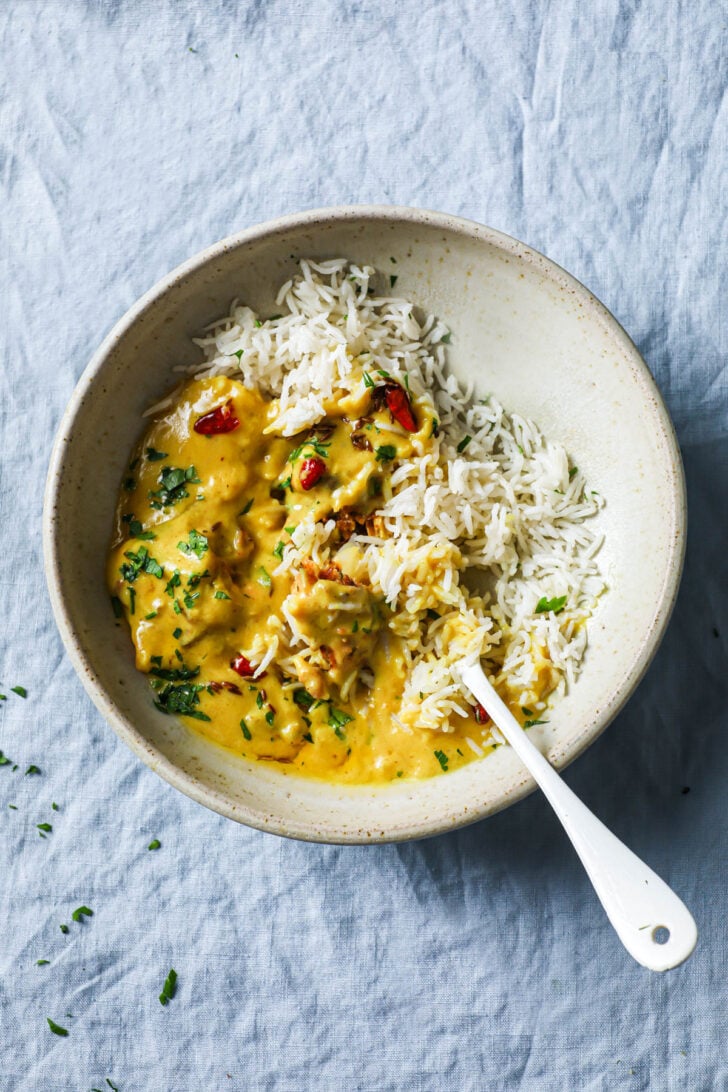
Kadhi Pakora
Kadhi, or Karhi, is a besan (gram flour) and yogurt-based vegetarian stew. In this Punjabi version, vegetable pakoras serve as delightful little dumplings in the gravy. The tarka, infused with cumin seeds and whole red chili peppers, finishes it off with texture and heat.
Kadhi isn’t as prolific as other Pakistani or Indian vegetarian curries, but once you’ve had a good Kadhi, it stays with you. It’s all at once earthy and tangy, creamy and bright, warming and light. Pure Desi comfort food.
My Kadhi Revelation
Growing up, I didn’t care much for Kadhi. My husband would tell me it’s one of his favorite dishes. And I remained perplexed until the day I came across the source of his affection – his mom’s.
Her Kadhi opened my eyes to what Kadhi could be. It was rich yet light, deeply flavorful, and had tender, moist pakoras.
The best part? Her recipe (the one I’m sharing!) happened to be fuss-free and simple to make; the middle ground between grandparent-approved taste and millennial-approved ease.
What Makes a Great Kadhi
When I first shared this Kadhi recipe several years ago, I knew my mom-in-law’s recipe tasted exceptional, but I didn’t know why. Since then, as I reworked the recipe to make a smaller batch (my mom-in-law has 5 sons!), I learned what made it special:
- A longer simmer. The flavor and color significantly deepens as it cooks down and reduces. Yes, this means you’ll have to be patient, but if you use a nonstick pot, it’ll largely be passive patience.
- Great yogurt. Almost goes without saying, but the yogurt influences the final taste of the Kadhi. All the various yogurts I’ve tried have resulted in slightly different-tasting Kadhis. My mom-in-law prefers sour yogurt and often makes Kadhi as a way to use up souring homemade yogurt. Recently, I’ve loved how it tastes with European-style yogurt, which is a little runnier and more tangy.
- Big Flavor. Browning the onions, blooming the spices, salting adequately. All this and more contributes to this recipe’s depth of flavor.
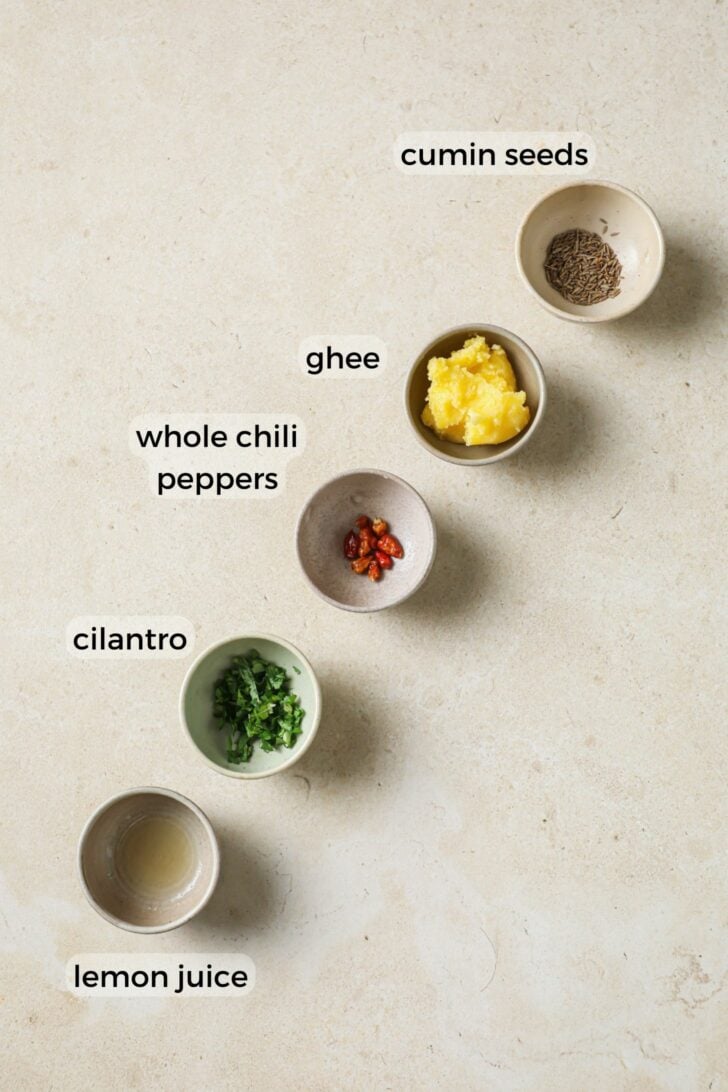
Kadhi Ingredients
Here are notes on some of the ingredients:
Kadhi Gravy
- Yogurt: Use plain, whole-milk yogurt. Greek yogurt can curdle easier because of higher protein content. And low/reduced-fat doesn’t have enough fat to protect the protein from the heat.
More tips to prevent yogurt from curdling:
- Avoid sudden temperature changes. Let the yogurt come closer to room temperature, so the mixture isn’t cold once it hits the pan. You can also use warm water to mix with the yogurt.
- Stir frequently while bringing to a boil.
- Use fresh yogurt. I find older yogurt is more likely to curdle.
- Lastly, if it does curdle, keep going. I’ve had Kadhi curdle and a bit of whisking and longer cook time was enough to make it homogenous again.
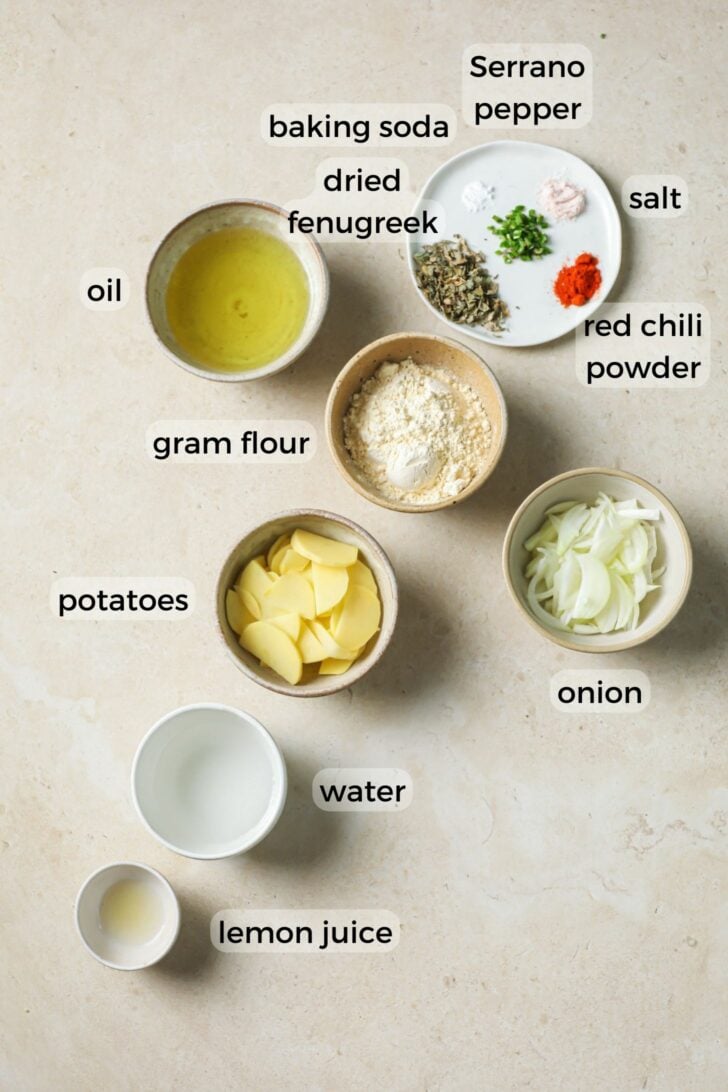
- Gram flour (besan): A nutty, earthy, gluten-free flour made with dried chana dal. Not to be confused with chickpea flour, which is made with garbanzo beans. Besan is readily available at Indian and Pakistani grocery stores but you can also find it in many American supermarkets.

Pakoras
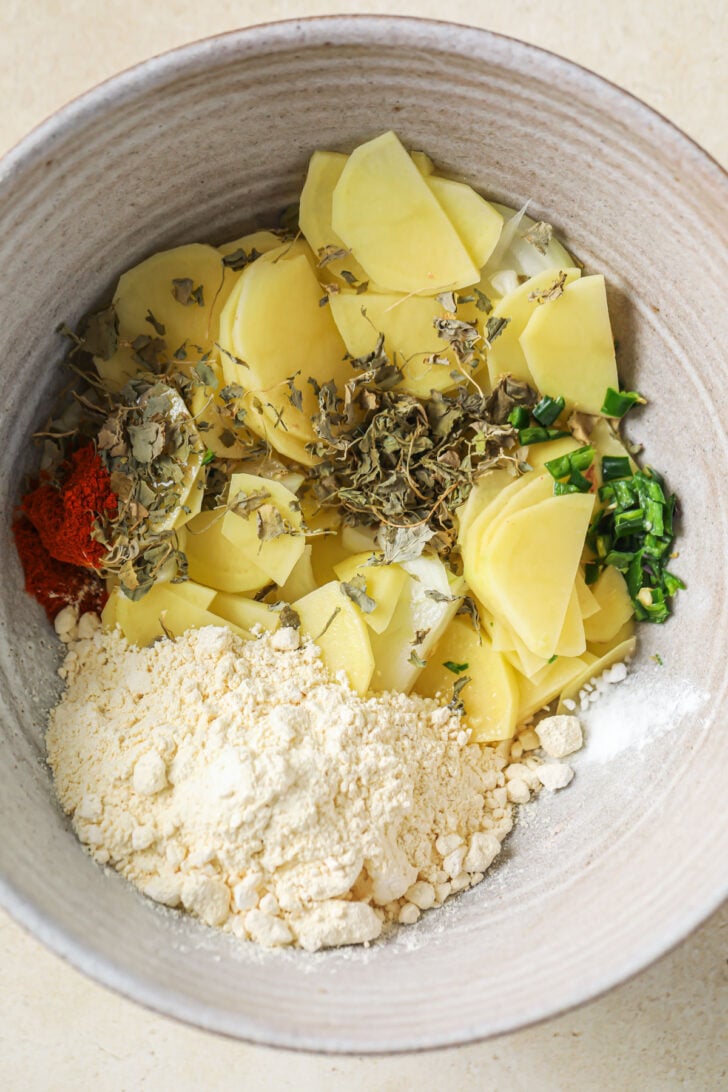
- Baking soda: Helps puff up the pakoras, making them better able to soak the sauce.
- Green chili pepper: I prefer Serrano here (less heat with more quantity) but Thai (bird’s eye) chilis also work well. Be generous with the chilis as they add lots of flavor and gentle heat to the pakoras.
- Dried fenugeek leaves (sukhi methi): Adds earthy flavor and aroma. Also essential in recipes like Mixed Vegetable Curry, Butter Chicken, and Sarson Ka Saag.
- Potatoes: I use small-sized russet potatoes, but any starchy, quick-cooking potatoes will work.
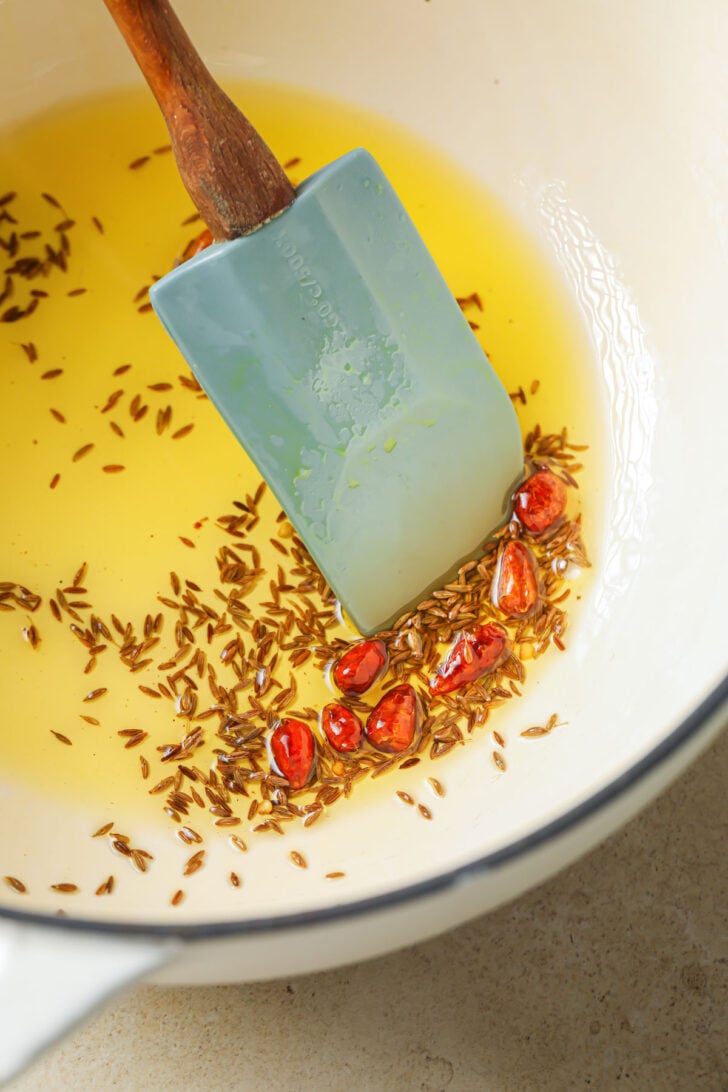
Tarka (Sizzle/Tempering of Spices)
- Whole dried chili peppers: I use dried button chili, but any type of dried red chili peppers work. If you can’t find any, try using whole green chili peppers and/or red chili flakes.
- Ghee (sub butter) or oil: Any more than 2 tbsp and ghee can get overpowering. I like to blend both for fluidity and taste.
How to Make Kadhi – Read for Tips!
The full recipe can be found on the recipe card, but here are a few tips that may help:
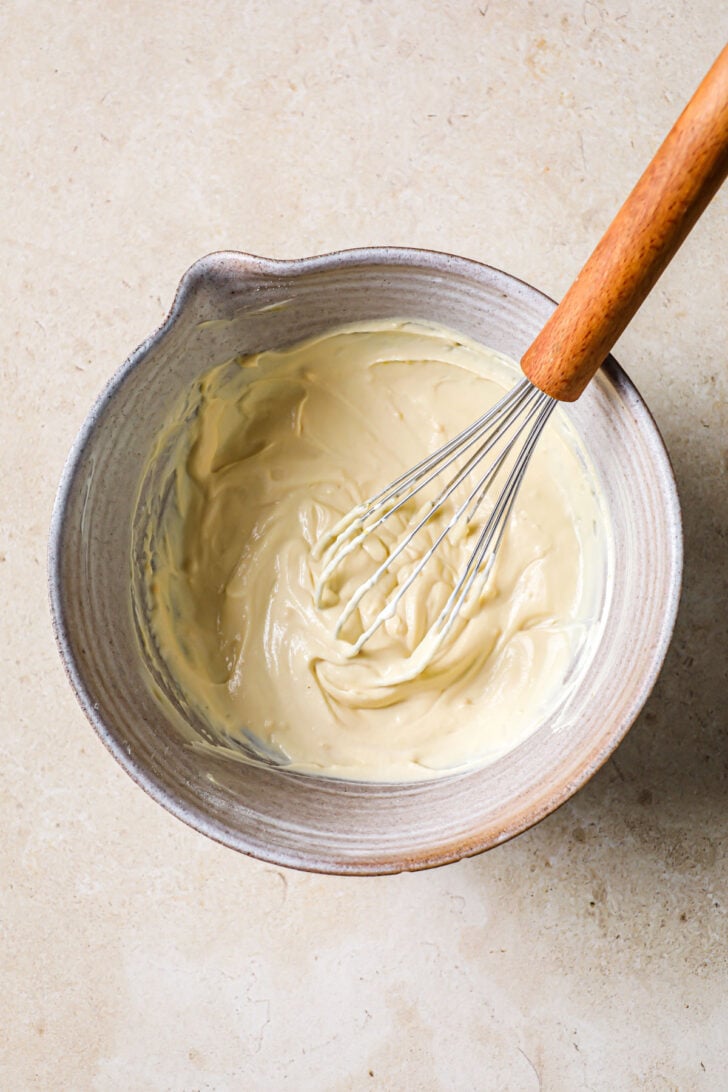
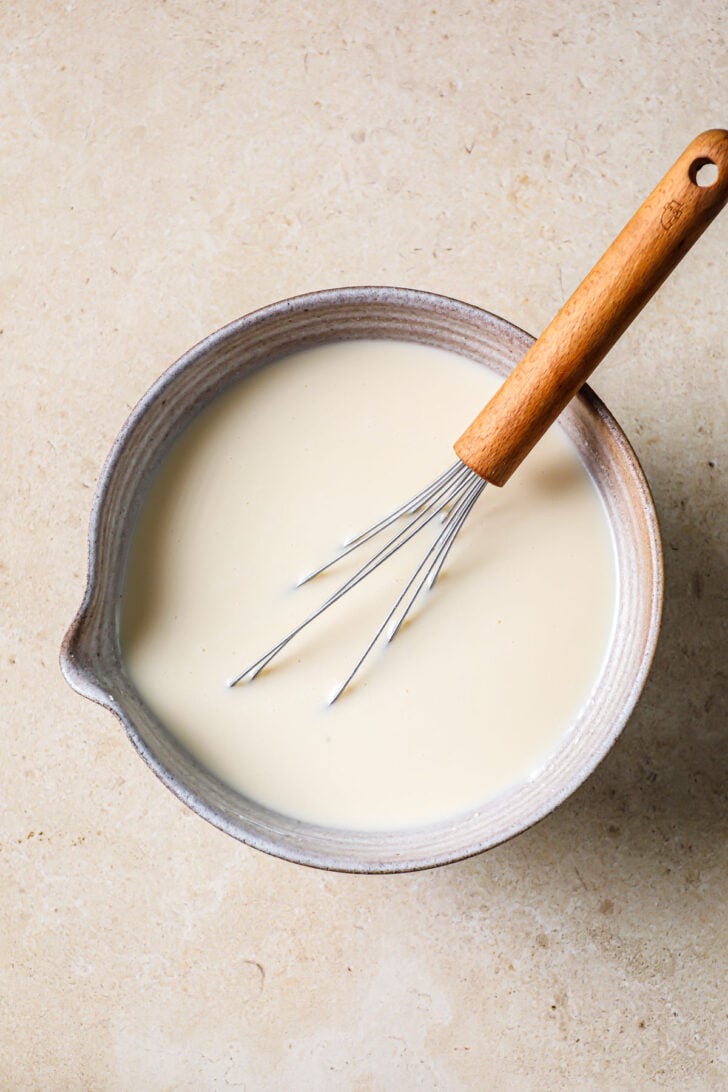
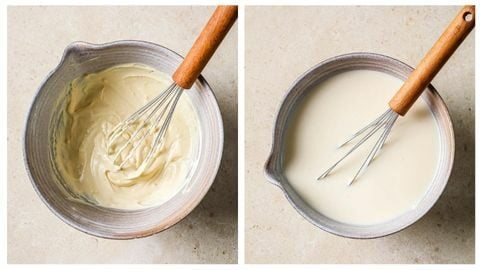
- Combine the besan and yogurt and whisk until no lumps remain. Combining these two first helps them easily dissolve in water. Add water and whisk again. Set aside.
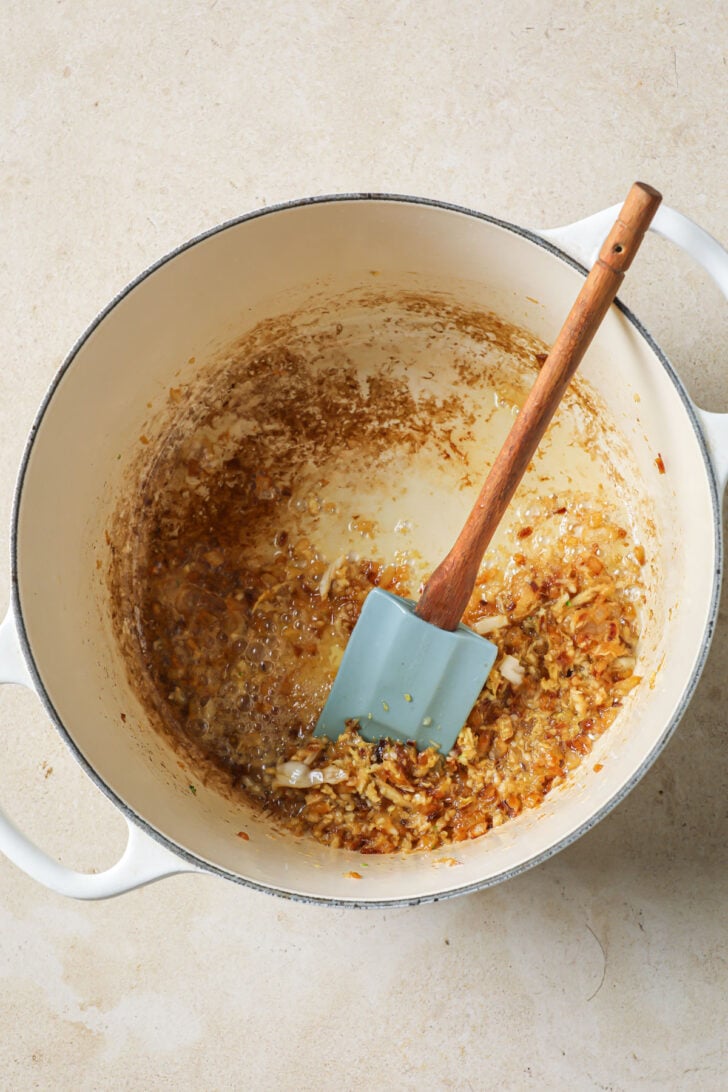
- Sauté the onion until it browns, then add the ginger and garlic. Add the spices and bloom them for 15-20 seconds. If you find the spices are sticking to the bottom of the pot, add a splash of water to prevent burning.
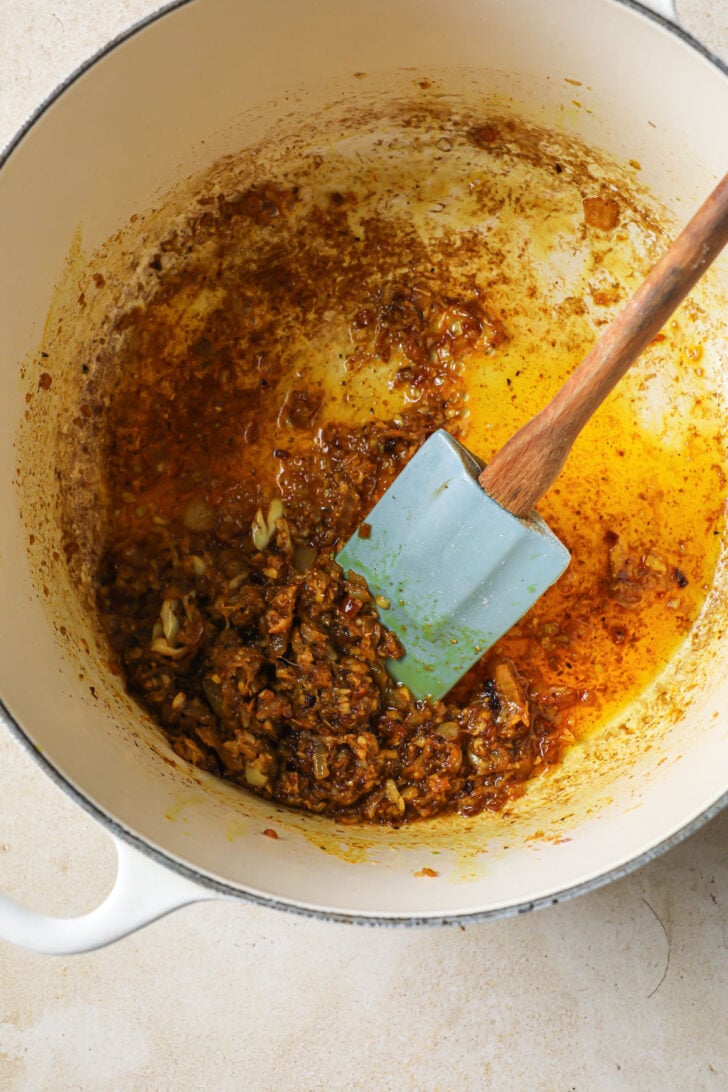
- Pour in the yogurt mixture and stir often until it begins to boil. Stirring frequently here helps prevent the yogurt from curdling.
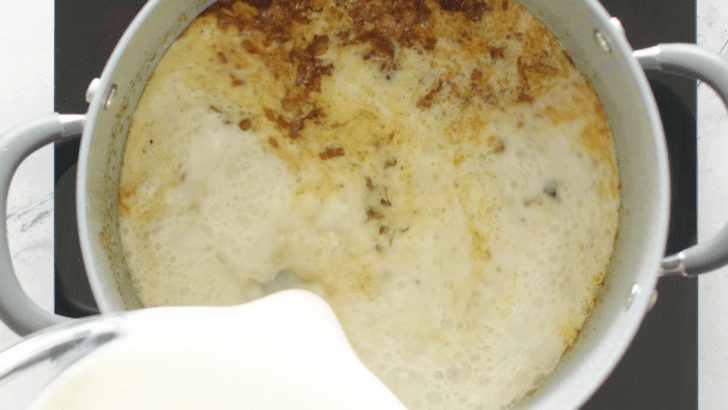
- Tip for those using Instant Pot: To prevent the dreaded burn sign, make sure to bring the mixture to a boil before closing the lid for pressure cooking.
- Once it reaches a boil, reduce the heat and you’re free to go for a while. It’ll gently simmer away.
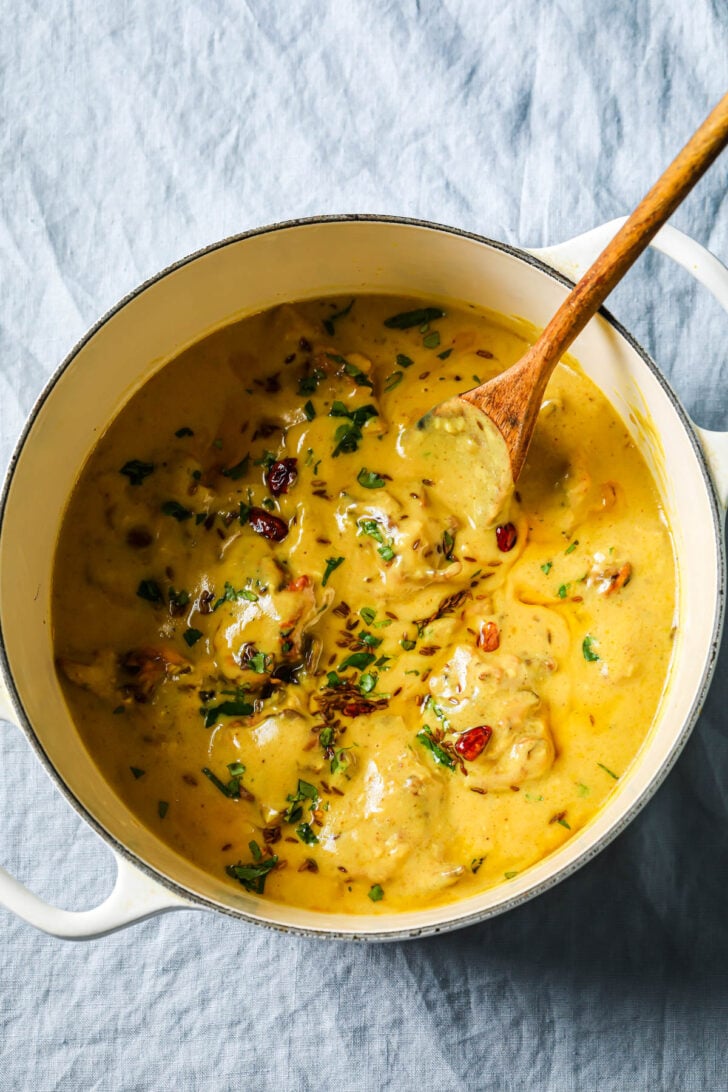
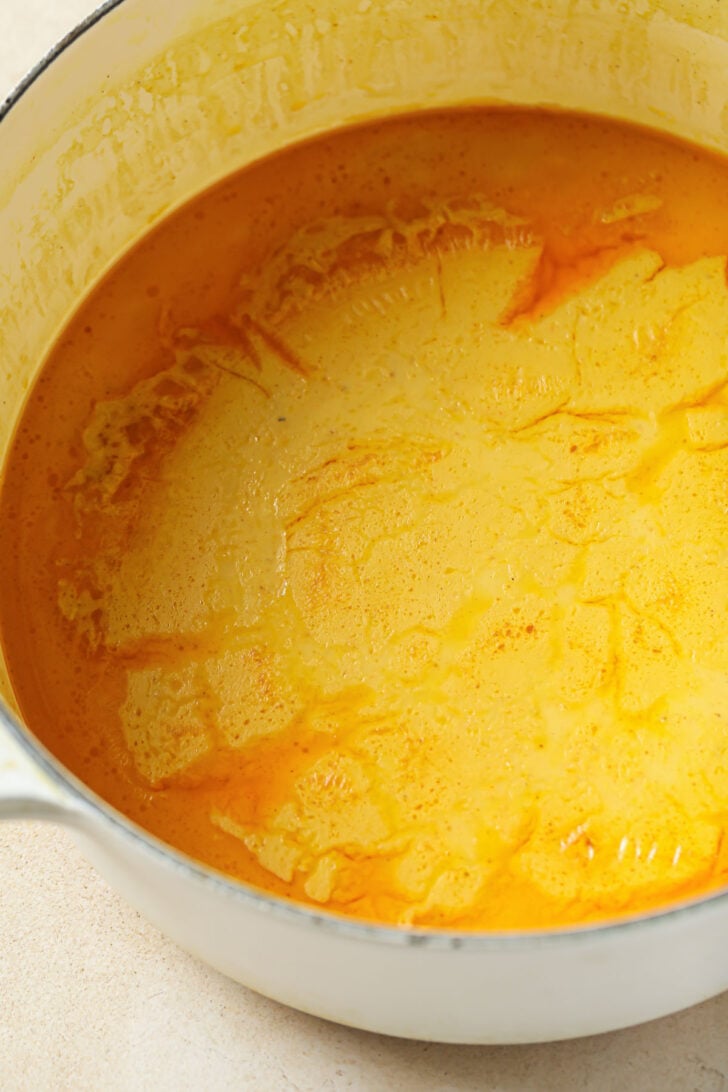
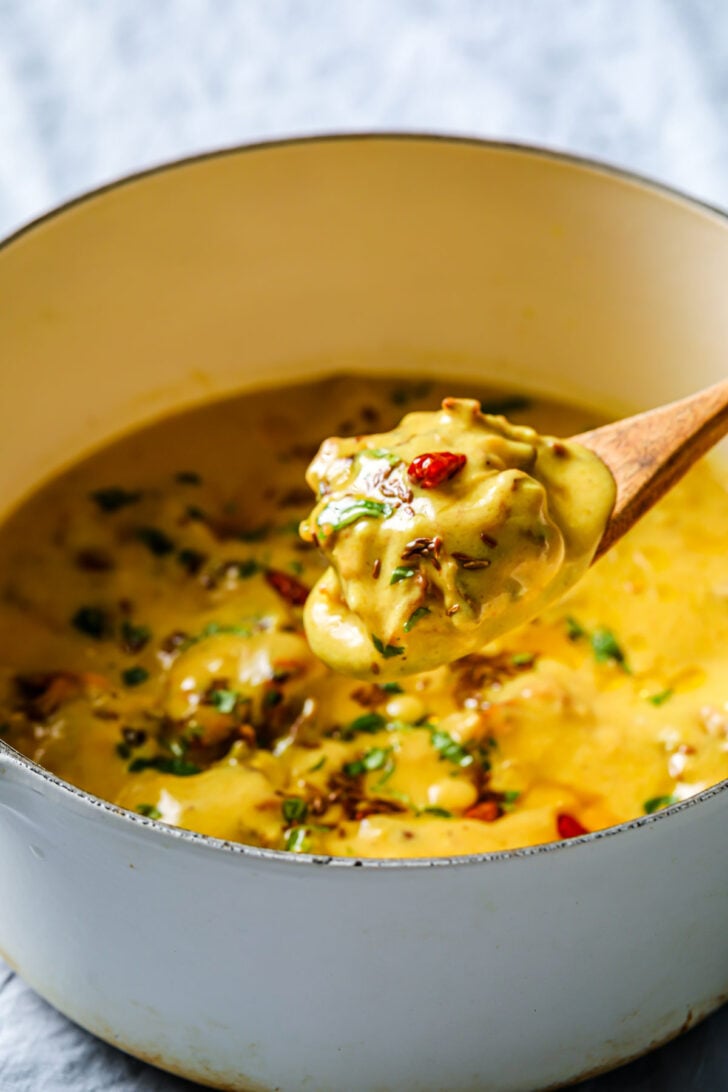
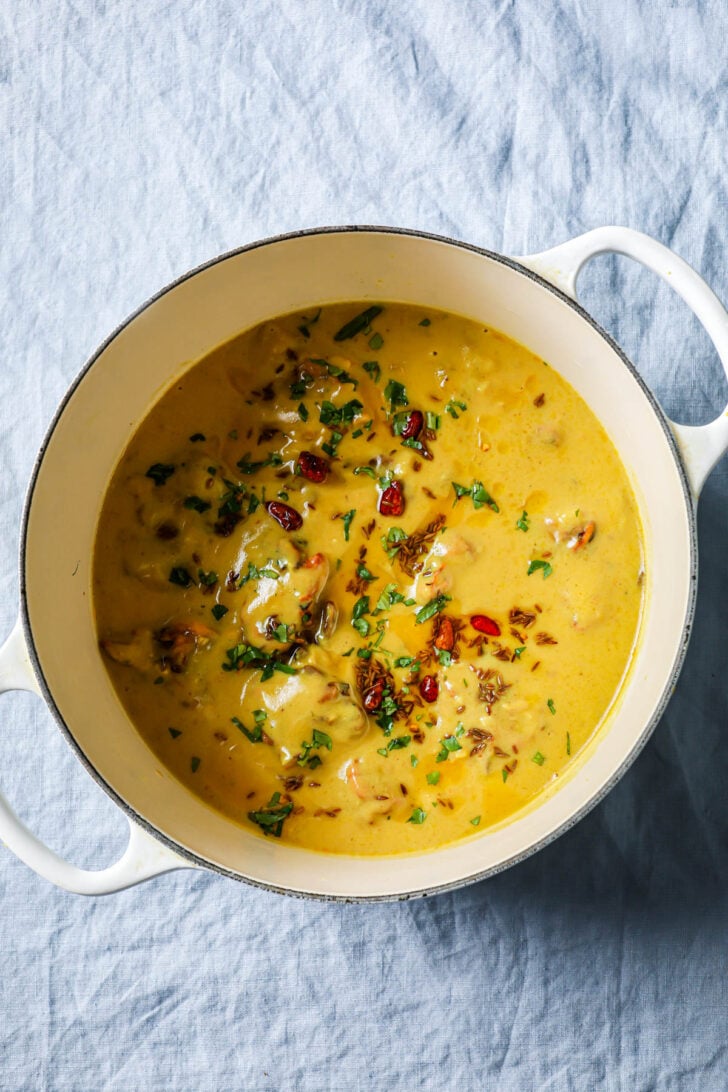
Mom-in-law’s tip: As the Kadhi thickens (indicated by the besan swelling and the gravy bubbling), it may appear as though the Kadhi has finished cooking. In reality, it requires a much longer cooking time to fully cook the besan. You’ll know it’s done when there’s no raw taste the oil rises to the top.
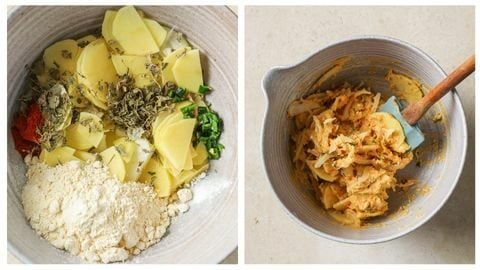
- When the Kadhi about half-way cooked, begin the pakoras.
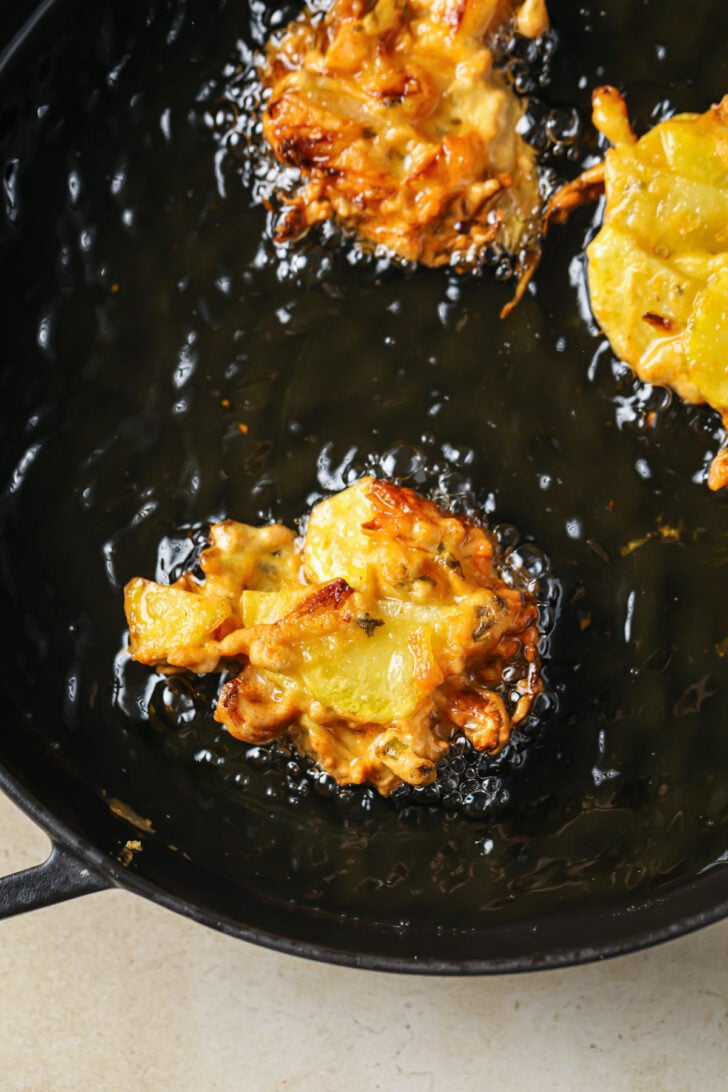
- Make sure to quarter the potatoes (though they’re halved in the pictures) and slice them thin so that they fully cook while frying.
- Frying tip: Keep the oil on medium heat (320°F/160°C), so the pakoras have enough time to puff up, cook from the inside, and get golden brown on the outside.

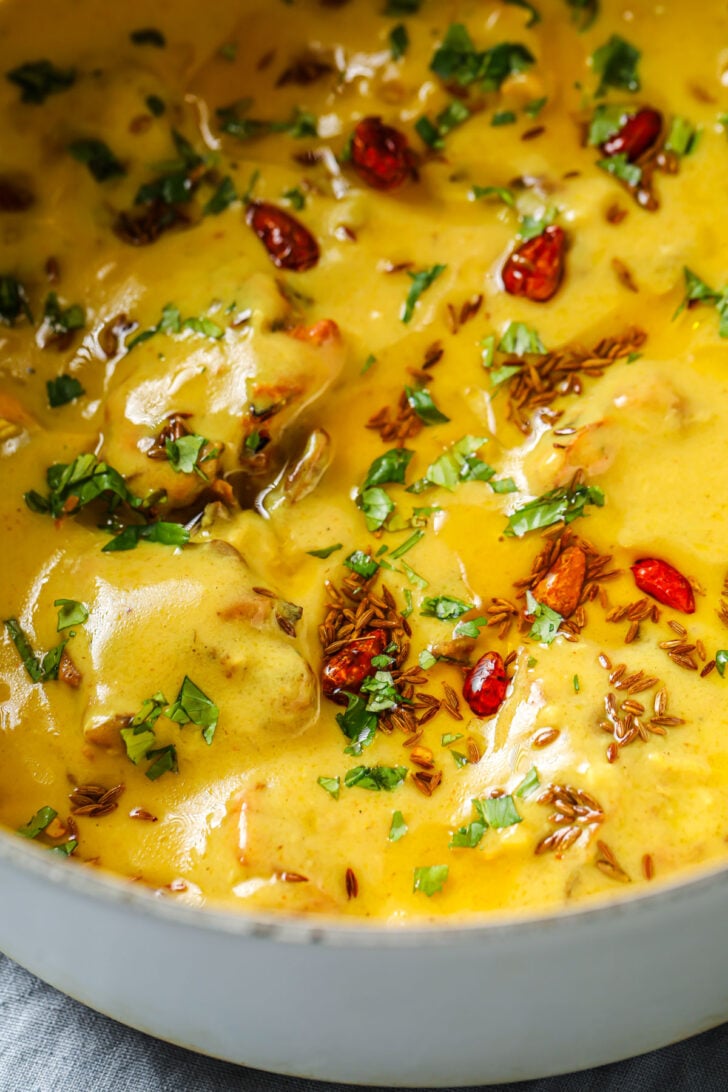
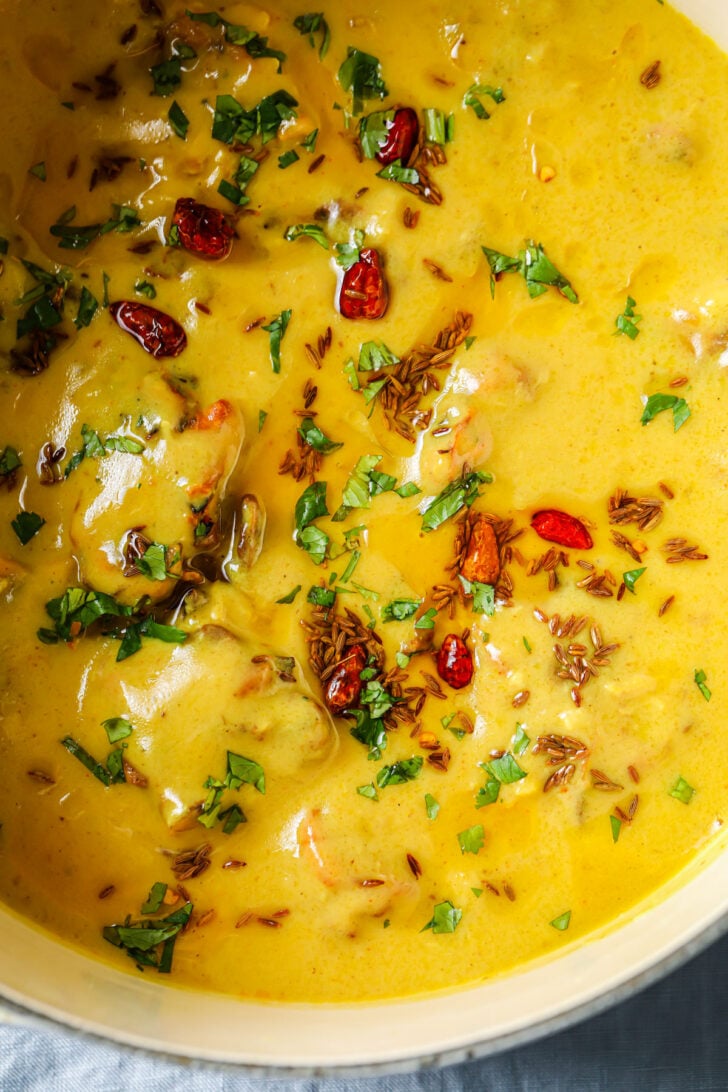
- Oil on top: You know the kadhi is cooked when the oil separates from the Kadhi and rises to the top. The Instant Pot makes this easy to see, but you’ll also be able to see it on the stovetop if you stop stirring. You can still cook it longer after this point, but don’t stop cooking until the oil rises to the top.
Consistency tip: If it gets too thick while simmering, add water. You want the Kadhi to have plenty of liquid before adding the pakoras. Otherwise, if the sauce is too thick, the pakoras won’t be able to soak it up.
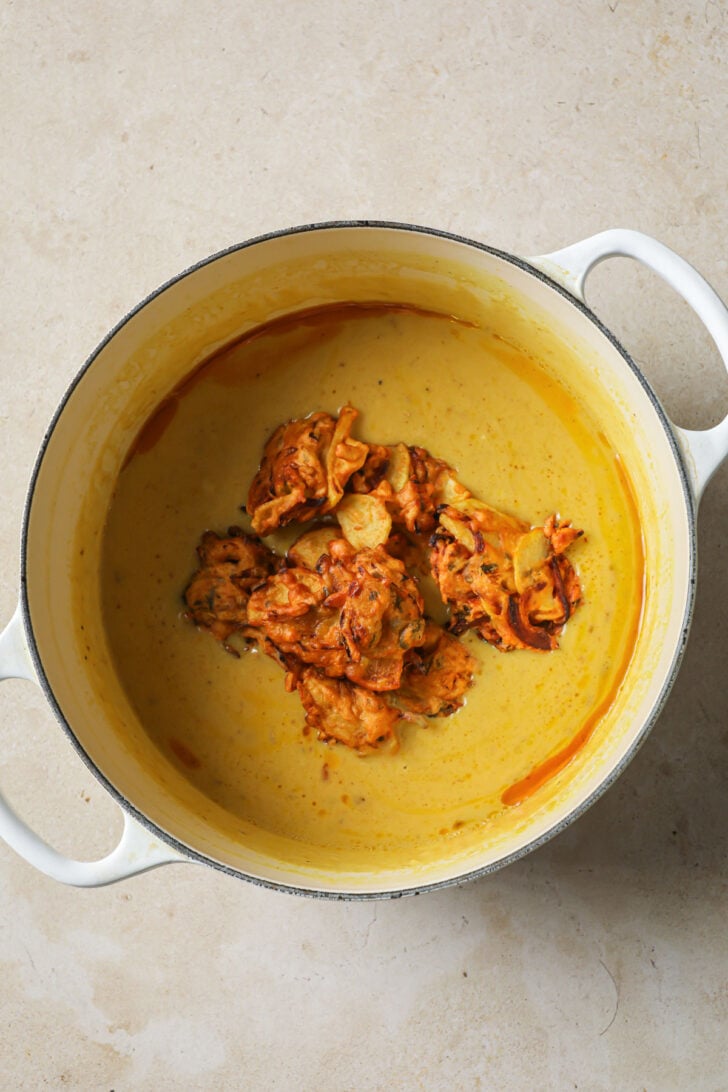
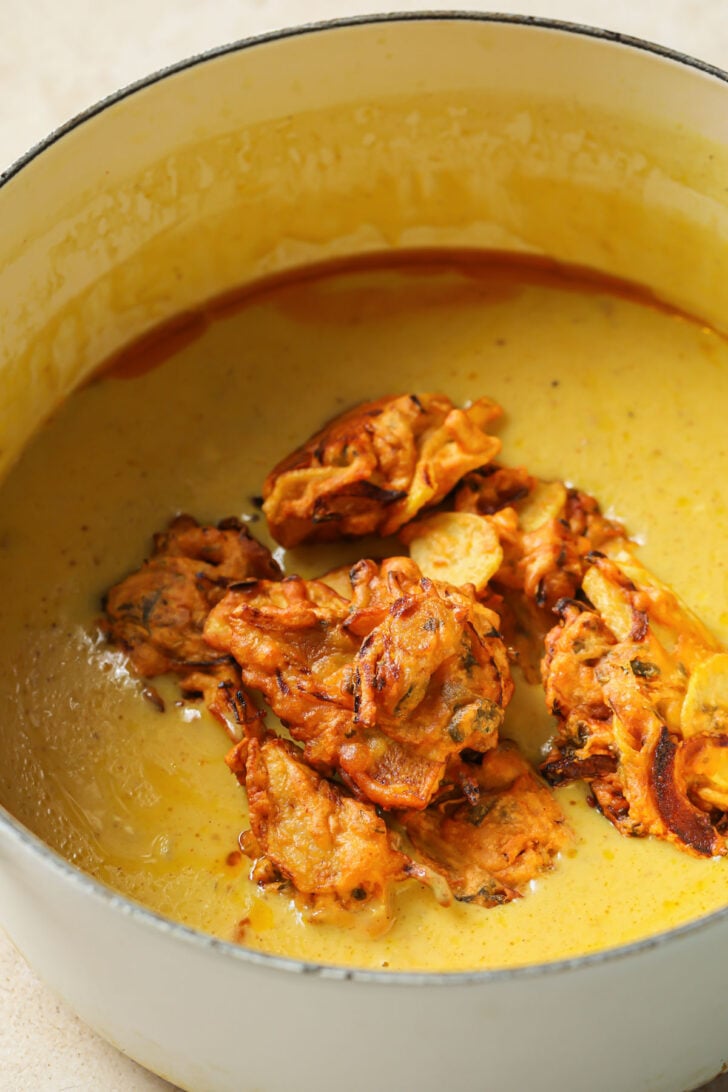
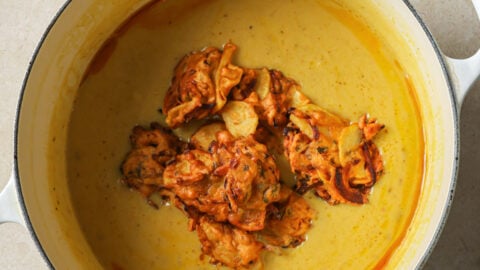
- Add the pakoras. You can add them with the heat off and they’ll get plenty soft. But if you want them even softer, simmer them in the curry for a few minutes.
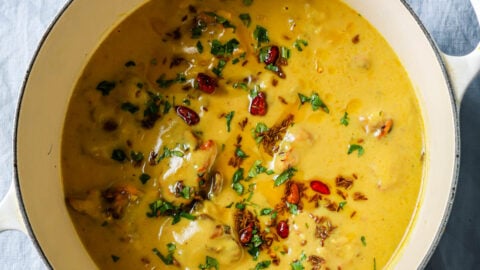
- Prepare the tarka. You want the chili and cumin to bloom in the ghee or oil. The cumin seeds should sizzle and deepen in color.
- Pour tarka over the Kadhi. Enjoy the sizzle.
How to Create Sourness in Kadhi
- Start with sour yogurt. As I mentioned earlier, I love using European-style yogurt, though my husband prefers regular.
- Add a souring agent. Lemon juice, vinegar, tamarind, anything works. One tip my Mom-in-law gave me is to add 1-2 tsp distilled vinegar while your Kadhi is cooking. If you do this and find it too sour, add 1/4-1/2 tsp sugar to offset the sourness.
Make-Ahead Options:
- Pakoras freeze well. Thaw before using. Like dahi bhalle, they take well to a quick soak in water before popping them in the Kadhi.
- I find Kadhi tastes even better the next day, making it a perfect make-ahead recipe for guests. Save the tarka for the day-of.
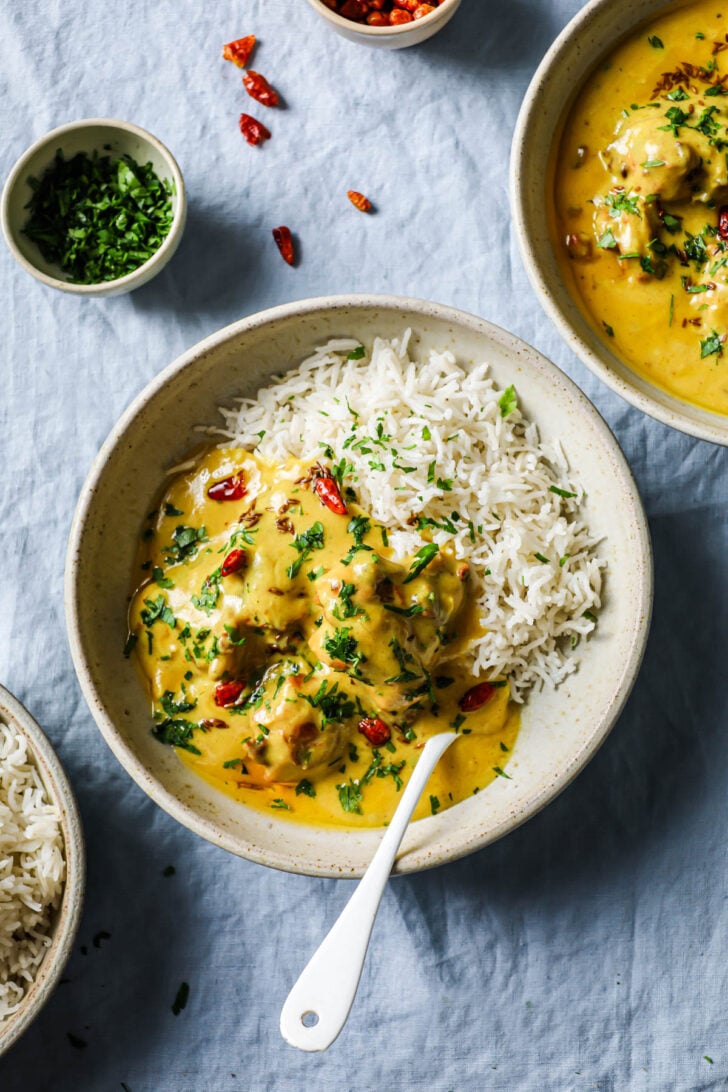
What to Serve with Kadhi Pakora
Kadhi is typically served with plain basmati rice and sometimes naan. These days, I’ve been leaning toward eating it with roti. That way, I can scoop up more Kadhi, and its flavors can be more concentrated in each bite.
Pairing Suggestion: To bulk up the spread or add protein, I think it would pair great with a kebab like Shami Kebab.
Variations
Kadhi varies greatly from region to region, and even family to family. Here are some of the common variations I hope to try:
- Fresh curry leaves (kadi pata) in the tarka.
- Buttermilk in the yogurt to enhance the tart flavors.
- Whole spices such as bay leaves, anardana (dried pomegranate seeds), and ajwain (carom seeds) in a spice bag to add aroma and depth in flavor.
More Vegetarian Curry Recipes
Tried this recipe? If you have a minute, please consider leaving a comment telling me how it was! If you have a photo of your dish, please feel free to upload it and share with others. If you’re on Instagram, please tag me so I can see your creations. I truly love hearing from you. Thank you!

Punjabi Kadhi Pakora (Stovetop and Instant Pot)
Watch the Video
Ingredients
- 1 cup (~250 g) plain, whole-milk yogurt
- 1/2 cup (55 g) gram flour (besan)
- 4 1/2 cups (3 1/4 cups for Instant Pot) water, this may vary depending on how much it thickens while cooking
- 3/4 tsp coriander powder
- 1/2 tsp red chili powder
- 1/2 tsp cumin powder
- 1/2 tsp turmeric powder
- 1/2 tsp garam masala
- 1/4 tsp black pepper powder
- 2 tsp fine sea salt or table salt, will need more if using kosher salt
- 1/4 cup neutral oil such as grapeseed or avocado
- 1/2 medium (~90 g) onion, finely chopped
- 4 garlic cloves, crushed or finely chopped
- 3/4 inch piece ginger, crushed or finely chopped
Pakora
- 1/2 small (~80 g) yellow onion, quartered and thinly sliced
- 1/2 small (~90 g) russet potato, peeled, quartered, and thinly sliced
- 1 medium Serrano pepper, slit, seeds removed (if desired for less heat) and finely chopped
- 1 tbsp dried fenugreek leaves
- 1/2 tsp fine sea salt
- 1/2 tsp red chili powder
- 1/8 tsp baking soda
- 1/2 tsp lemon juice
- 1/2 cup + 2 tbsp (65 g) gram flour (besan)
- 1/4-1/3 cup water
- neutral oil, as needed, for frying the pakoras
After Cooking + Tarka
- 1/2 tsp lemon juice, or white vinegar
- 2 tbsp ghee or oil
- 8 whole red chili peppers, (I've used button chili peppers)
- 1 tsp cumin seeds
- 1 tbsp cilantro leaves, chopped
Equipment
- Instant Pot or Nonstick Dutch oven
- Small Saucepan for Tarka
Instructions
- In a large bowl, combine the yogurt and gram flour and whisk until no large lumps remain. Add water and whisk again. Set aside.
- Combine the spices and salt in a small bowl and set aside.
Stovetop Method
- Heat oil in a non-stick dutch oven over medium-high heat. Once hot, add the onion and sauté, stirring occasionally, until it turns golden brown, about 6 minutes. Deglaze the pan with 2 tbsp of water.
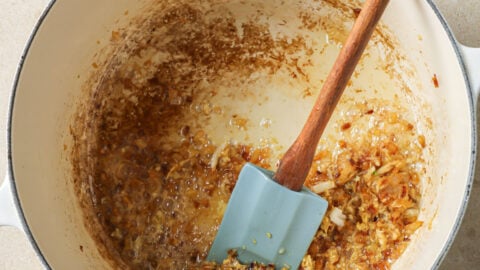
- Once the water dries up, add the garlic and ginger and continue to sauté for 1-2 minutes, until the raw smell disappears. Add the spices and salt and sauté for 15 seconds, then pour in the yogurt mixture. Bring this mixture to a boil, stirring often.
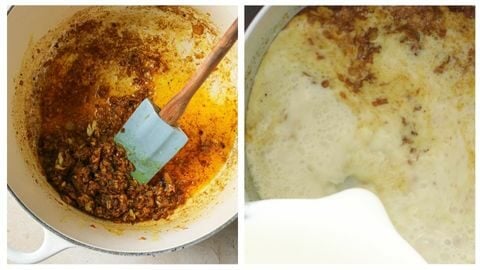
- Once the mixture starts to reach a boil (this will take around 6 minutes), lower the heat to medium-low so that it simmers. Partially cover with the lid, and allow it to simmer for 1 hours and 30 minutes, stirring occasionally. Scrape the sides of the pot as needed. If the mixture thickens too much, stir in 1/4-1/2 cup (preferably boiling) water.
- Once the oil rises to the top and the mixture no longer has any raw taste, turn the heat to the lowest setting and allow it to simmer while you prepare the pakoras.
Instant Pot Method
- Select the Sauté – More/High setting on the Instant Pot. Once hot, add the oil and chopped onion. Sauté, stirring occasionally, until the onion turns golden brown, about 6 minutes. Deglaze the pan with 2 tbsp of water.
- Once the water dries up, add the garlic and ginger and continue to sauté for 1-2 minutes, until the raw smell disappears. Add the spices and salt sauté for 15 seconds, then pour in the yogurt mixture. Bring this mixture to a boil, stirring often.
- Once the mixture reaches a boil (this will take around 6 minutes), press the Cancel button to turn off the Instant Pot. Secure the lid and set the Pressure Release to Sealing. Select the Pressure Cook setting and set it to low pressure. Set the cooking time for 30 minutes.
- Allow the pressure to naturally release for 10 minutes. Manually release pressure by moving the Pressure Release to Venting. Stir to mix. If you'd like it thicker, select Saute – Normal and reduce down to desired consistency.
To Prepare Pakoras
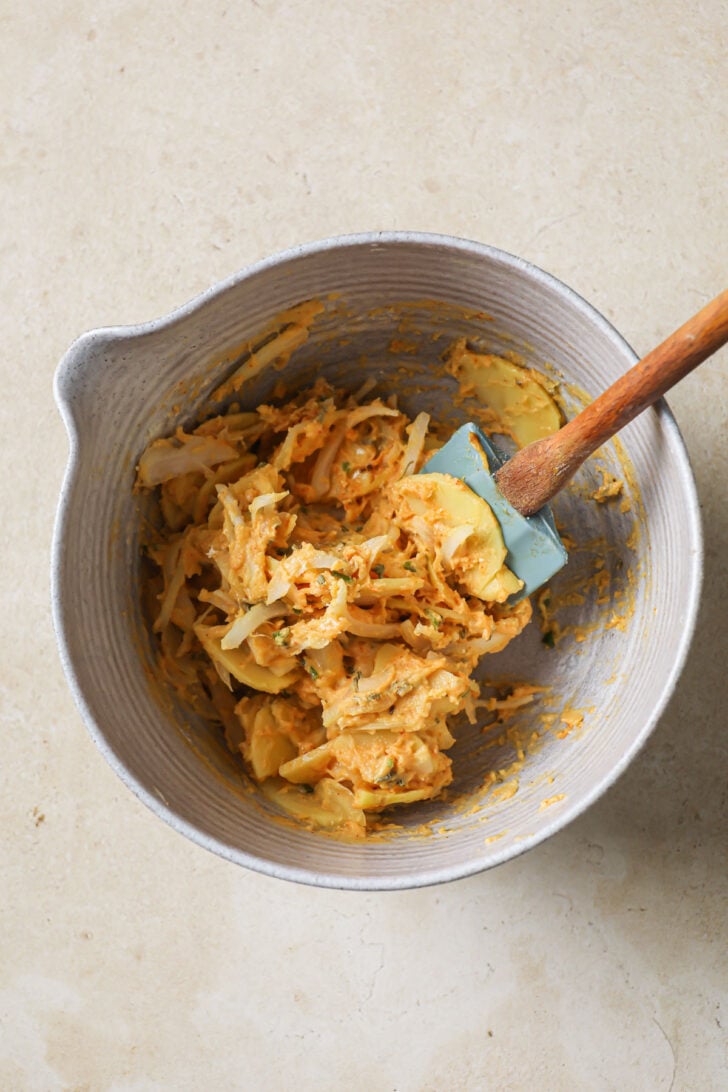
- Meanwhile, prepare the pakora mixture. In a small bowl, combine the ingredients listed under Pakora except water and oil in the order they're listed. Add water, bit by bit, until the mixture is coated but not runny. Set aside. The vegetables will release their own juices and the mixture will become thinner.
- Heat a small frying pan or heavy-bottomed pot over high heat. Add oil so that it’s at least 3/4”/1.9 cm deep. Once the oil is hot, adjust heat level as needed to maintain medium-high heat (around 320°F/160°C).
- Gently lower in the pakora mixture a tablespoon at a time, making sure not to overcrowd the pan (I do 4-5 at a time). Fry for 3-4 minutes on each side, until golden and crisp. Use a slotted spoon to remove and place on a paper-towel lined plate. Repeat until all pakoras are cooked, adding oil if needed.

After Cooking the Kadhi
- Taste and adjust salt. Turn off the heat and stir in vinegar or lemon juice.

- Add cooked pakoras to the Kadhi and stir gently. Remove from the Instant Pot and place in a serving bowl.
Tarka (Tempering)
- Heat ghee or oil in a small sauté pan over medium-high heat. Once hot, add the whole red chilis and cumin seeds. Sauté for about 15 seconds, until the red chili peppers begin to darken and the cumin seeds sizzle and lightly toast.

- Remove from heat and gently pour the oil over the kadhi. Sprinkle with cilantro. Serve with basmati rice, naan, roti or other bread.

- This post is an updated version of the Kadhi I originally published on July 19, 2019. Since then, I’ve updated with new text, pictures, and video. The recipe, aside from a few tweaks as a result of halving, remains the same.

71 Comments on “Punjabi Kadhi Pakora (Stovetop or Instant Pot)”
I actually didn’t think Kadhi could be this easy and tasty, somehow it always seemed to me the most difficult desi recipe to make. Izzah’s recipes are always brilliant – try this one, I made the IP one and it was delish! Love the convenience of it. Thanks x
Hi Alina! Thank you so much for taking the time to share such a nice comment. Makes me so happy to help simplify a once-daunting dish!
Can this recipe pe doubled?
Yes it can! In the recipe card, next to the title ‘Ingredients’ you can select ‘2x’ to double. For more tips, please read this note on How To Double A Recipe.
Absolutely lovely recipe in terms of taste and directions – I somehow made it a bit dry 🙁 When I first served it, it was perfect but then slowly the pakoras or besan sucked up all the gravy. Any tips for future tries?
The best recipe, I have ever tasted, it is easy to follow step by step, even the beginners finds very easy to follow,
Make it once and you will see what I mean.
Oh yay! I’m so glad. 🙂 Thank you, Sulu!